
How to Set Up Facebook Pixel in a Quiz
To set up Facebook Pixel, follow these steps:
1. Log in to Facebook Business
Go to Facebook Business and sign in
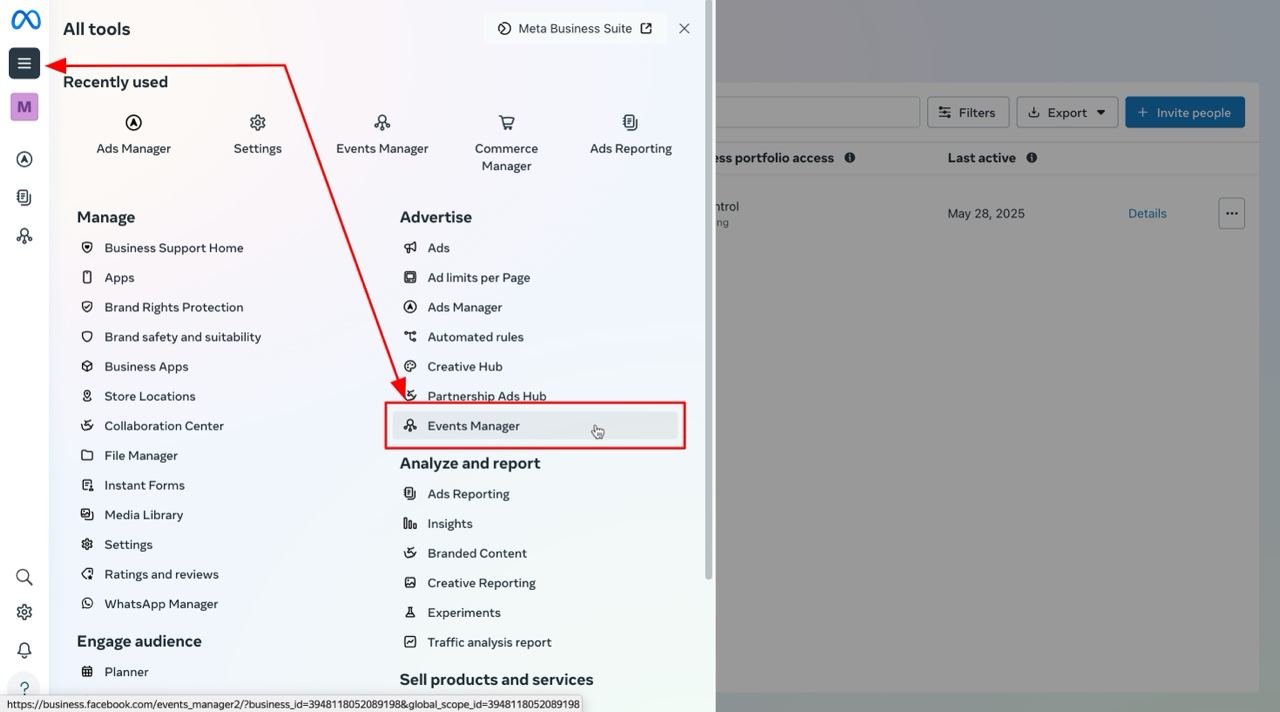
2. Access Events Manager
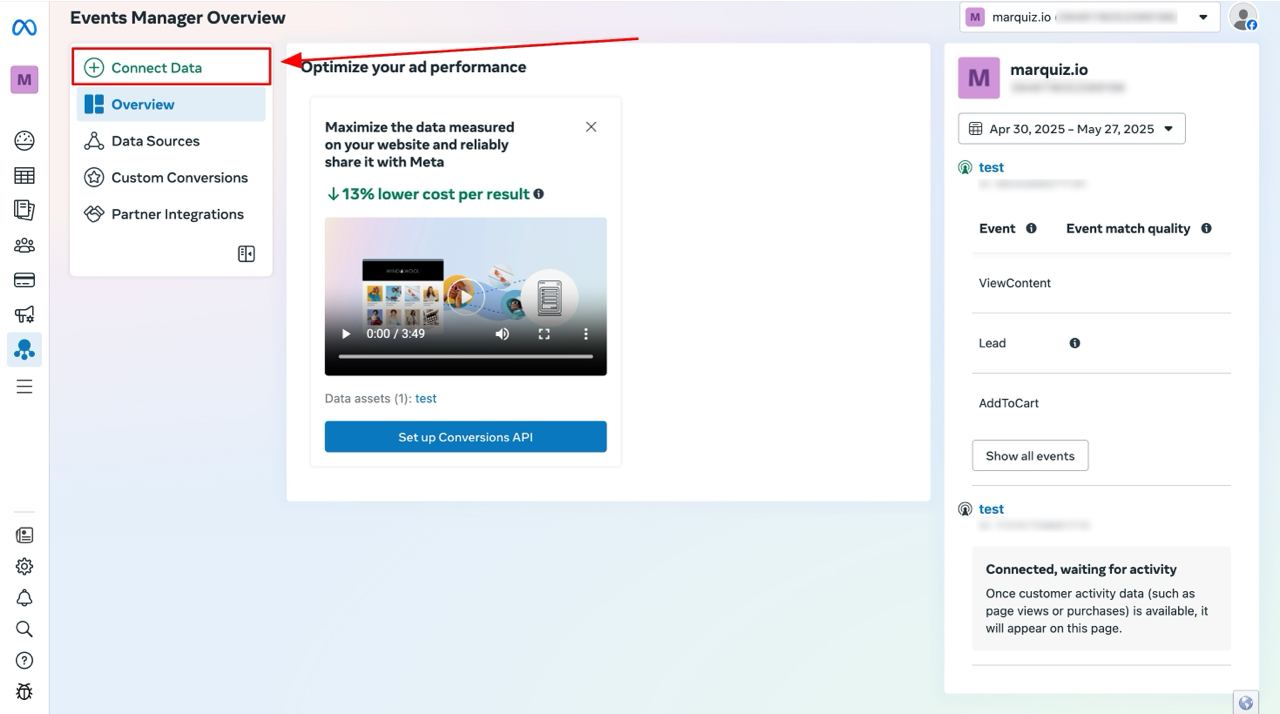
In the account menu (top left), select All Tools and navigate to Events Manager. Click Connect Data (if creating a new Pixel)
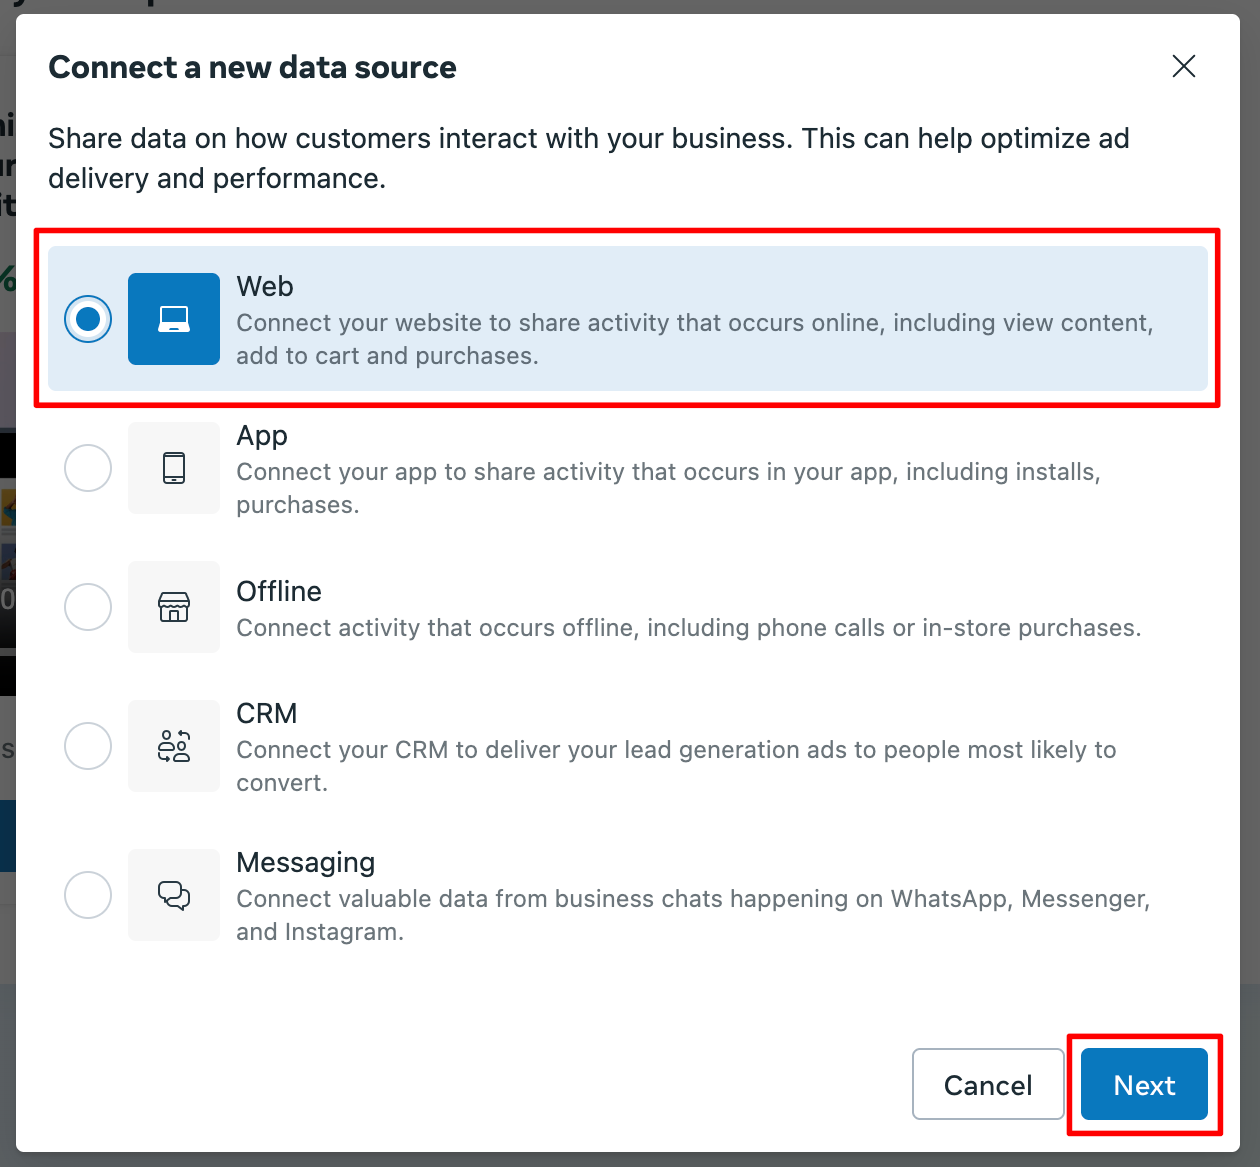
3. Select Data Source
In the pop-up window, choose Web and click Next
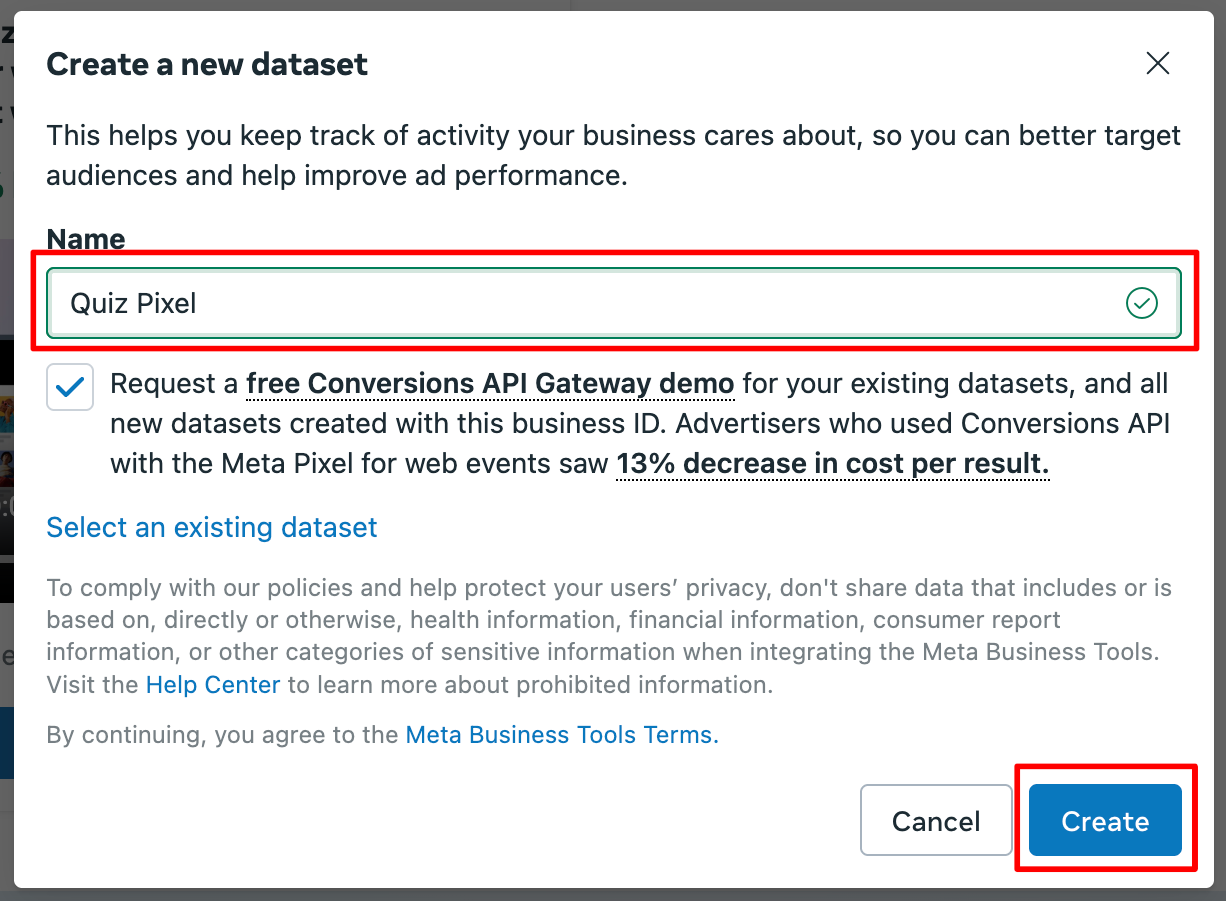
4. Name Your Pixel
Enter a name (e.g., "Quiz Pixel") and click Create.
5. Choose how to connect your website
There are three options here, you need to choose Set up manually

6. Choose Connection Method
In the Events Manager, select how to connect your website for data sharing:
Conversions API Gateway (Demo Available)
- Partner Integration: Use platforms like Shopify or WordPress for automated setup.
- Manual Setup: Add the code to your website directly (requires developer help)
Click Next after selecting your preferred method.
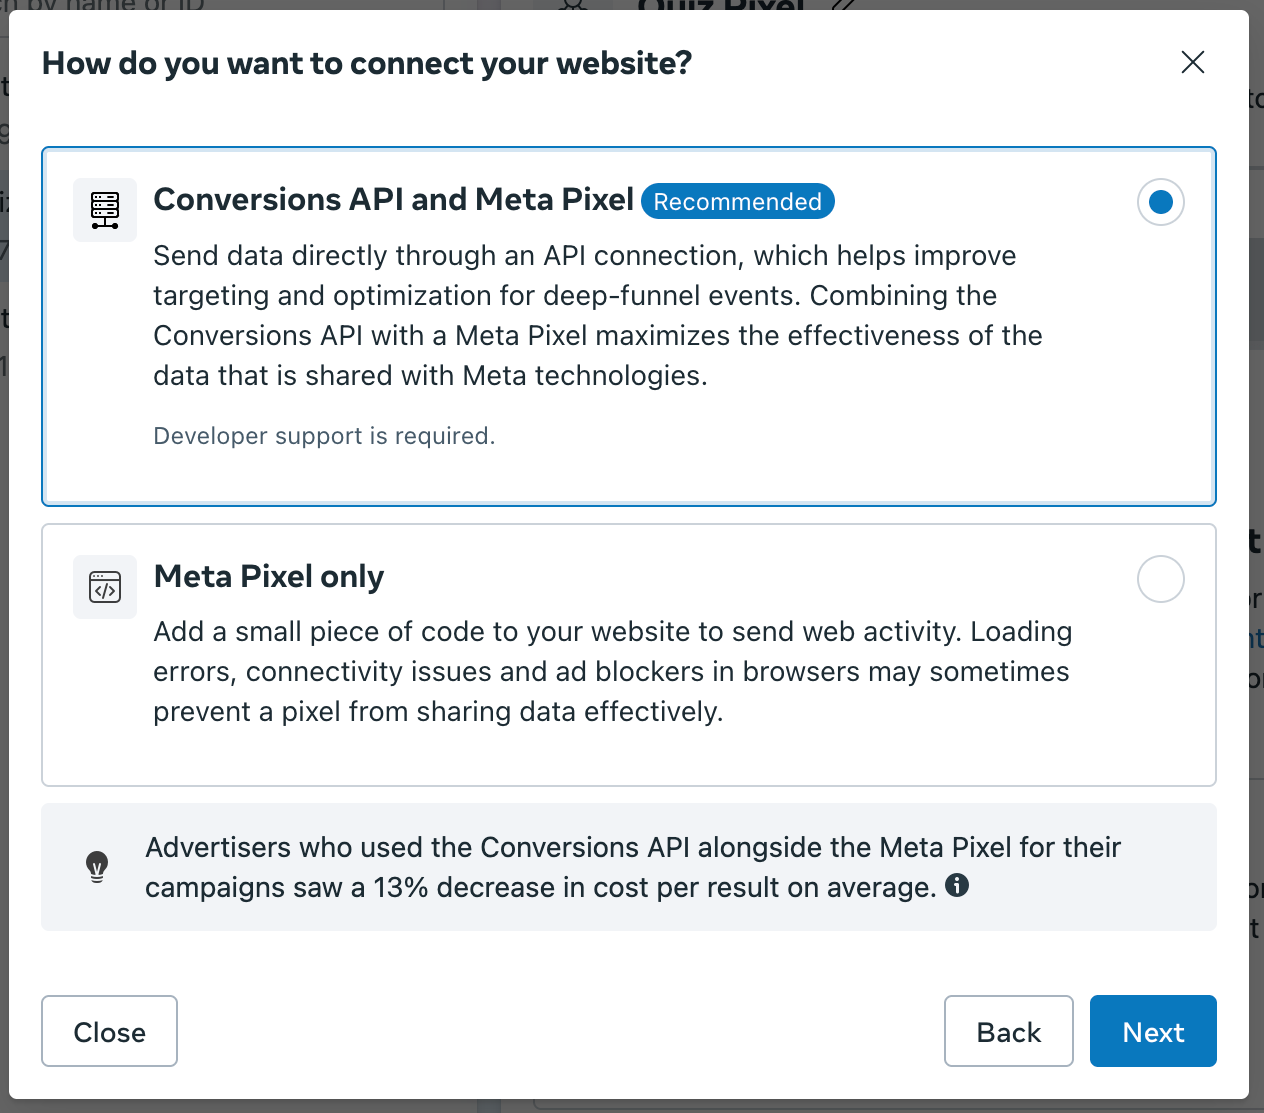
7. Choose Connection Method
Recommended: Select Conversions API and Meta Pixel for server-side tracking.
Alternative: Use Meta Pixel Only (less reliable due to ad blockers)
Integration with Marquiz
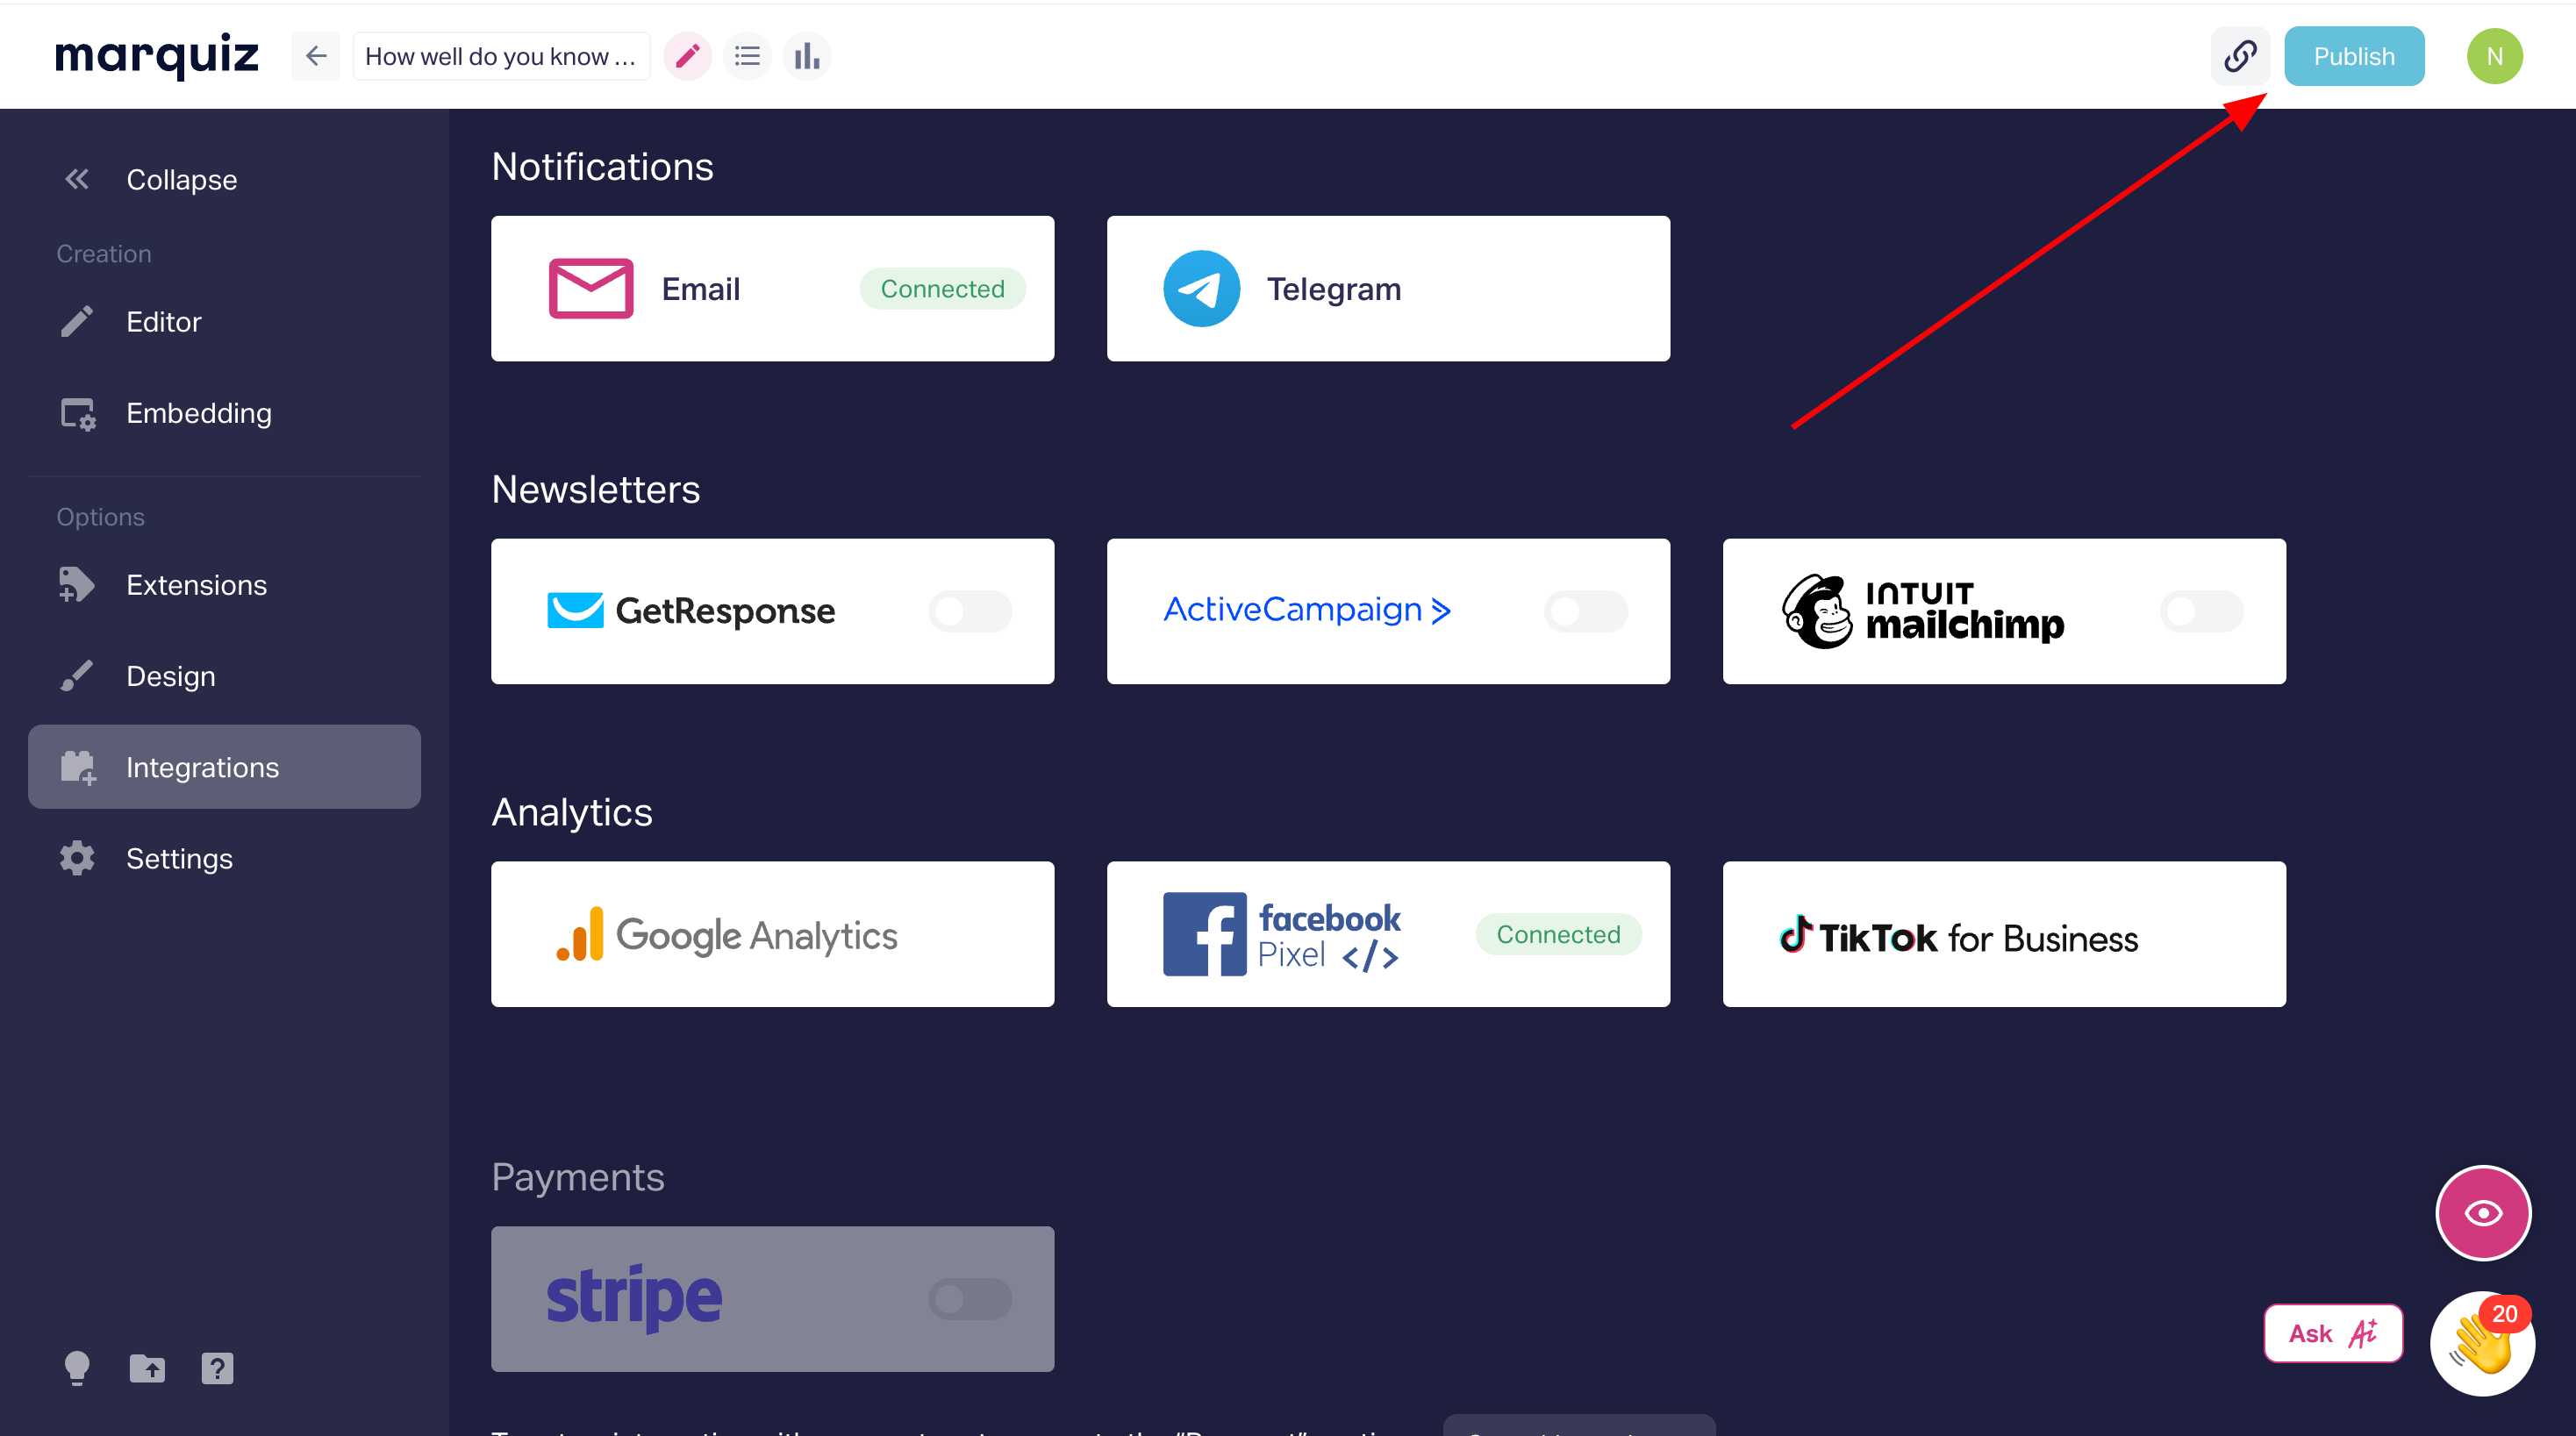
8. Add Pixel to Marquiz
Copy the Pixel ID.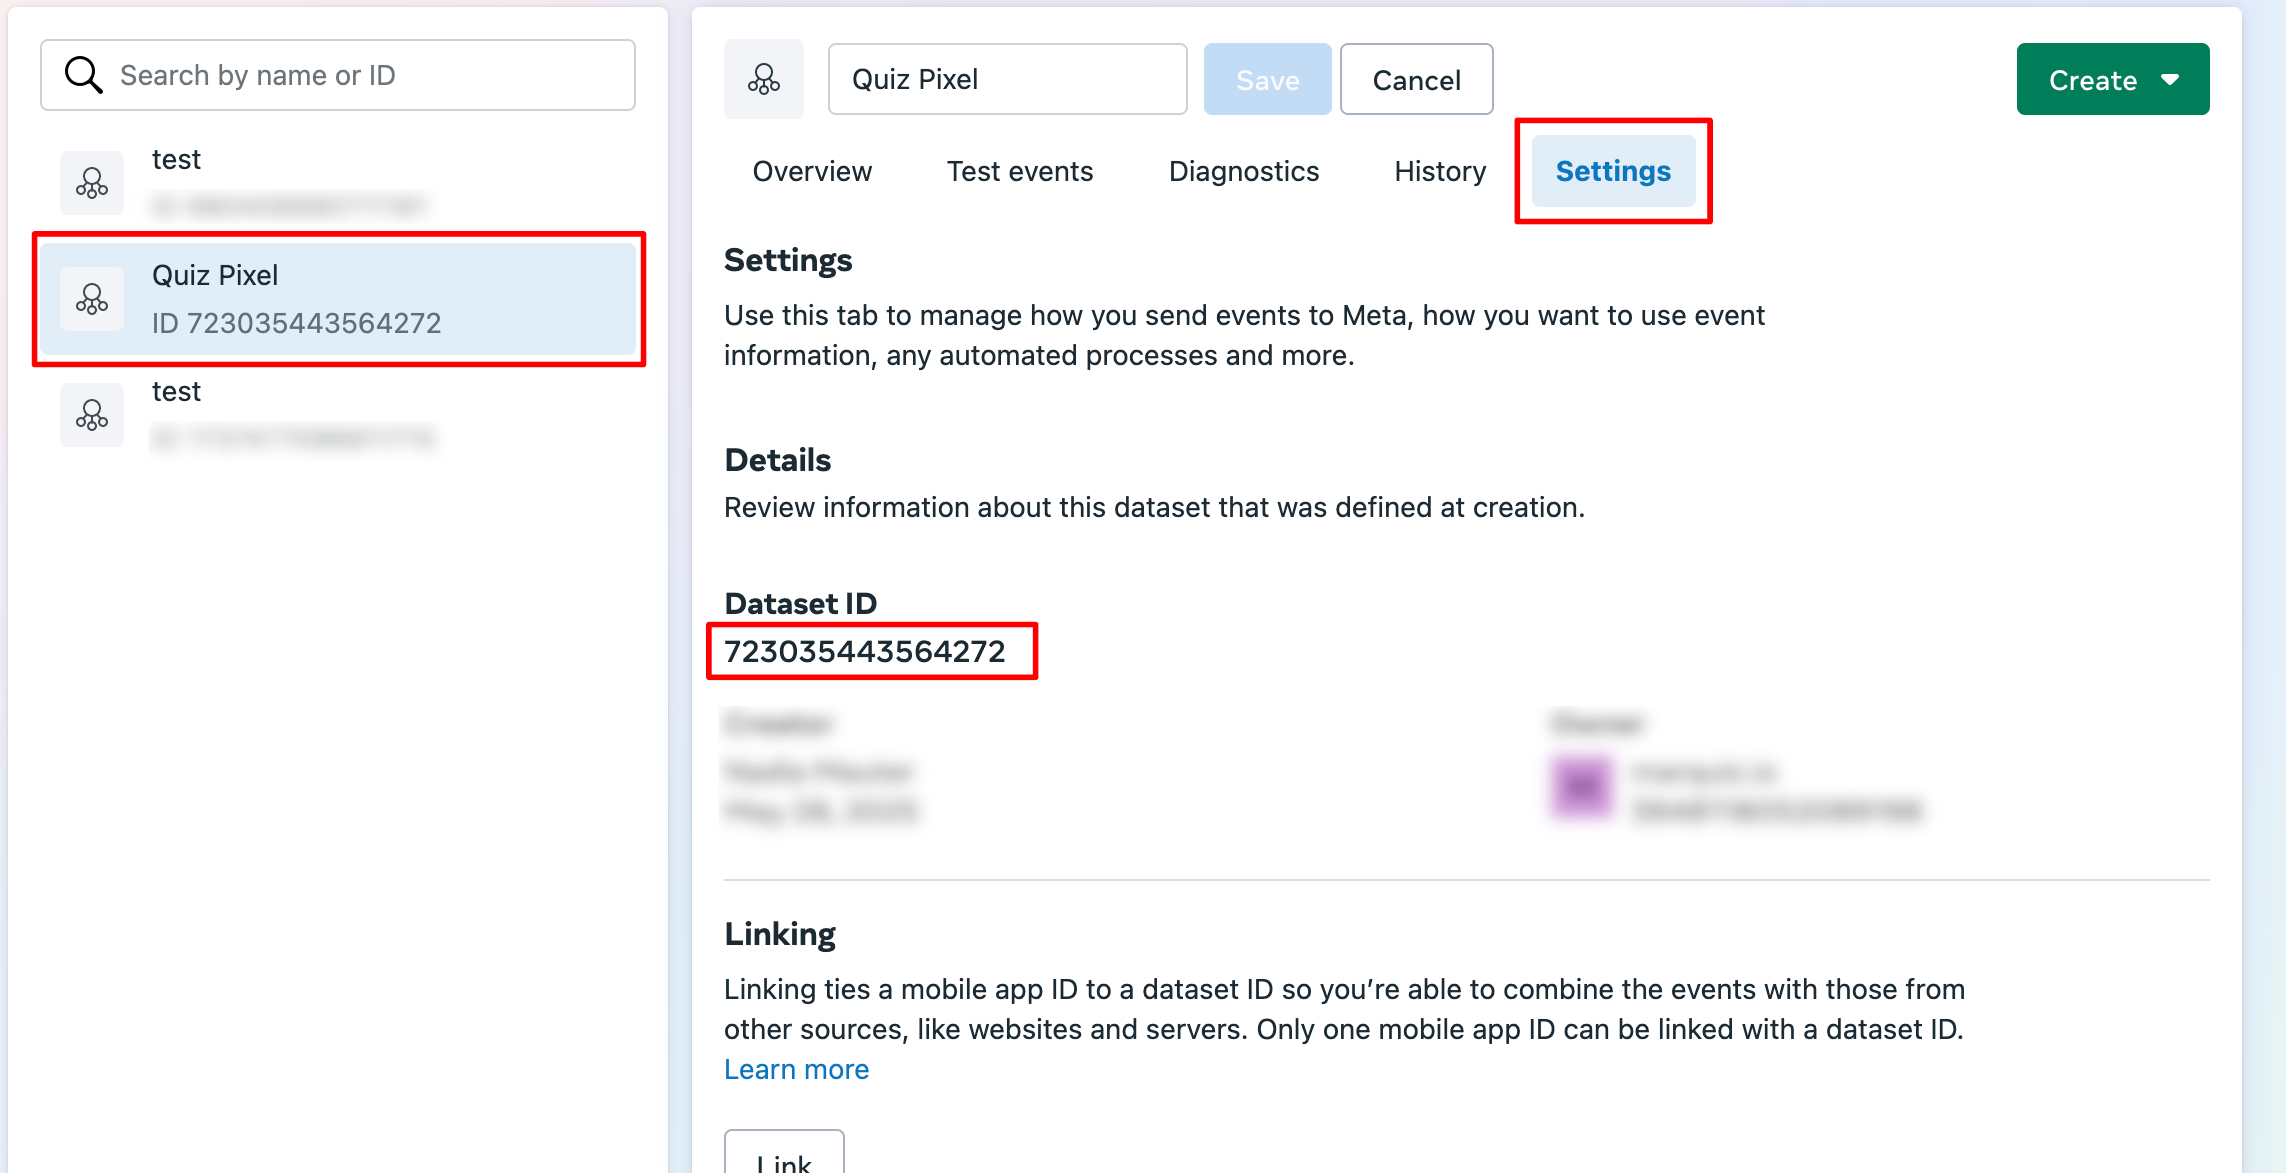
Open your quiz in Marquiz and go to "Integrations" → "Facebook Pixel".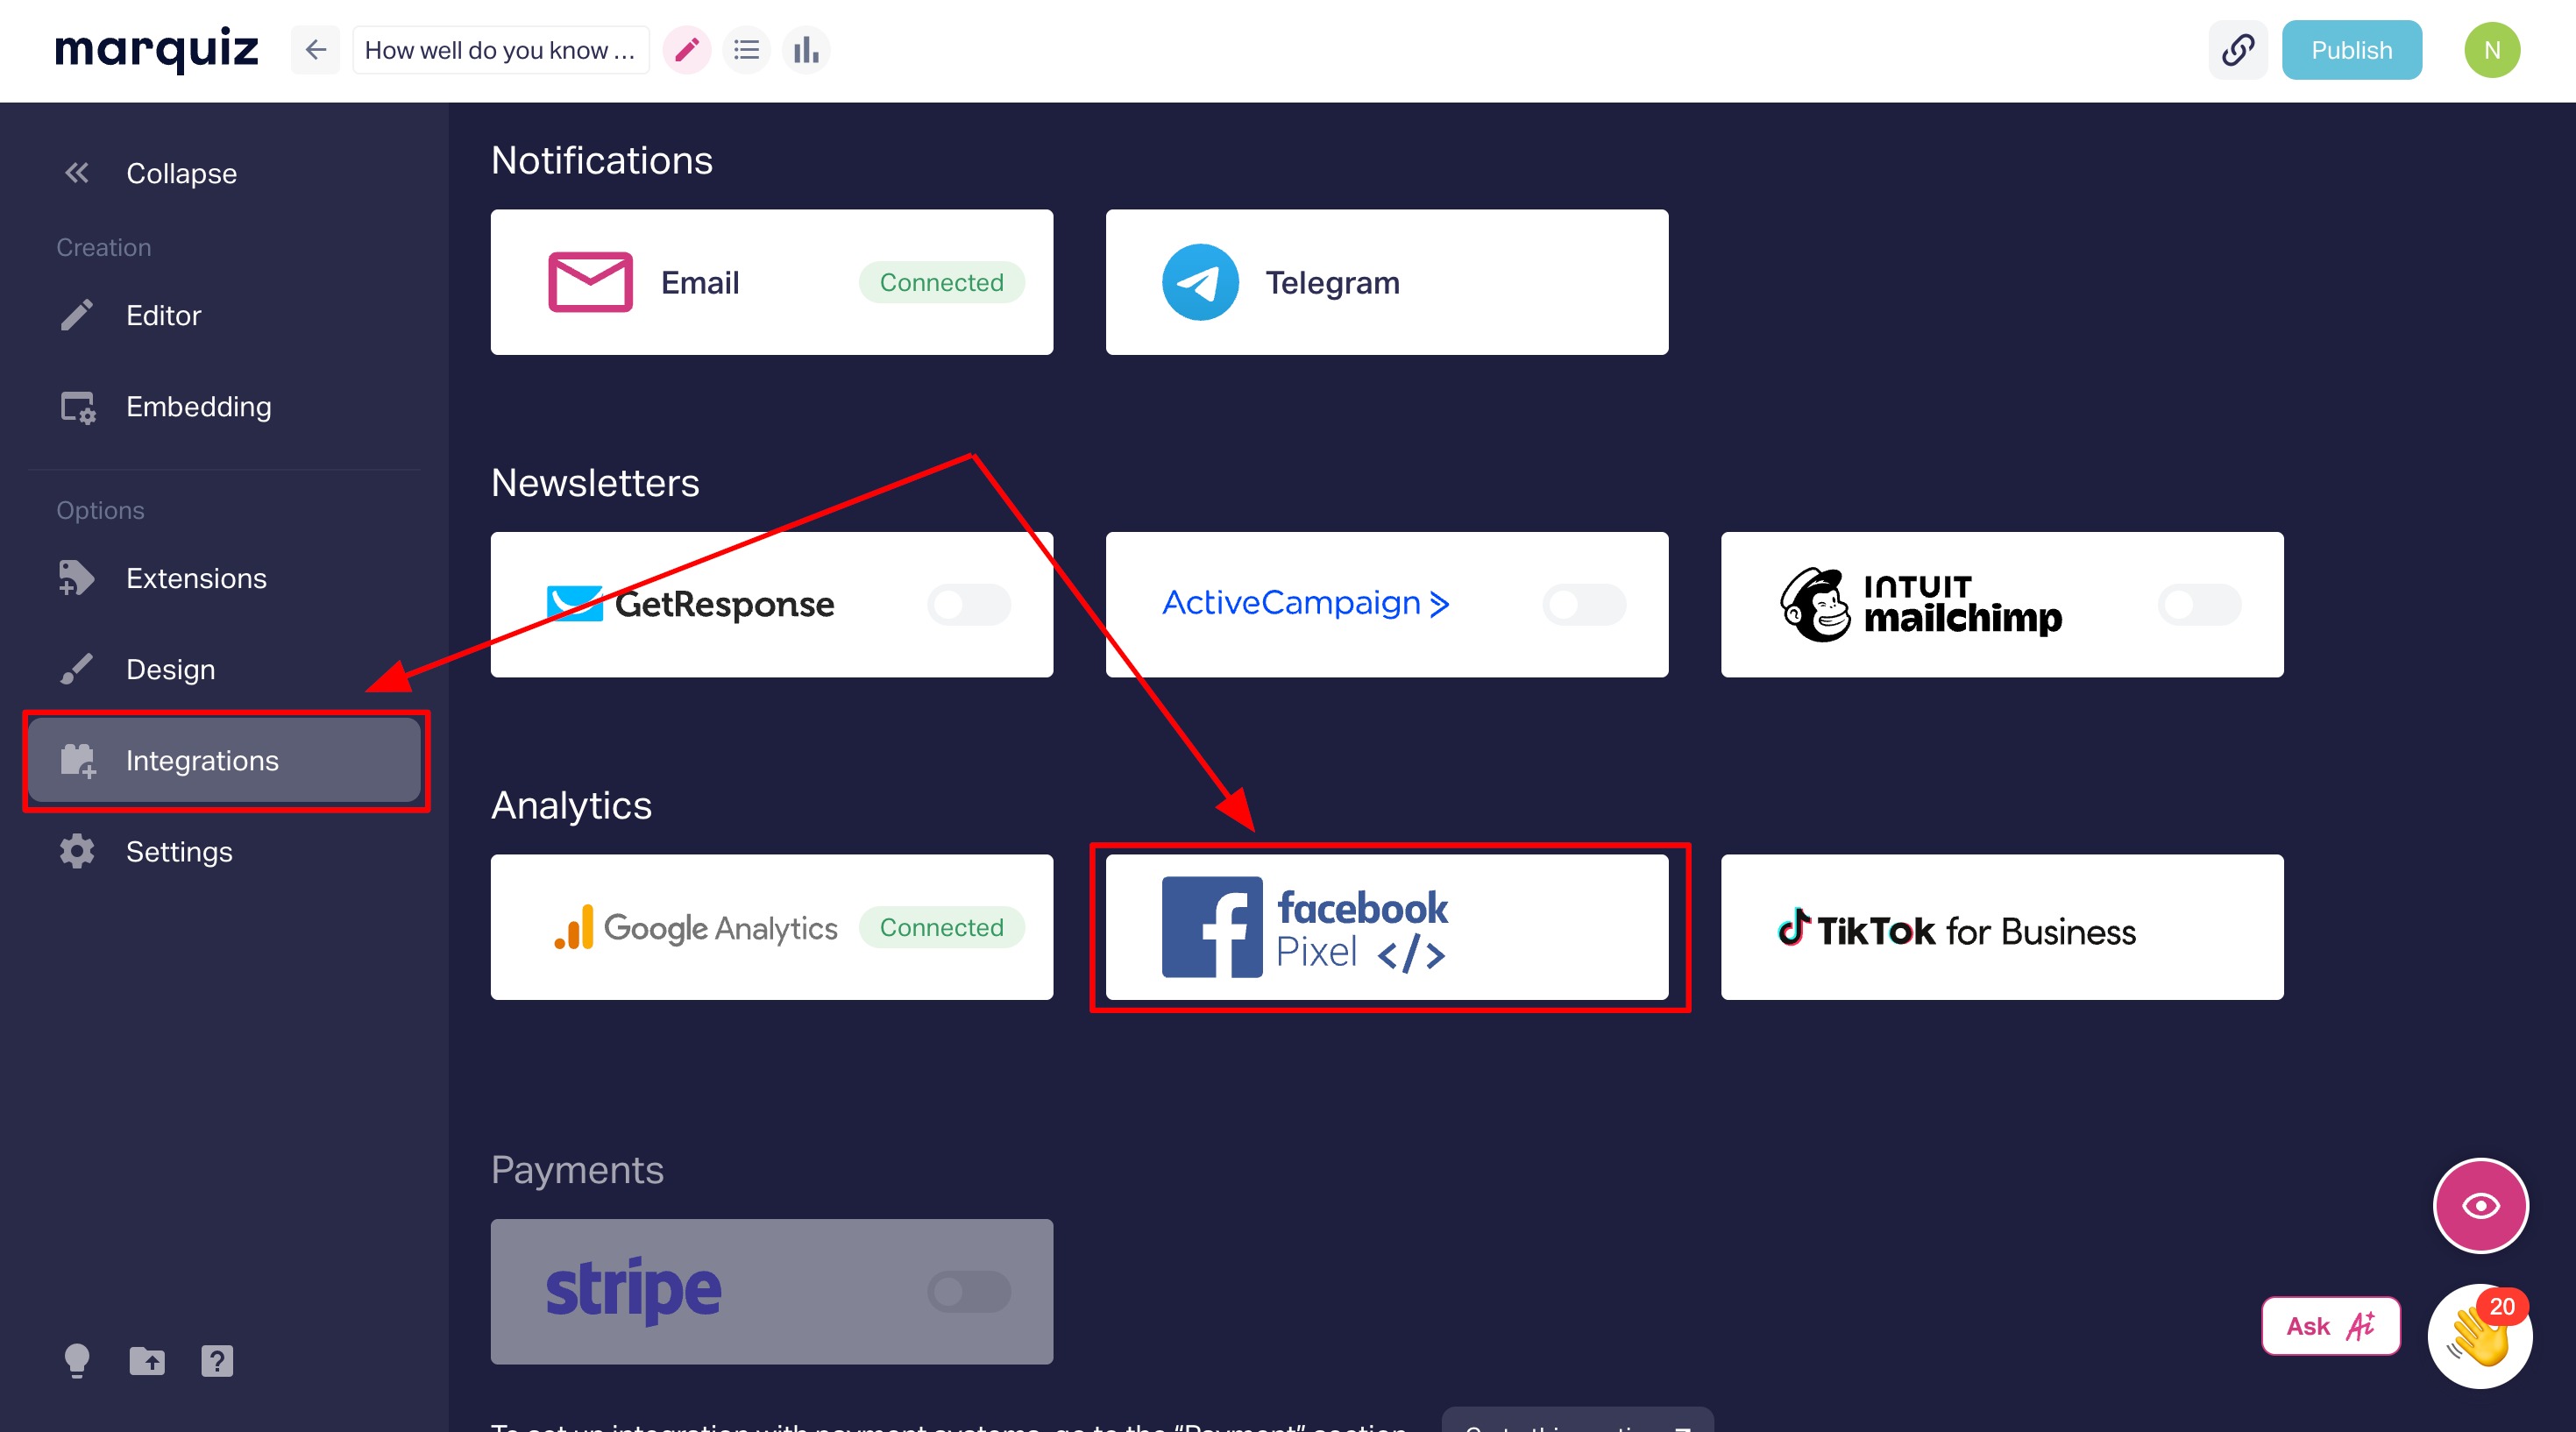
Paste the Pixel ID and Publish the quiz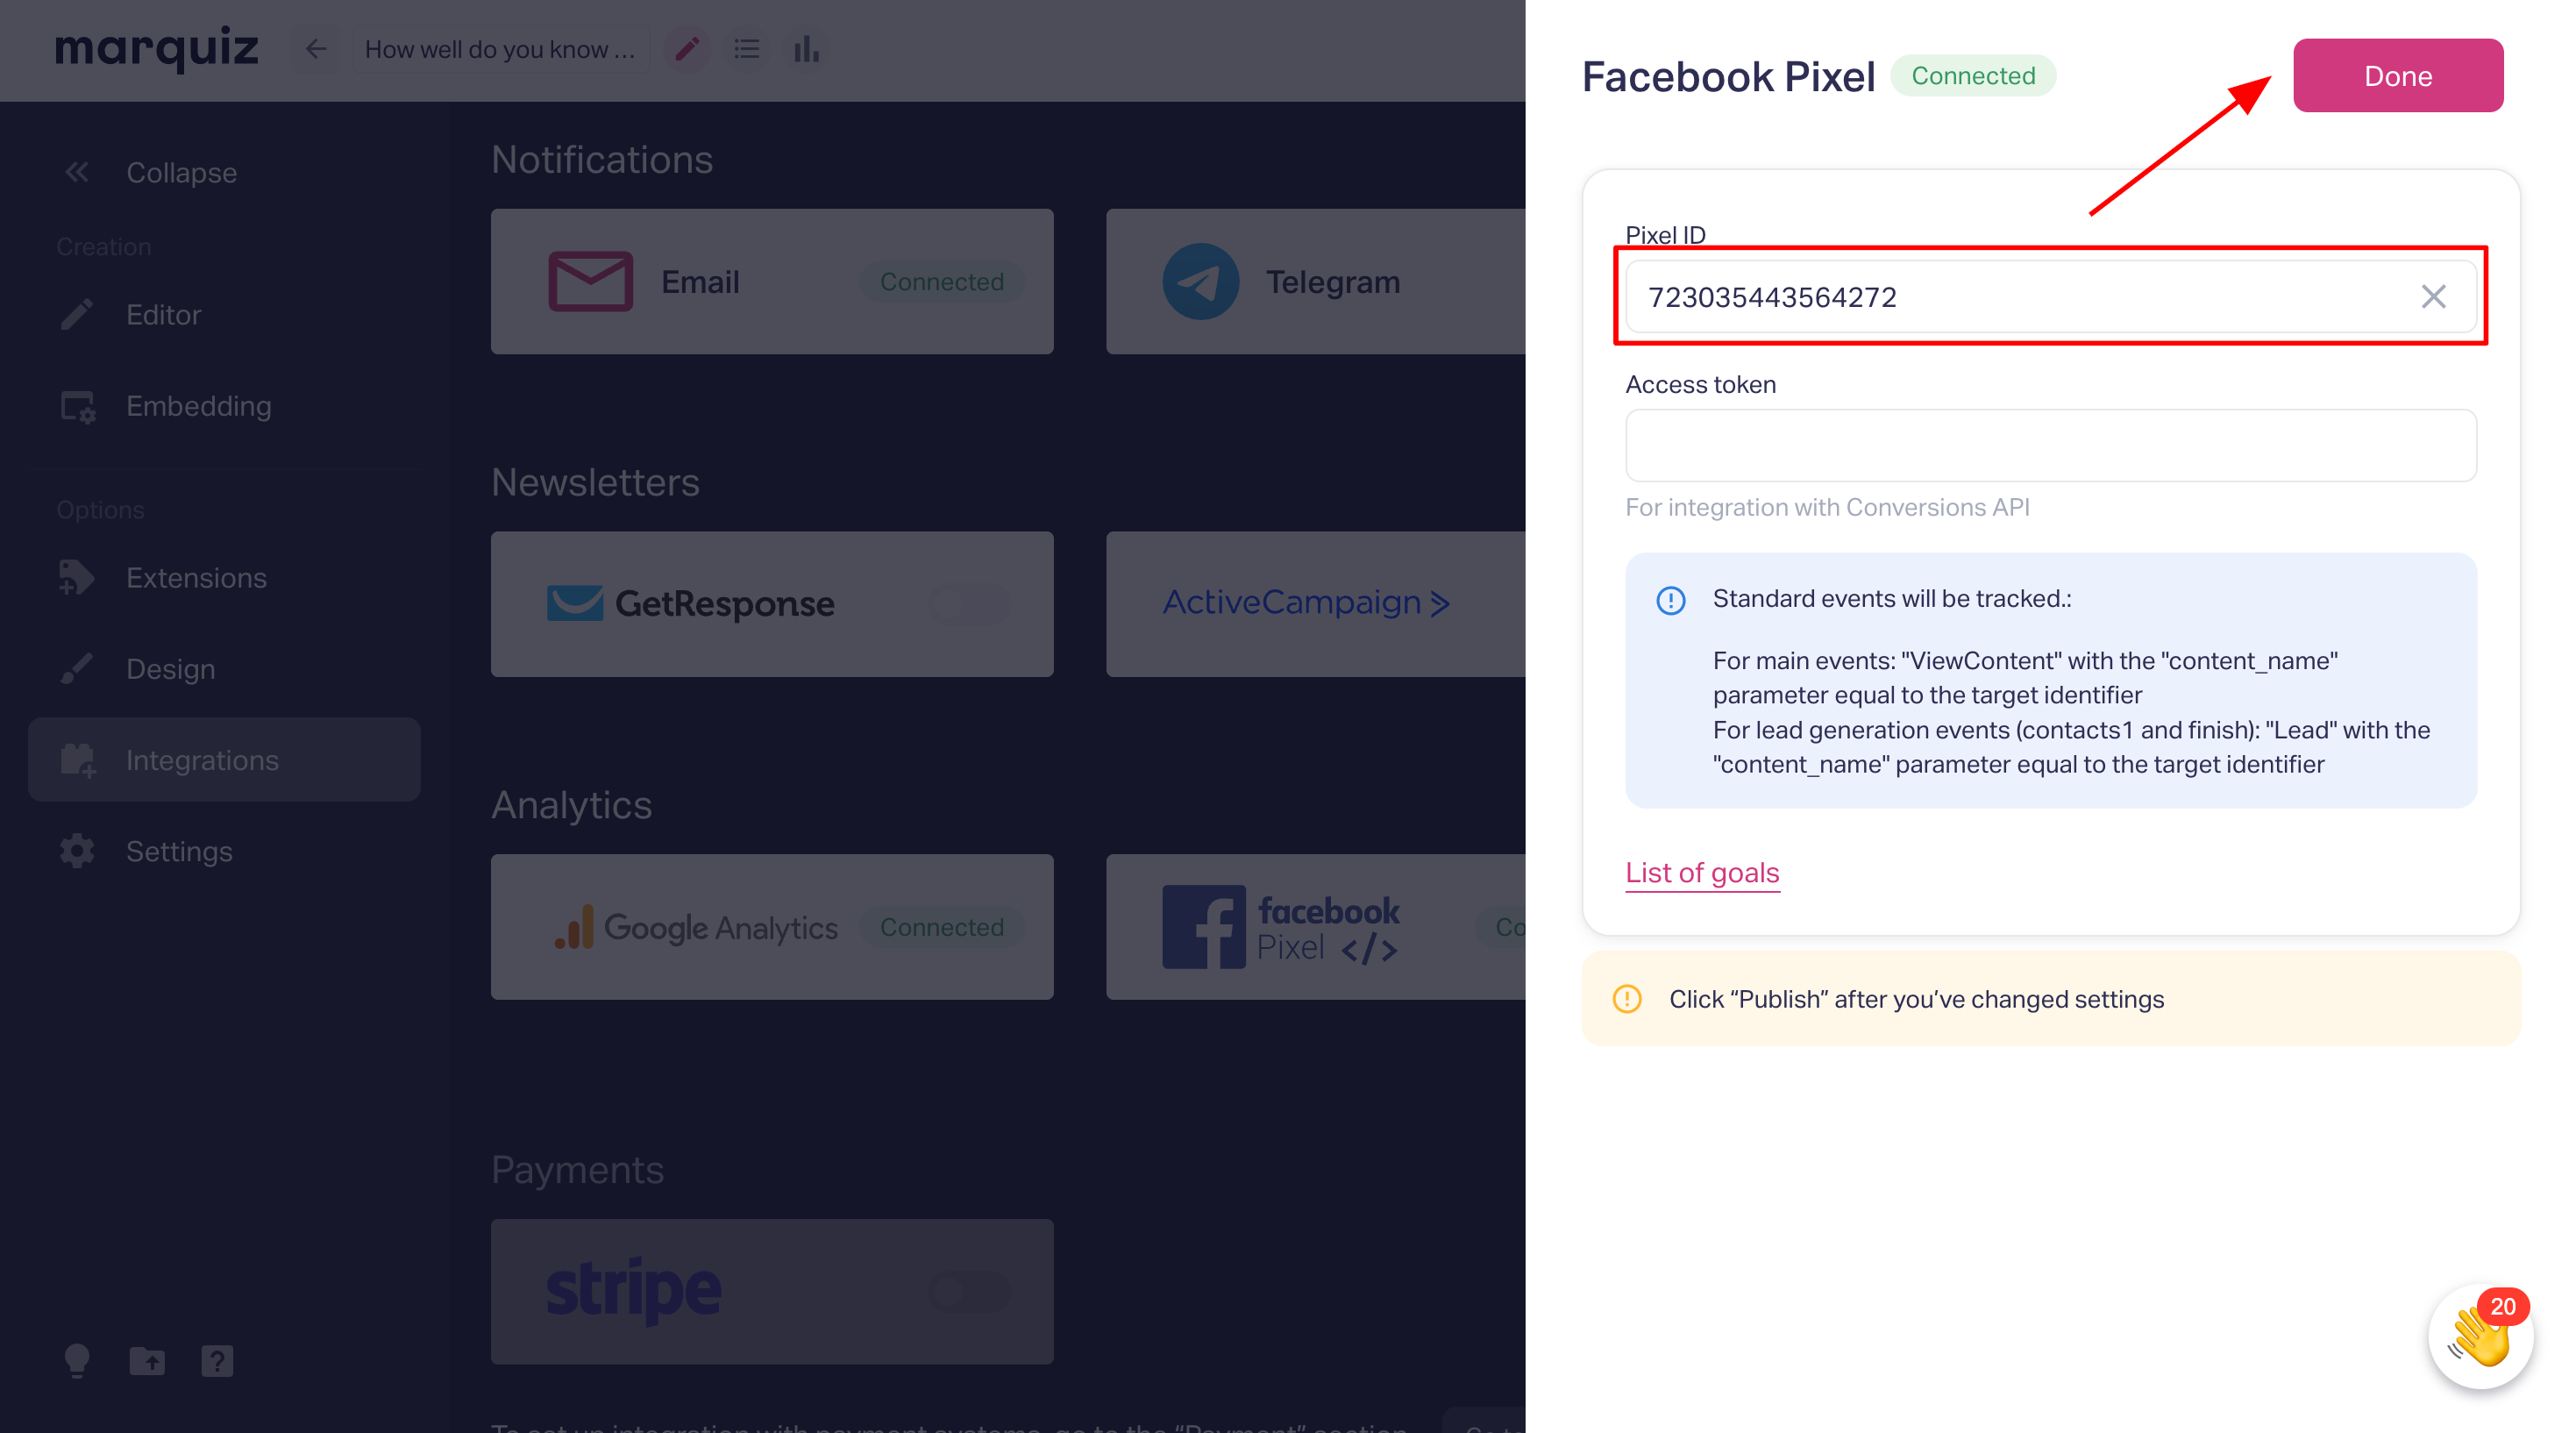
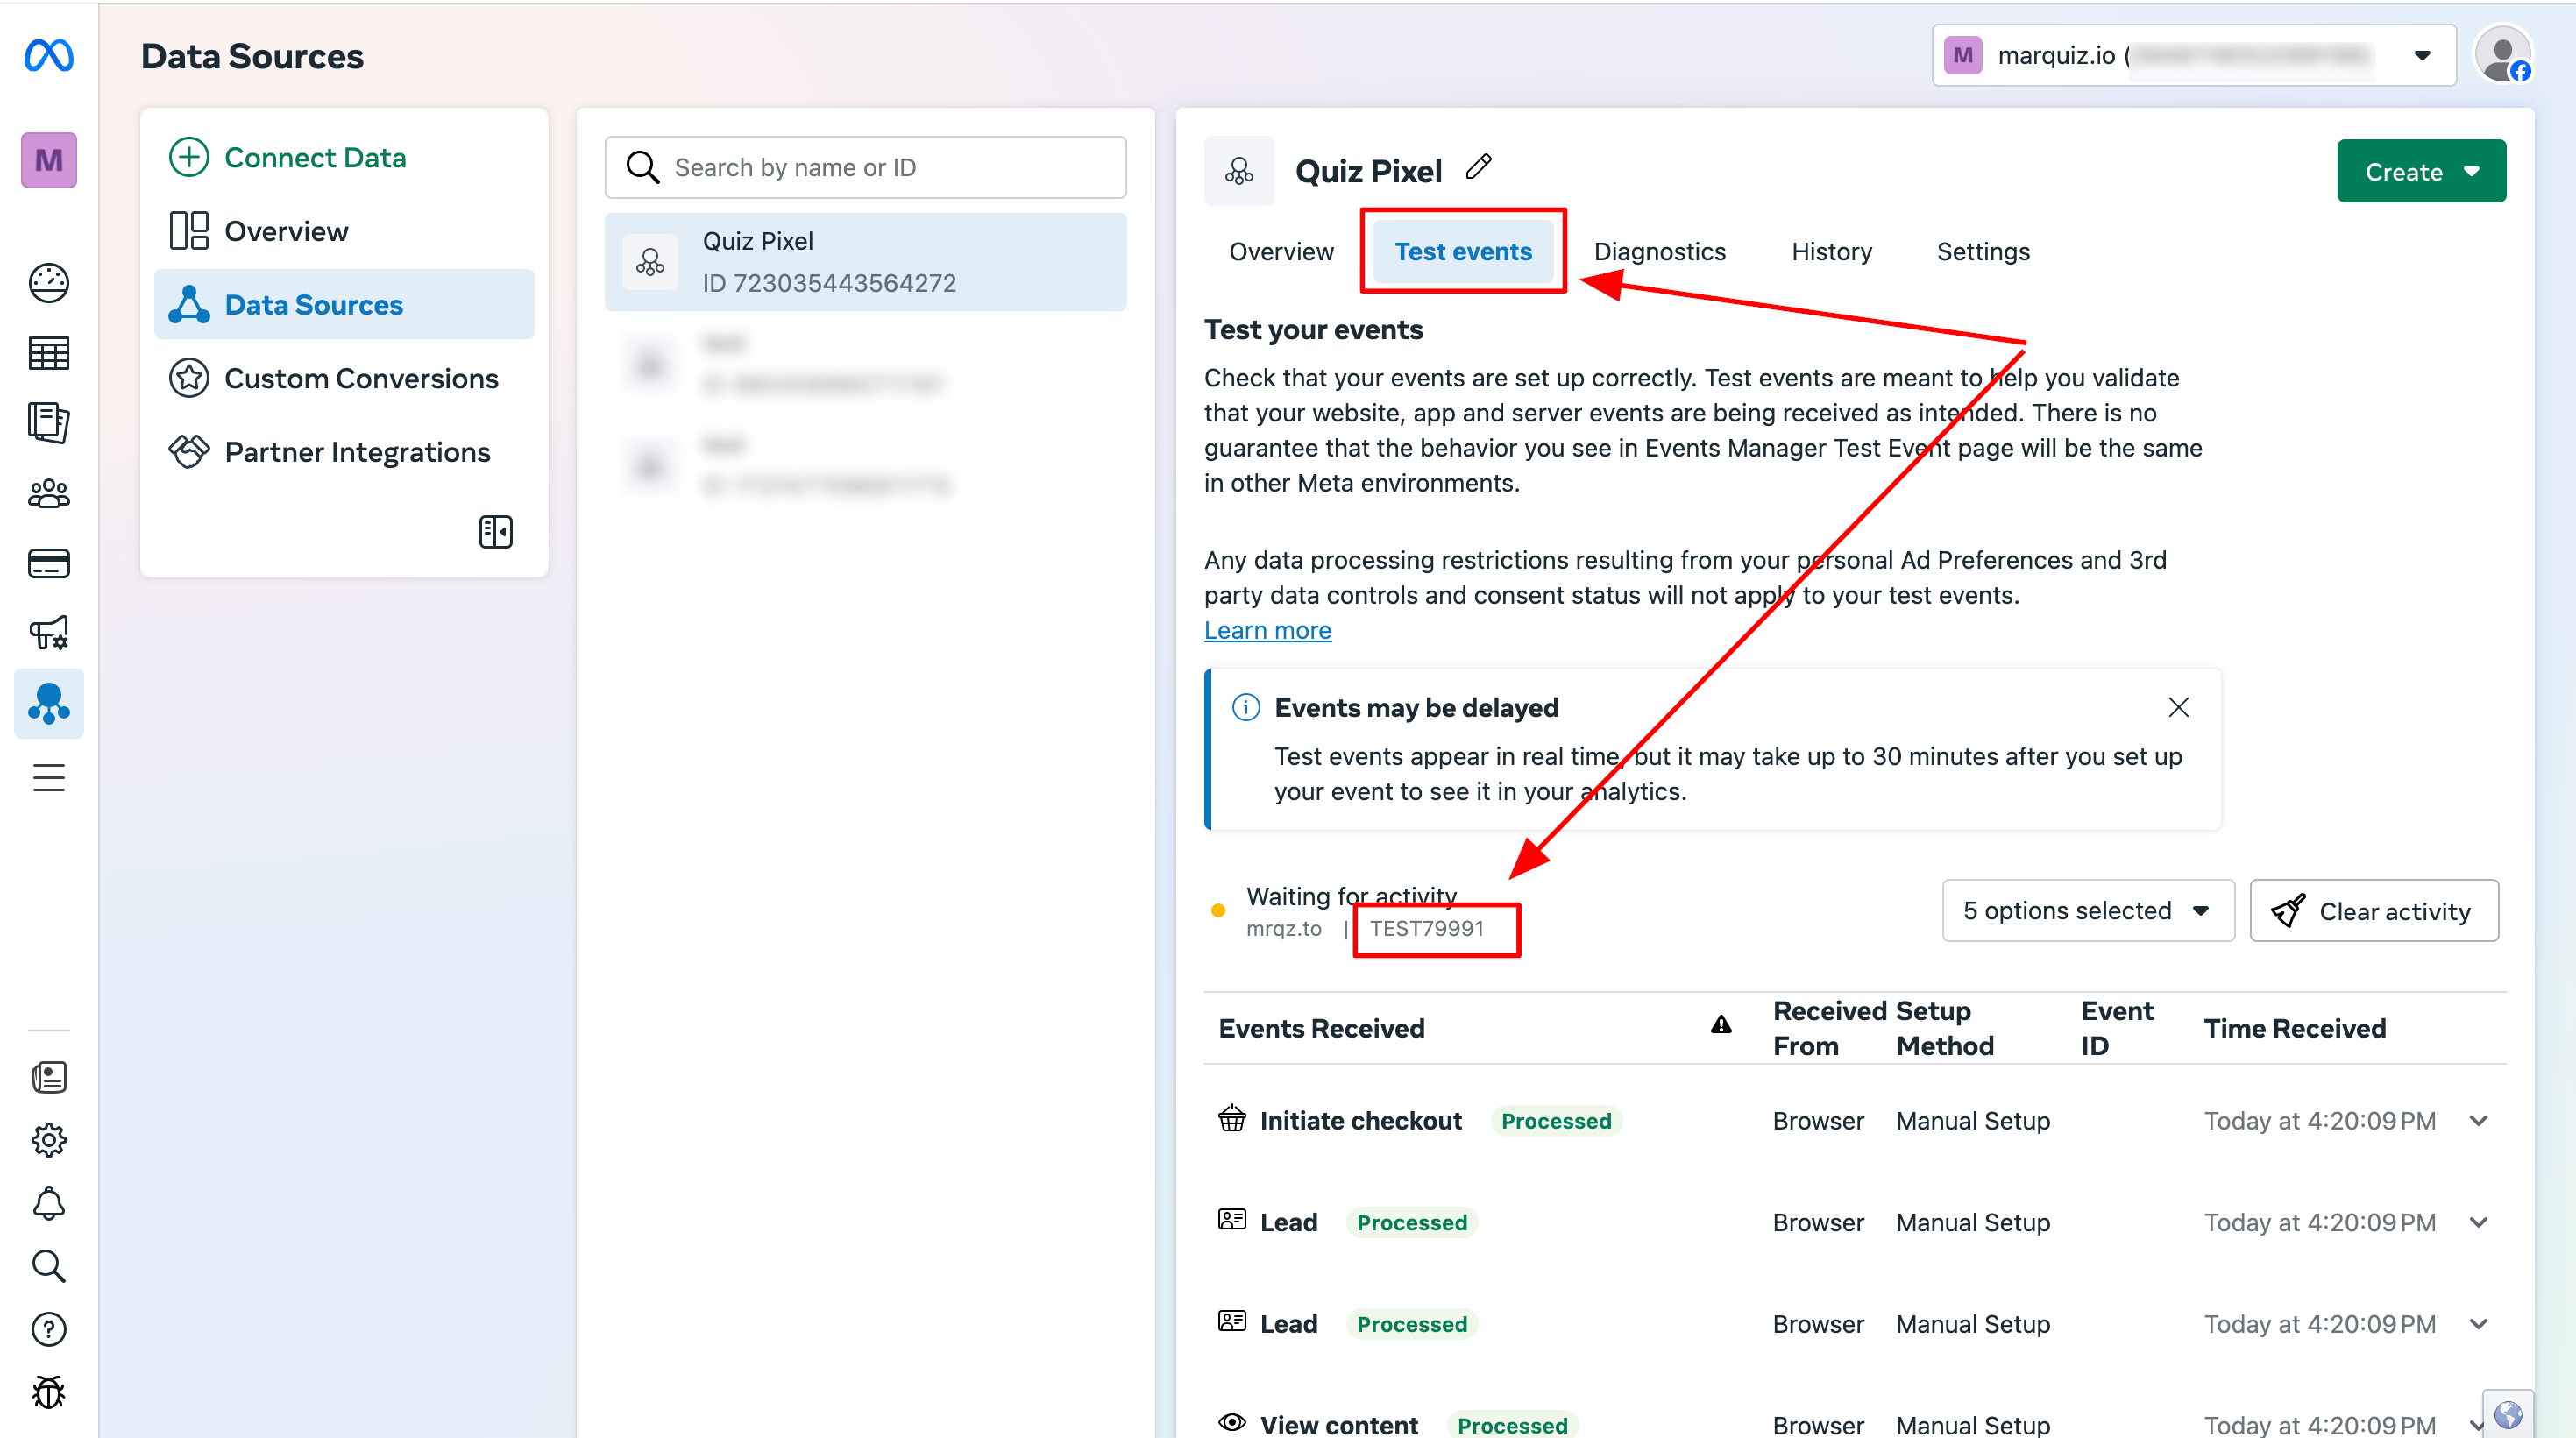
9. Test Events
Copy the quiz URL from Marquiz (Embedding → Quiz Link).
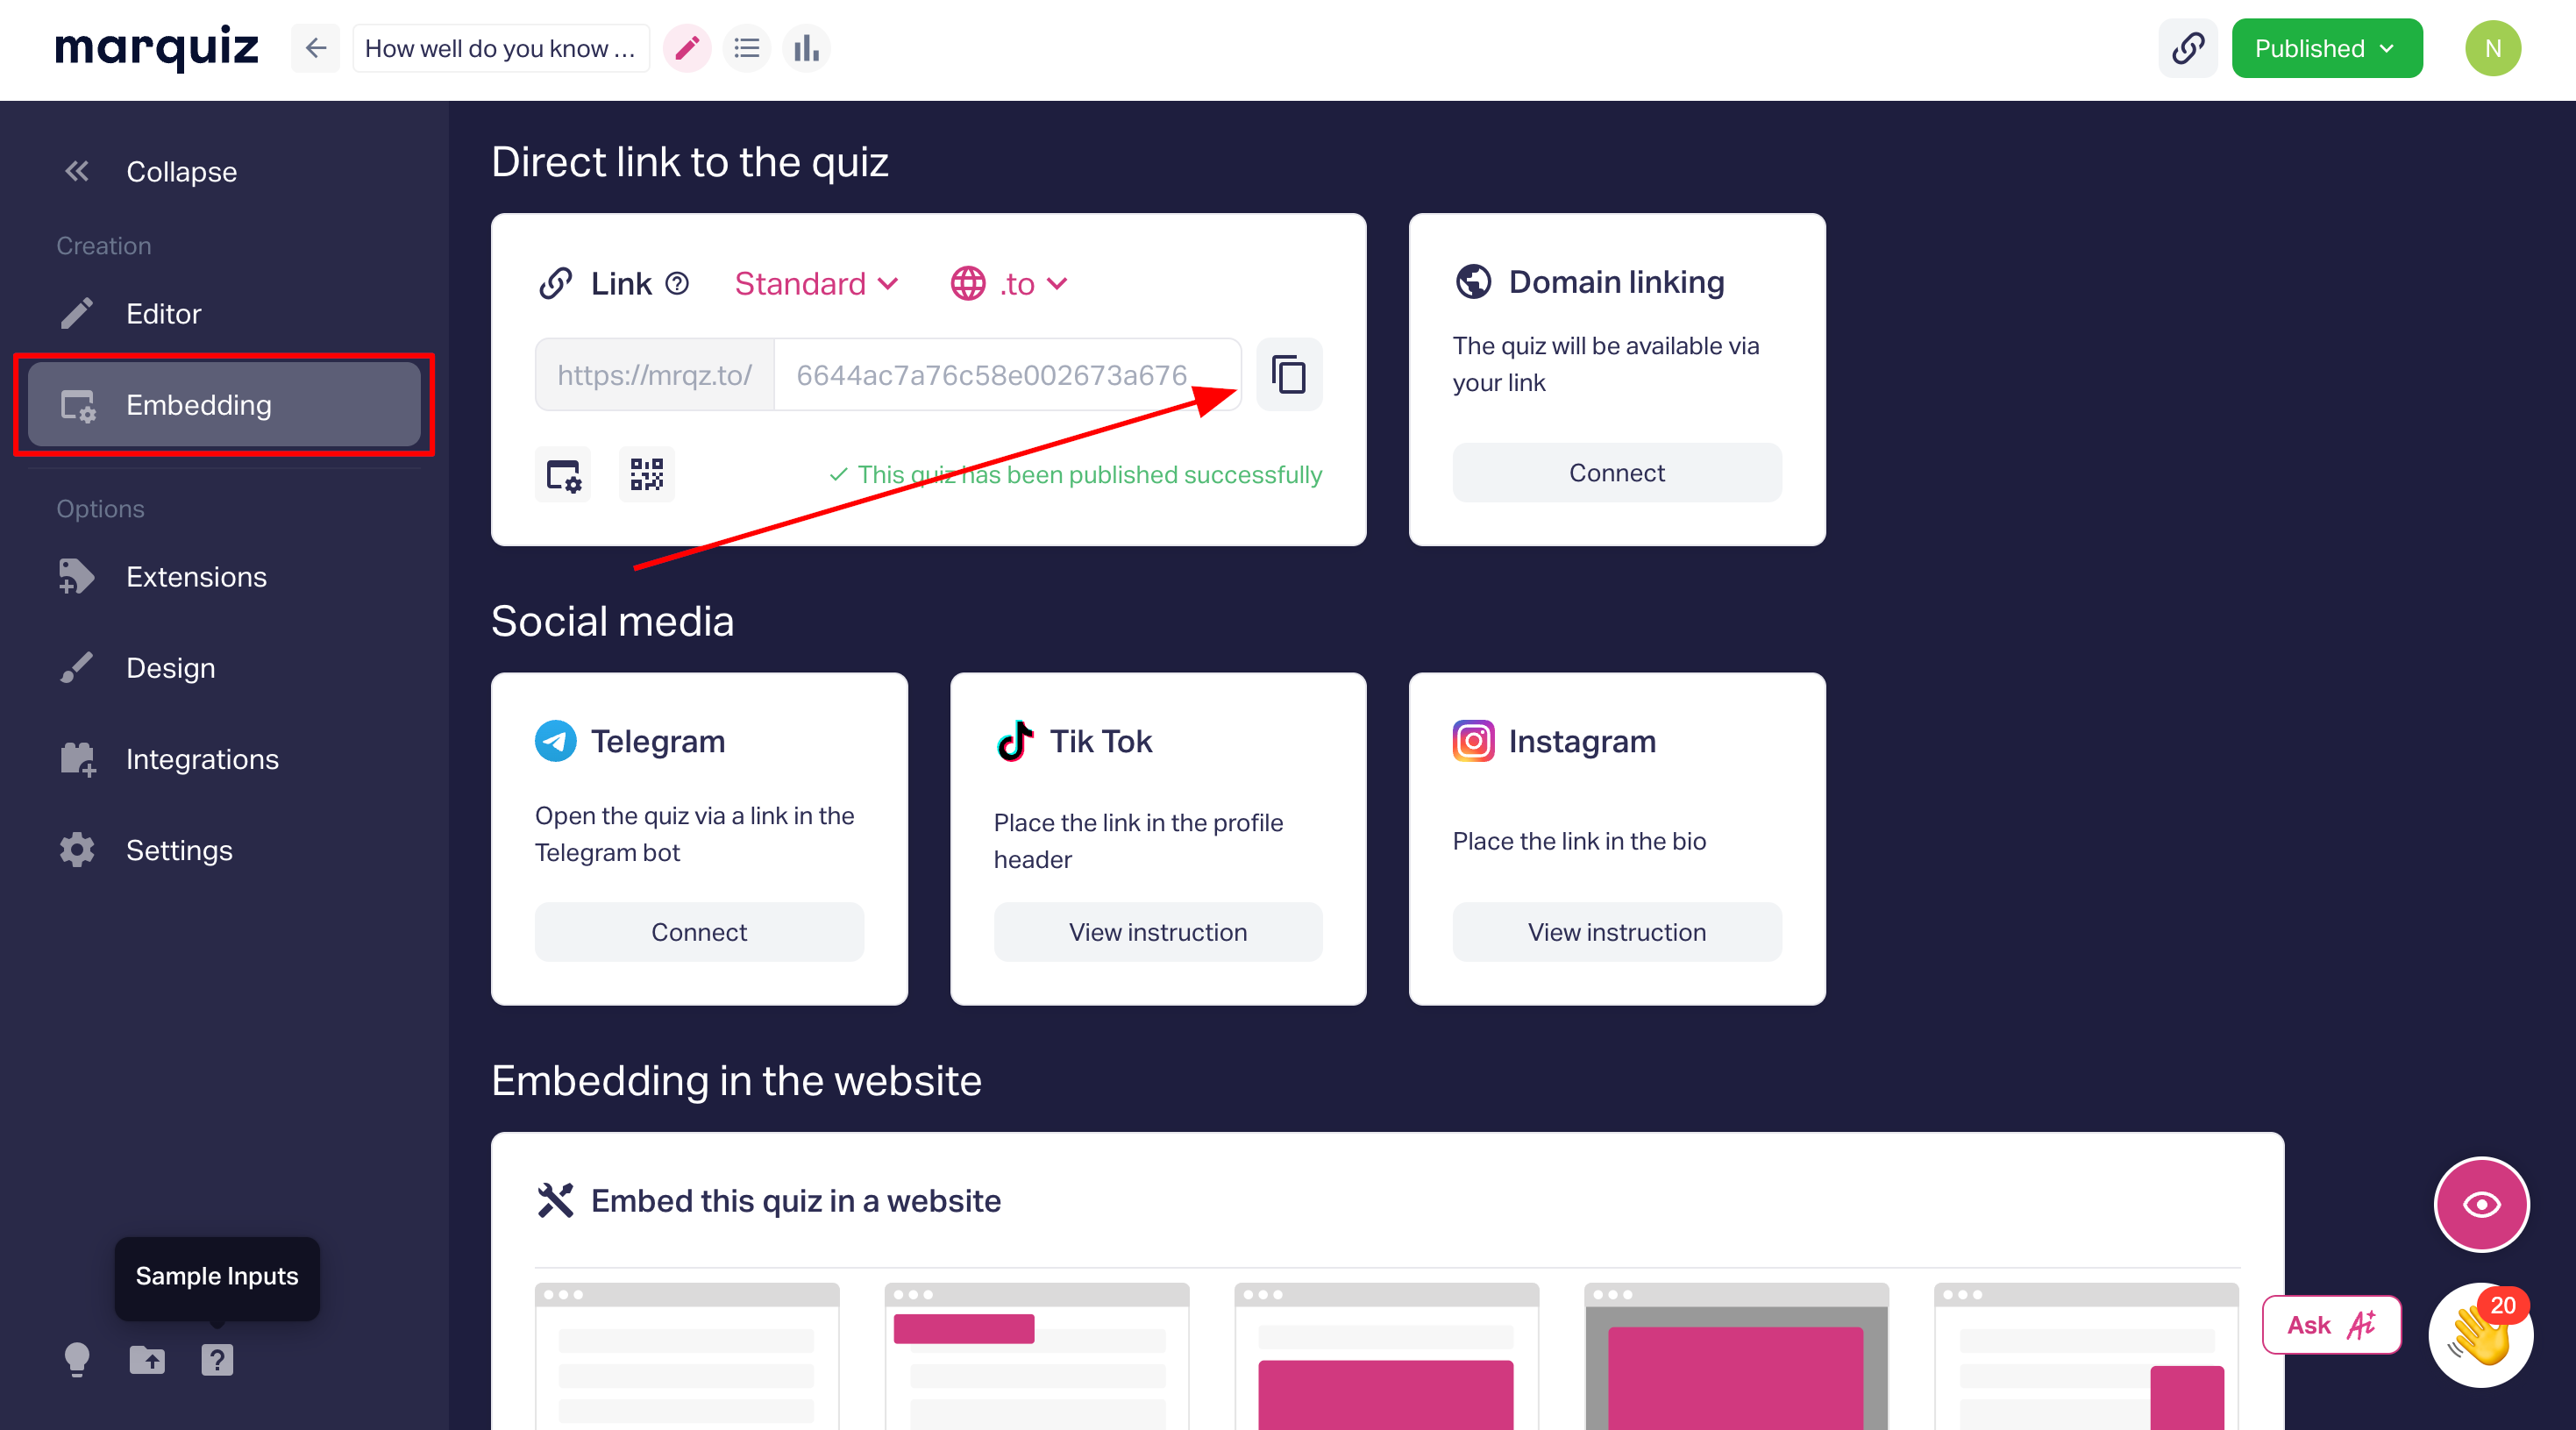
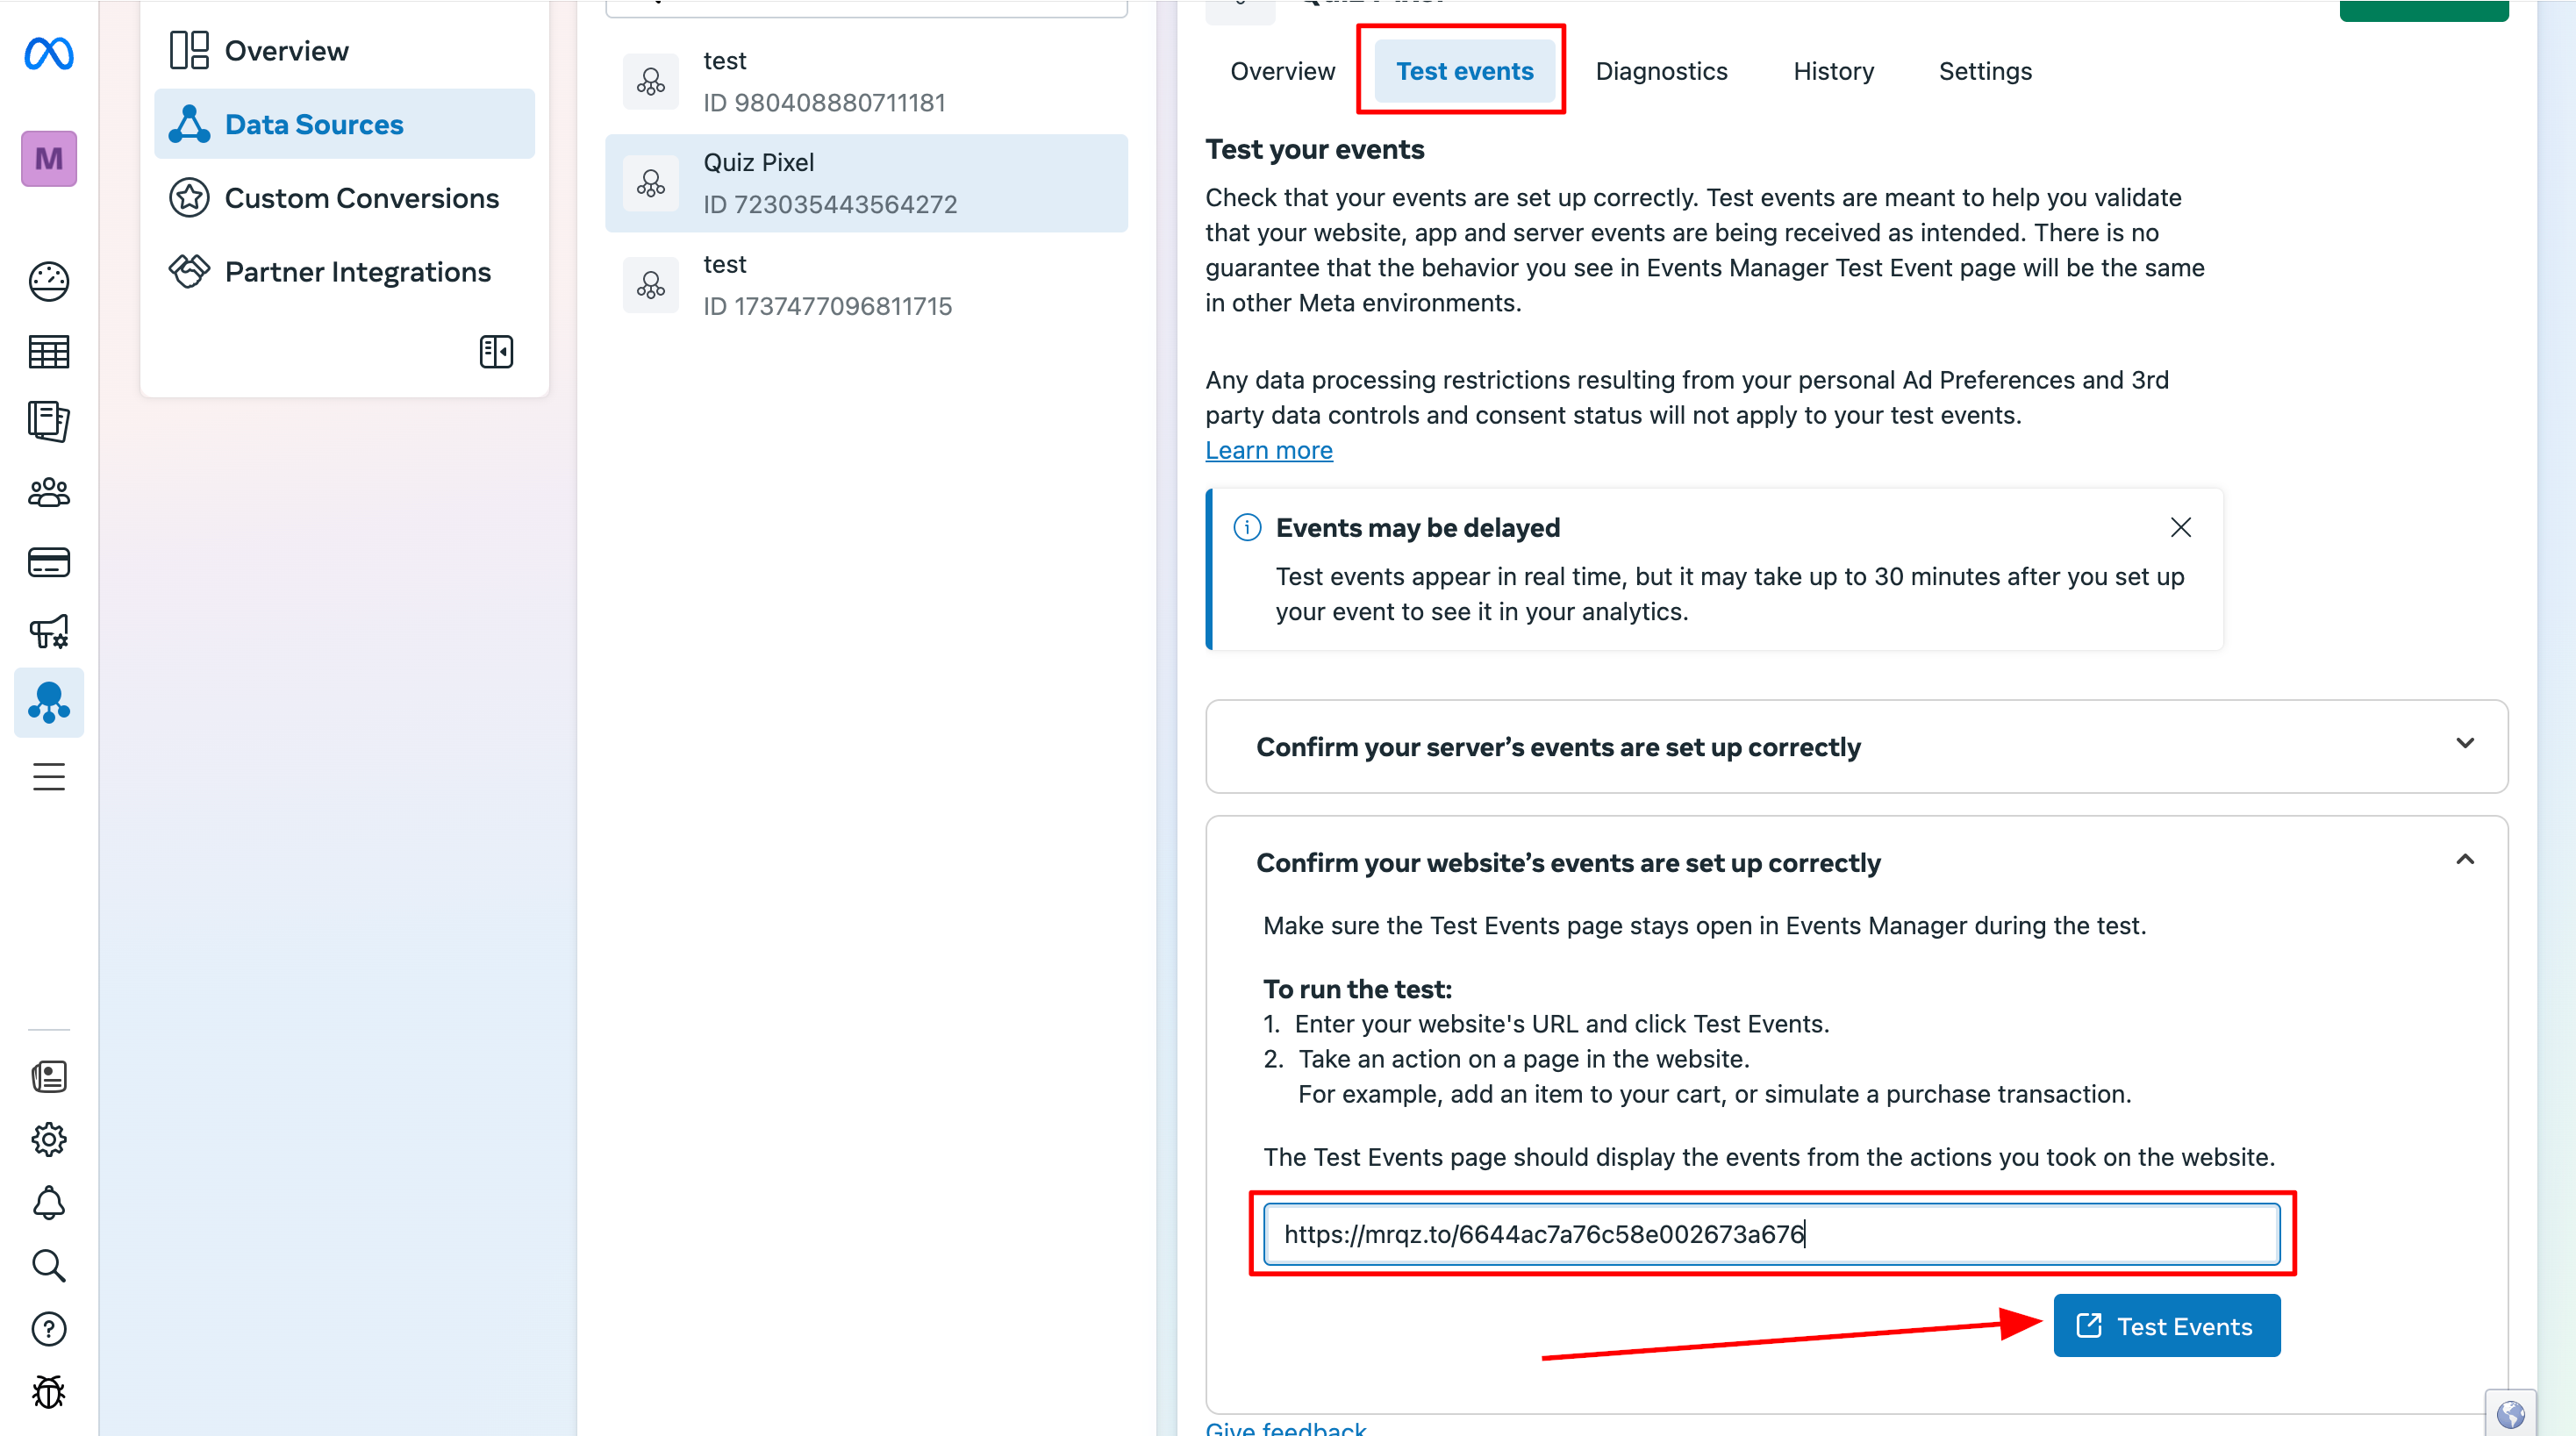
In Facebook Events Manager, go to Test Events and paste the URL. Click Test Events.
Complete the quiz using test data:
Email: test@marquiz.io
Phone: +1-999-999-99-99 or "test" in messengers.
Any name (to avoid balance deductions)
Key Notes:
Ad blockers (e.g., AdBlock, uBlock Origin) can prevent Facebook Pixel from tracking events.
Facebook Pixel Helper (Chrome/Firefox extension) helps debug tracking issues in real time.
Always test events after disabling blockers to ensure data accuracy.
Now, you can create custom conversion for different events:
For the main View Content events with an attribute content_name, the events are equal to the following identifiers:
- The visitor opened the quiz: marquiz-start
- The visitor reached the lead form: marquiz-form
- The visitor saw the outcome: marquiz-result (this goal is used only when outcomes are set)
- Visitor passed the question N: marquiz-stepN (where N is the sequence number of the question. For example, marquiz-step2)
For the Lead capture events - leads with an attribute content_name, the events are are equal to the following idetifiers:
- The visitor saw the thank you page: marquiz-finish
- The visitor filled out the lead form (1st step): marquiz-contacts1
IMPORTANT: (This goal is set only if you have a two-step lead capture form.) - The visitor filled out the lead form (2nd step): marquiz-contacts2
IMPORTANT: (This goal is set only if you have a two-step lead capture form.) - The visitor successfully paid for an item — marquiz-payment-success
IMPORTANT: (This event is only available if you have shopping cart functionality and payment processing enabled in your quiz.) - The visitor failed to complete payment — marquiz-payment-fail
IMPORTANT: (This event requires active shopping cart and payment integration in your quiz setup.)
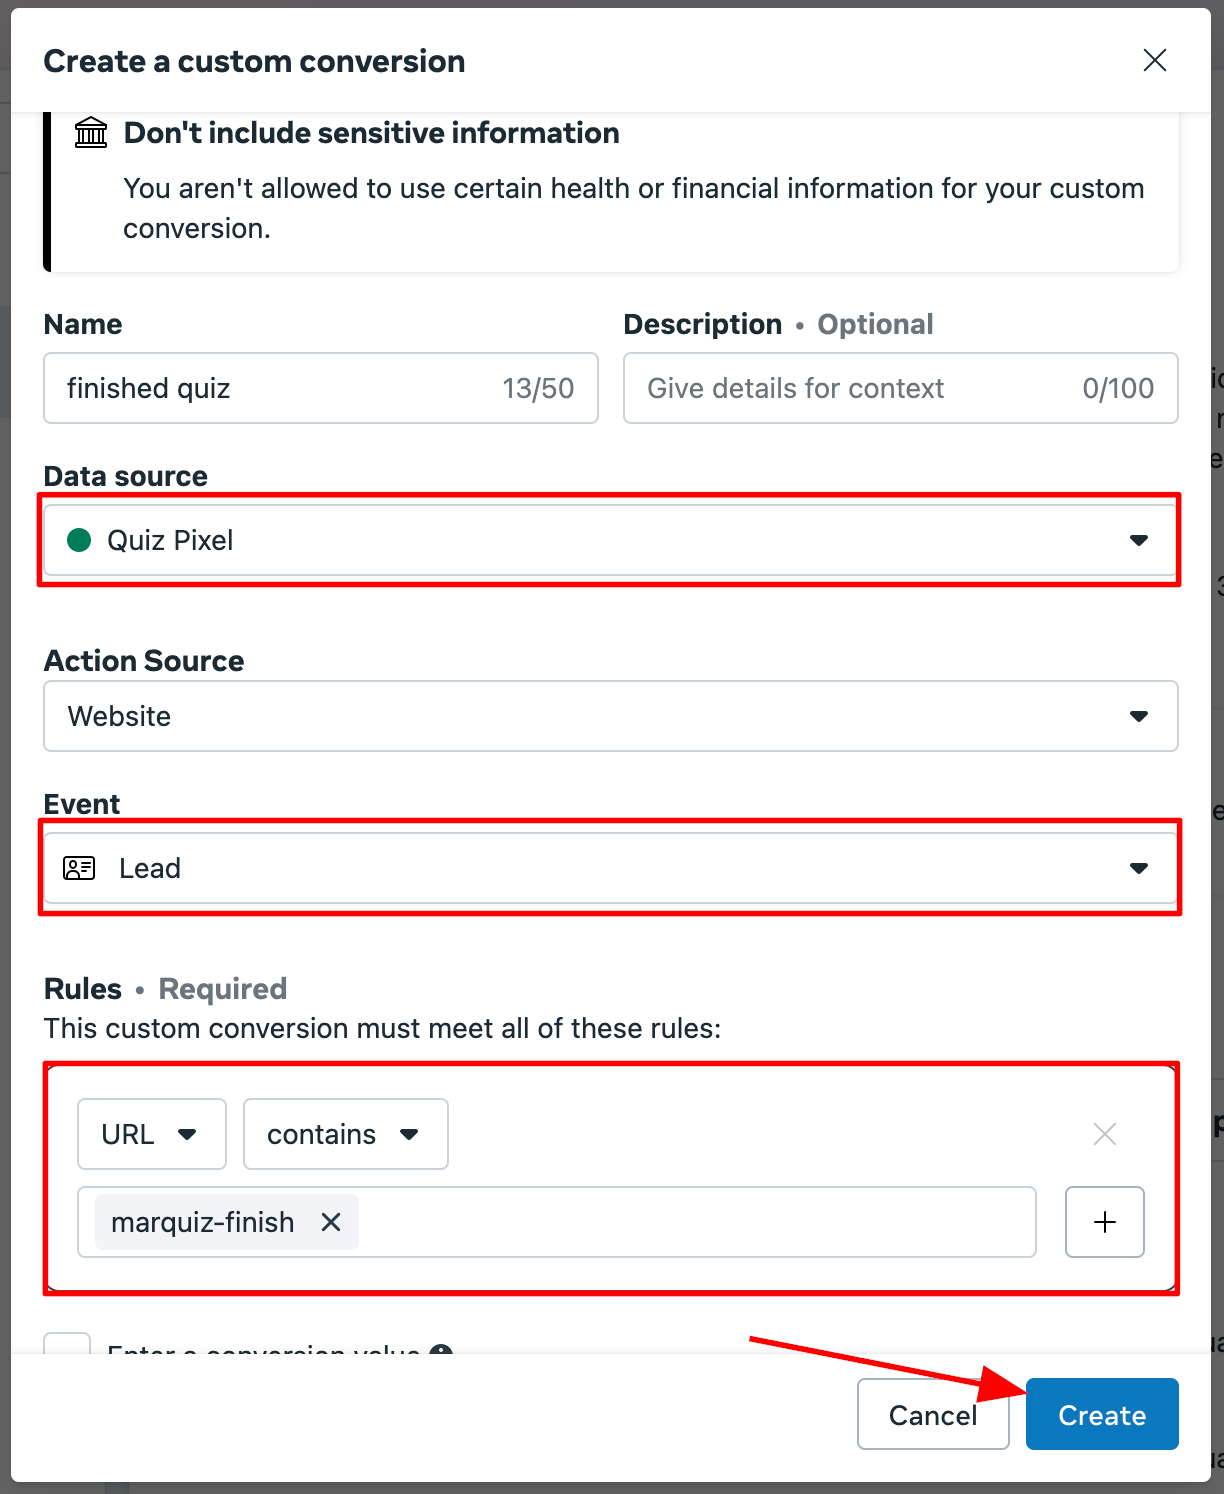
Custom Conversions
10. Create Custom Conversions
In Events Manager, click Create → Create Custom Conversion.

Set rules (e.g., URL contains marquiz-finish for thank-you page visits).
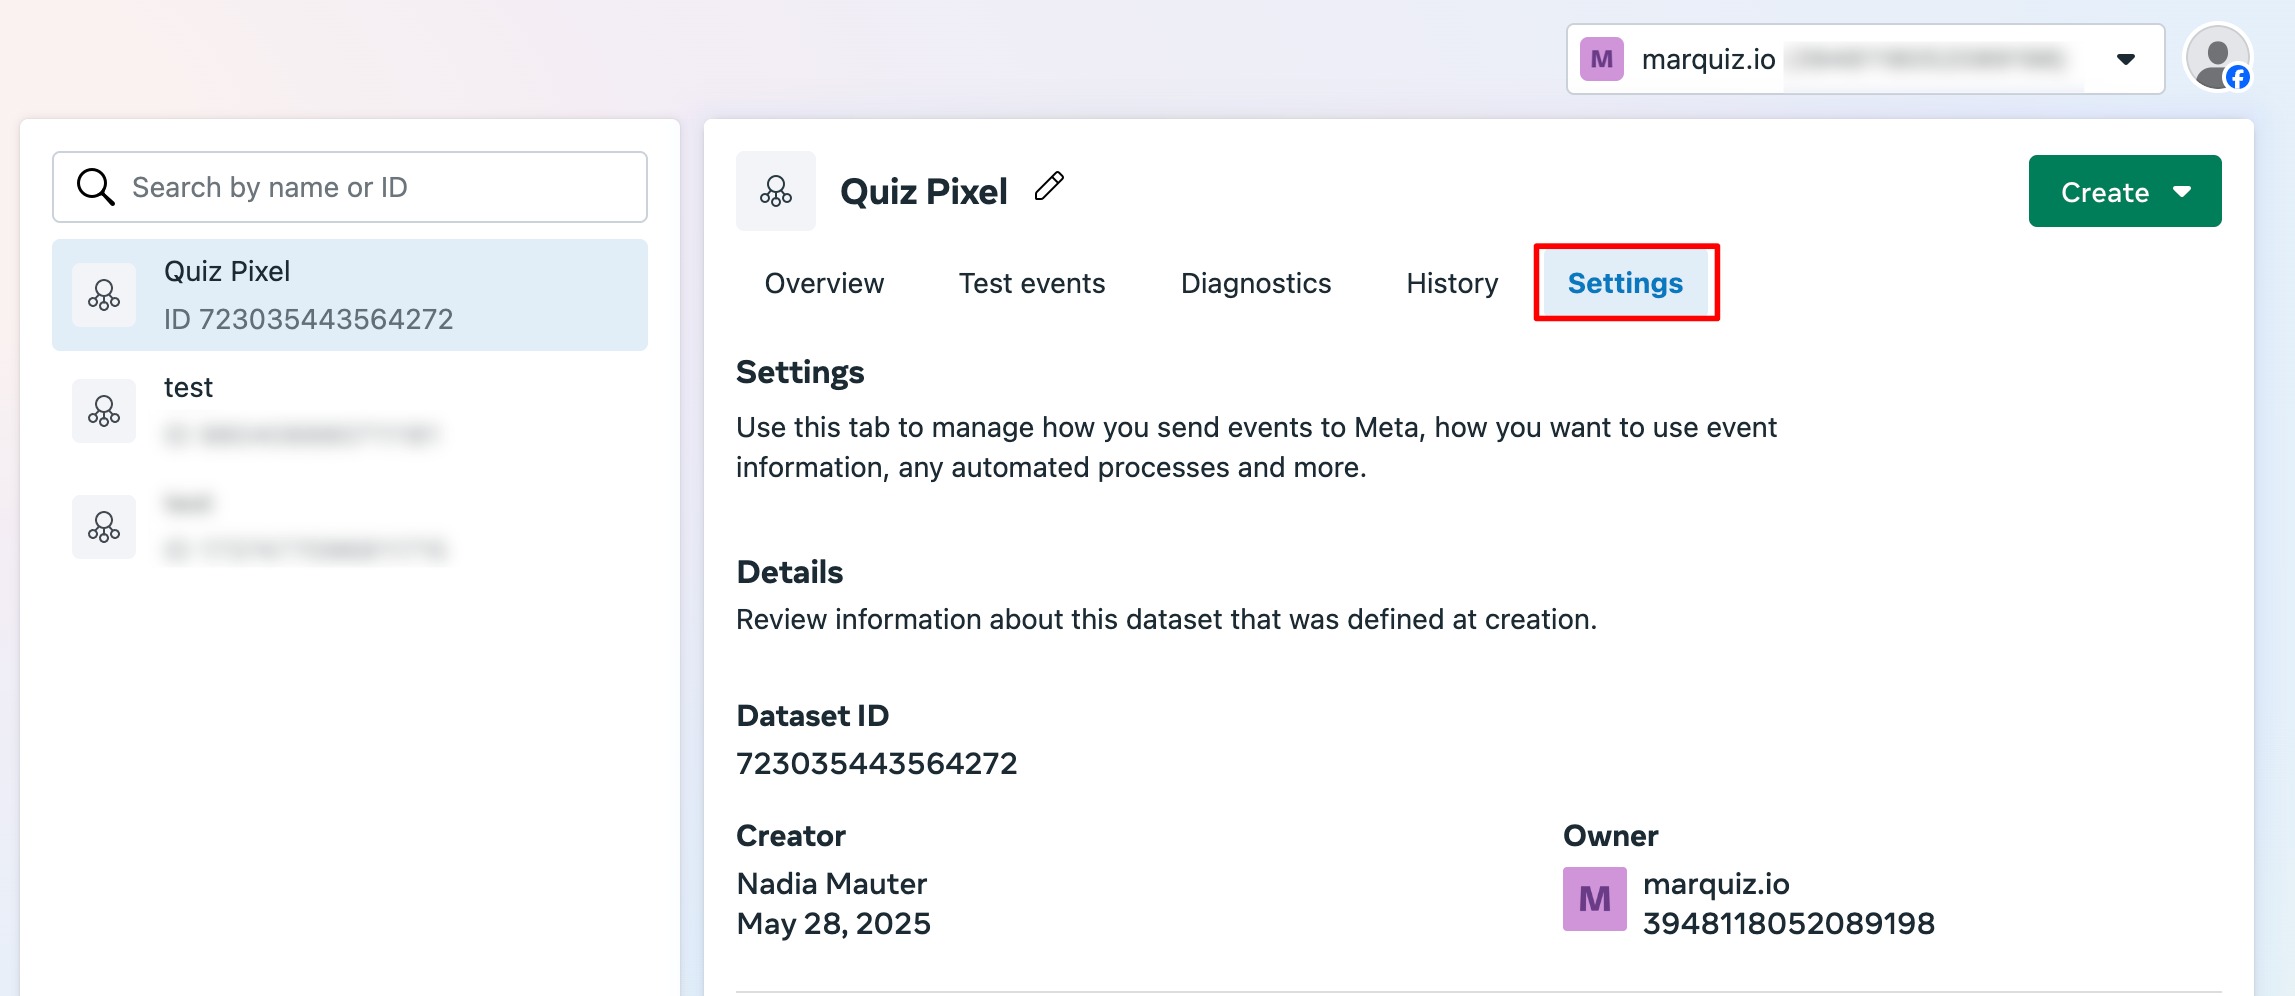
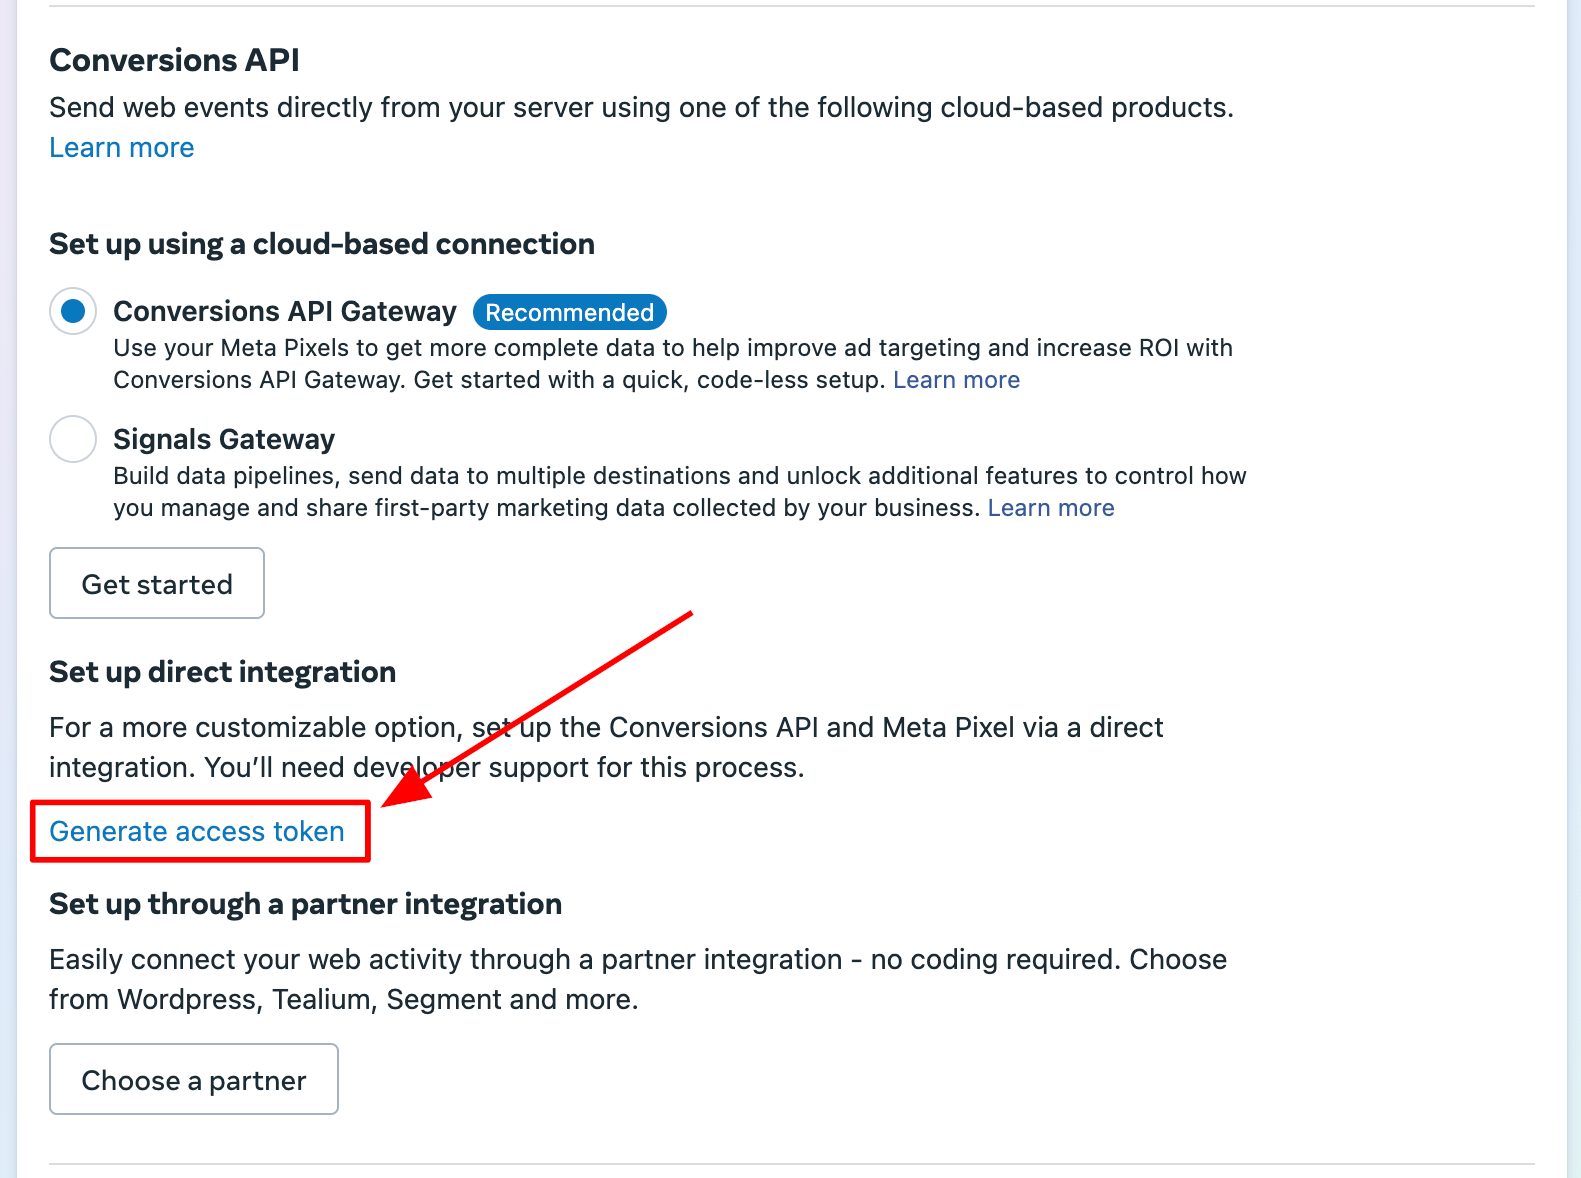
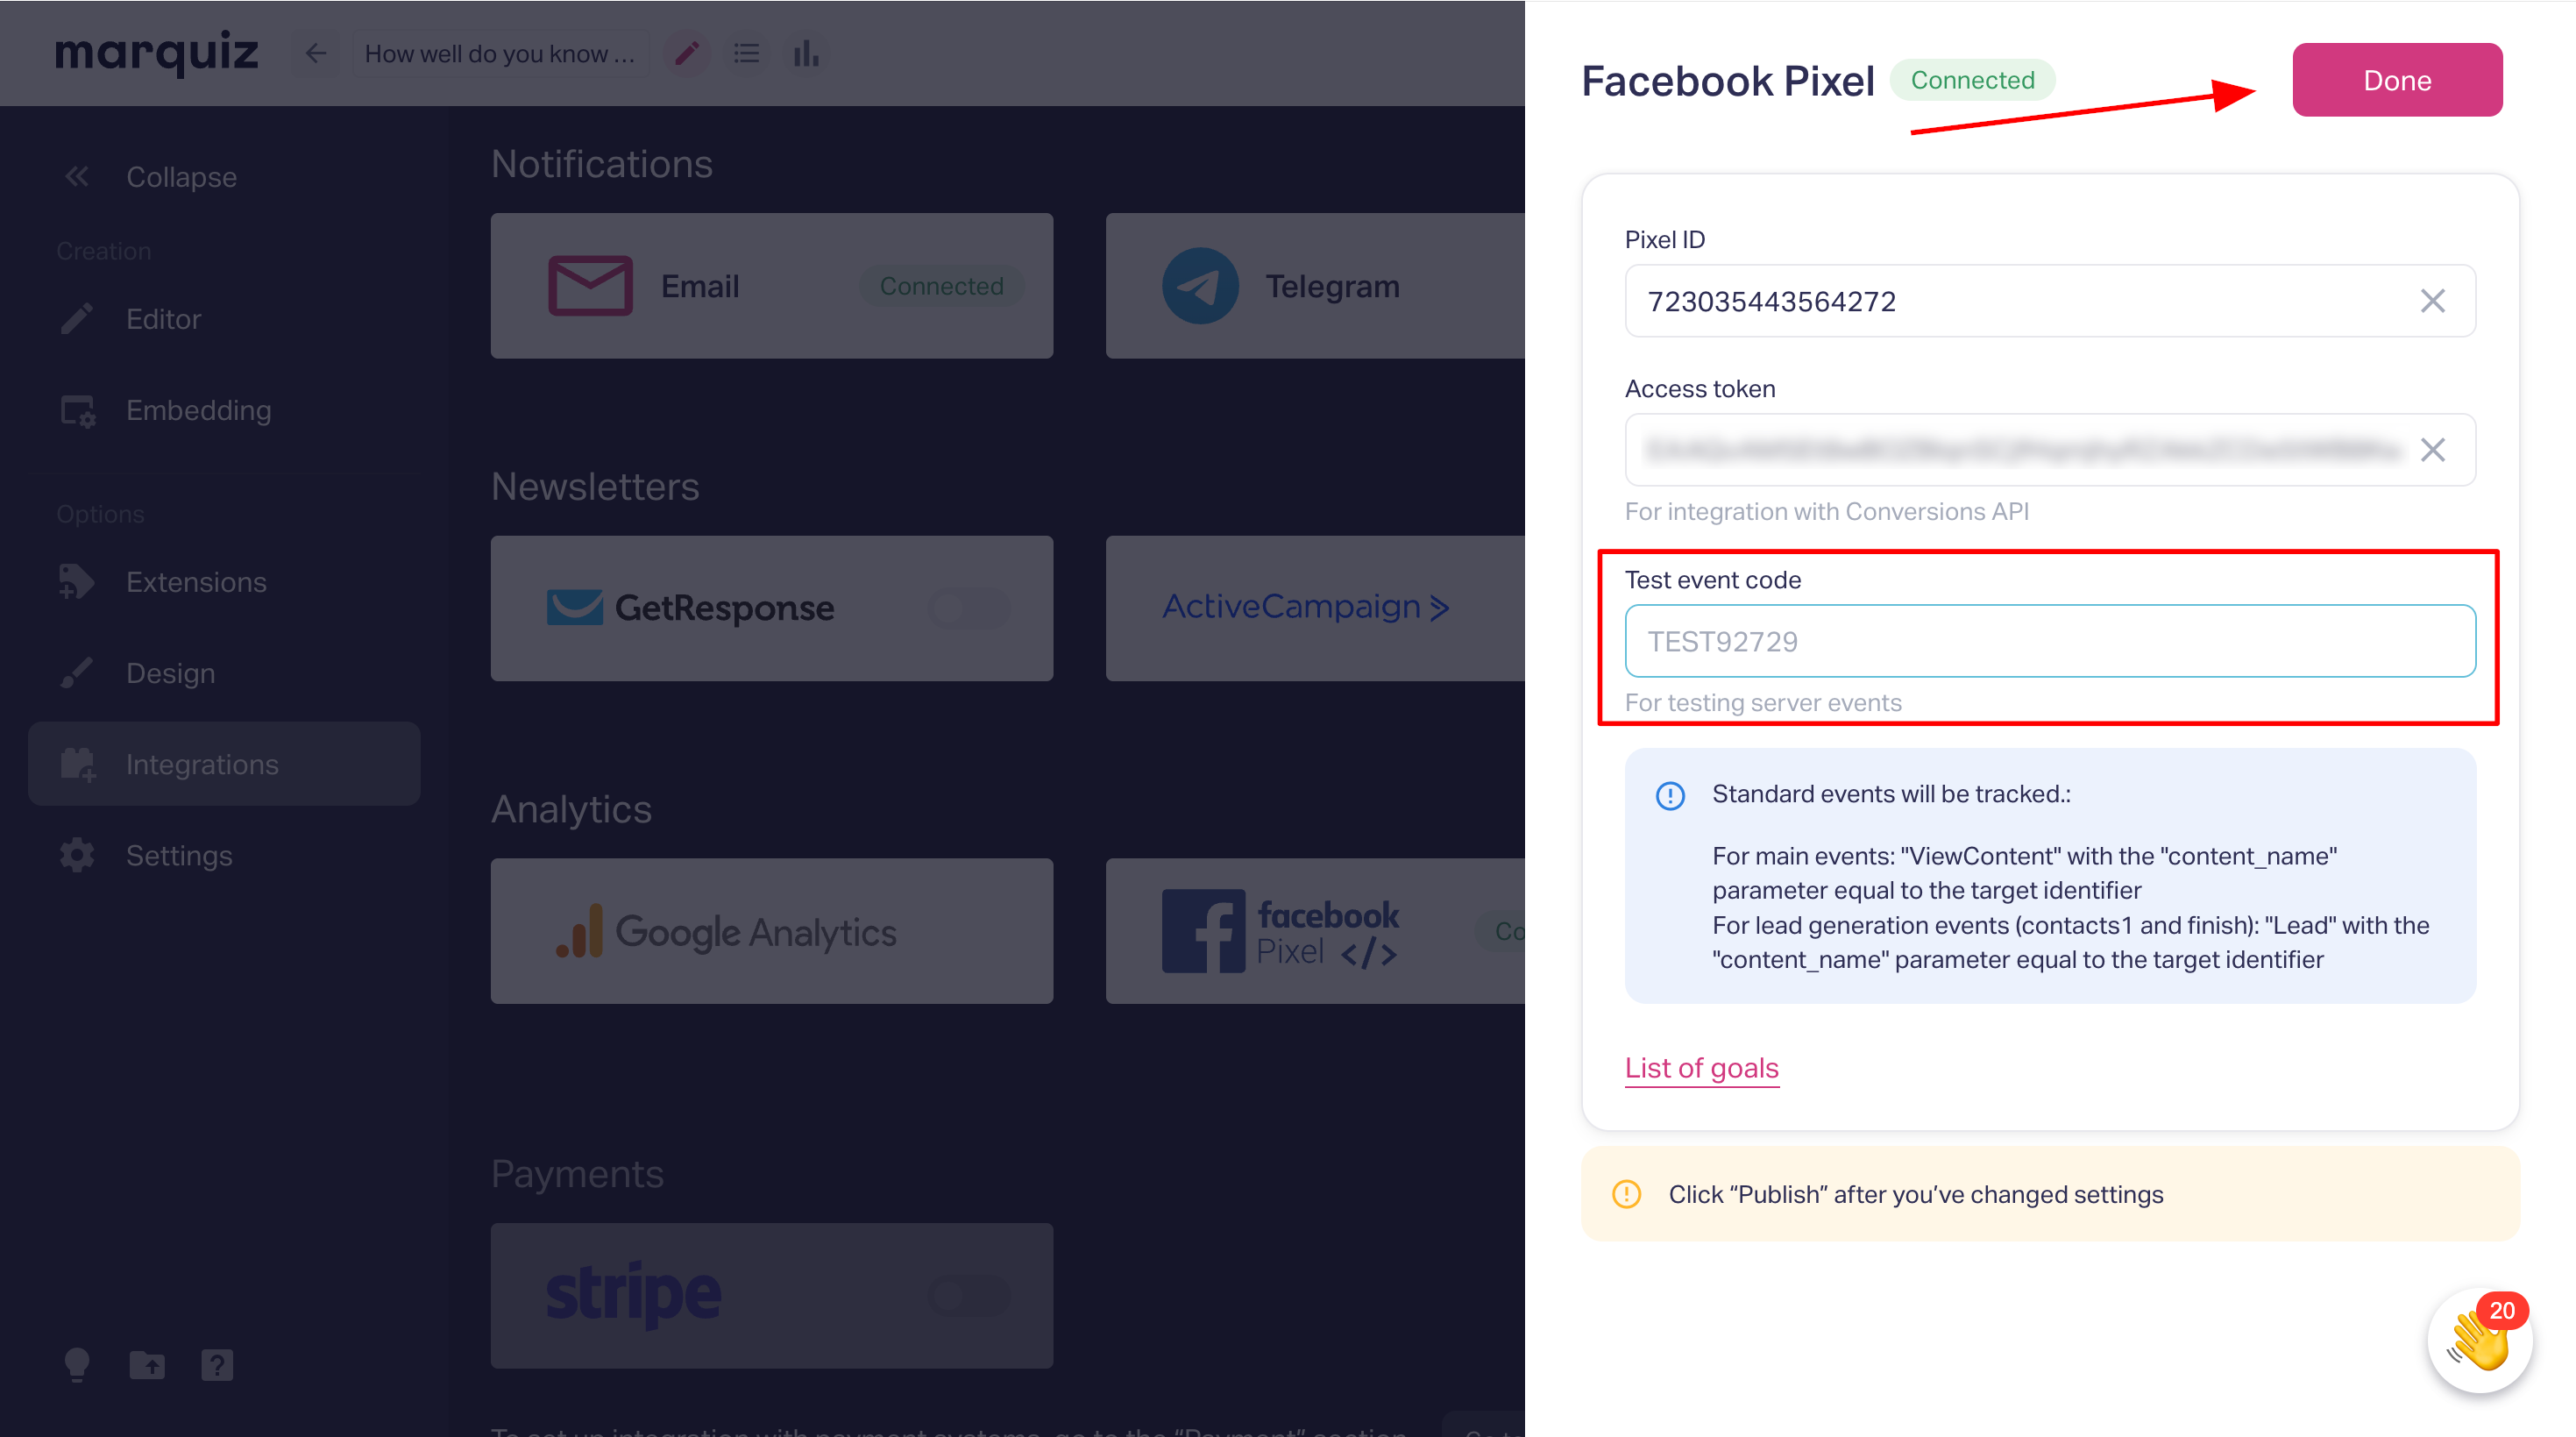
11. Conversions API (Optional)
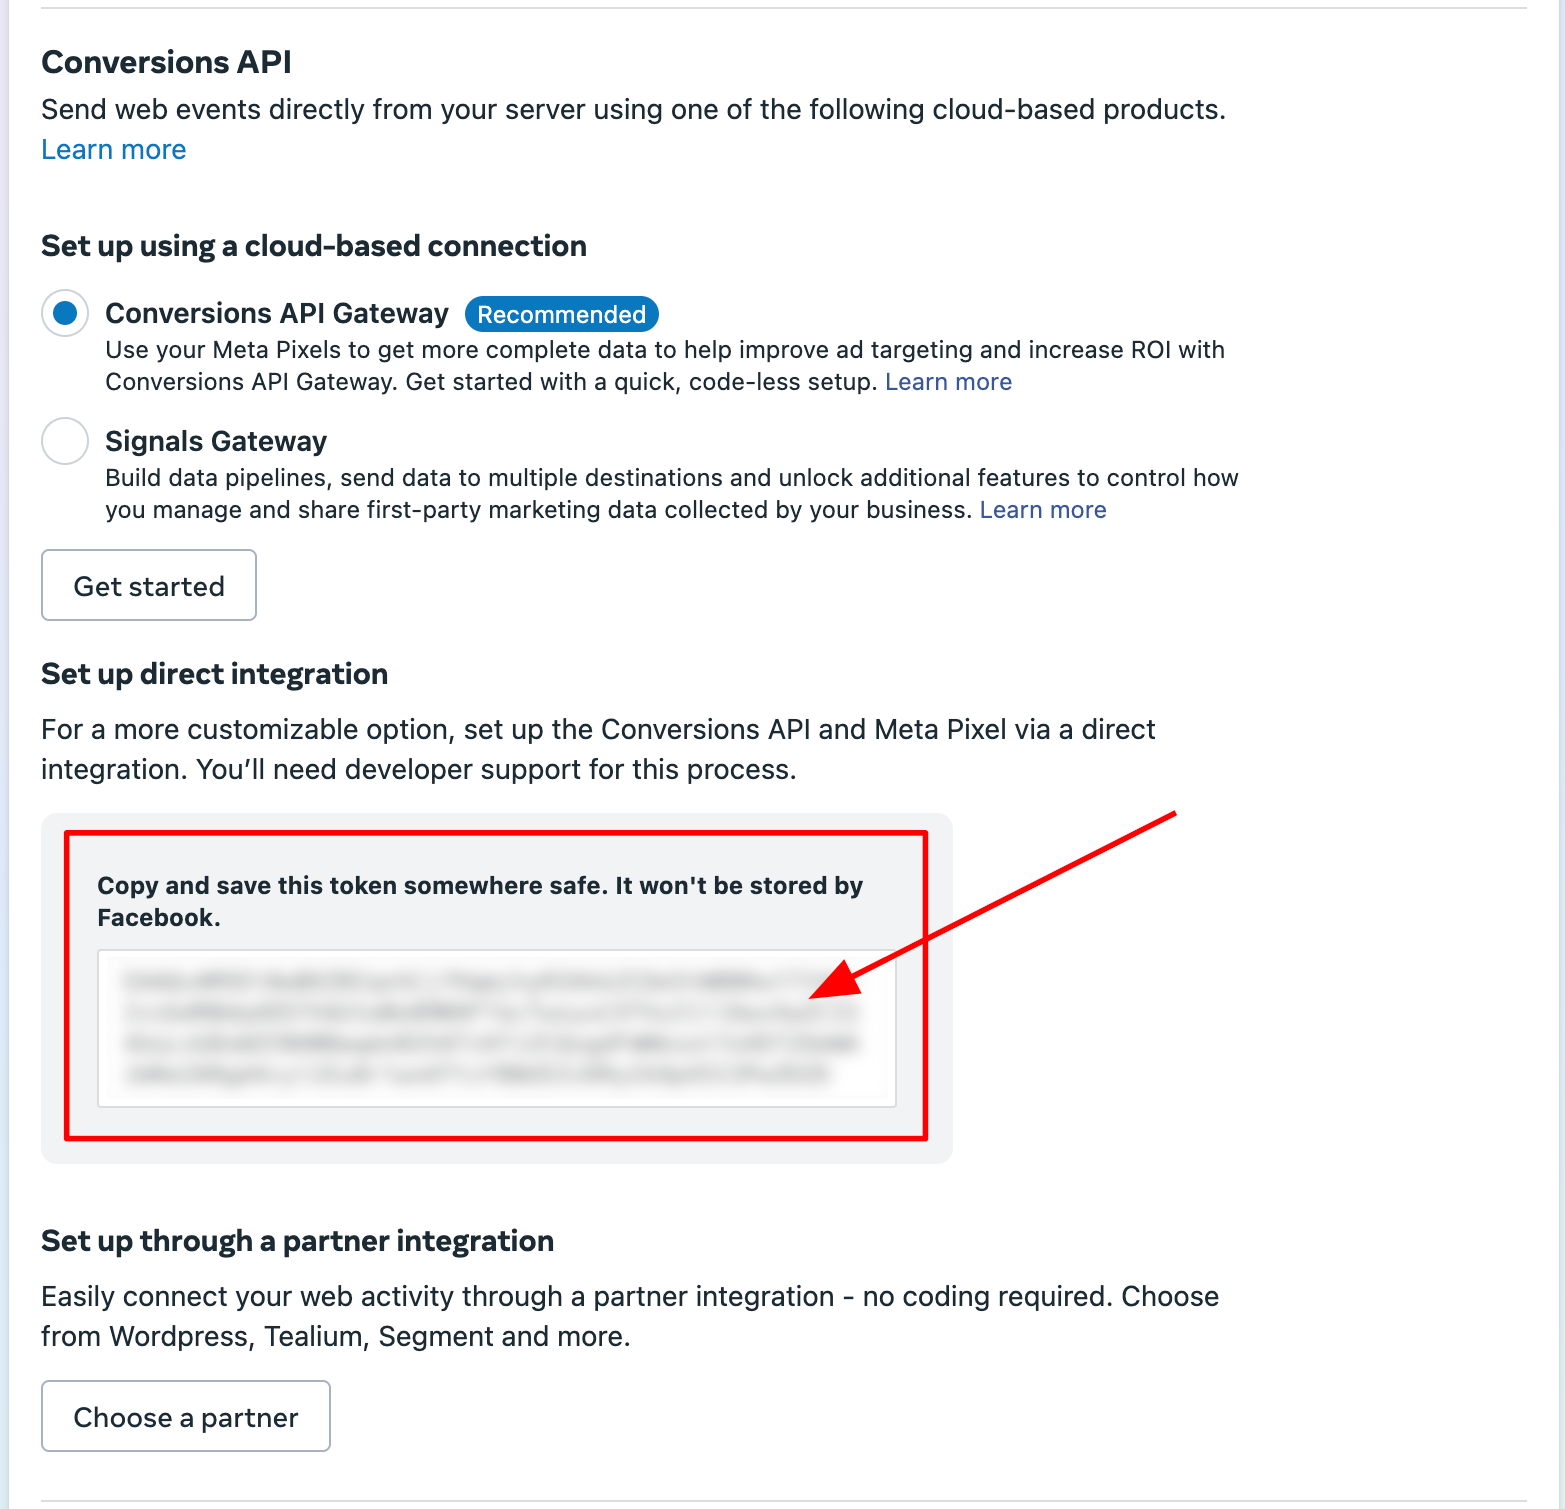
Generate Access Token in Pixel Settings.
Paste it in Marquiz (Integrations → Facebook Pixel).
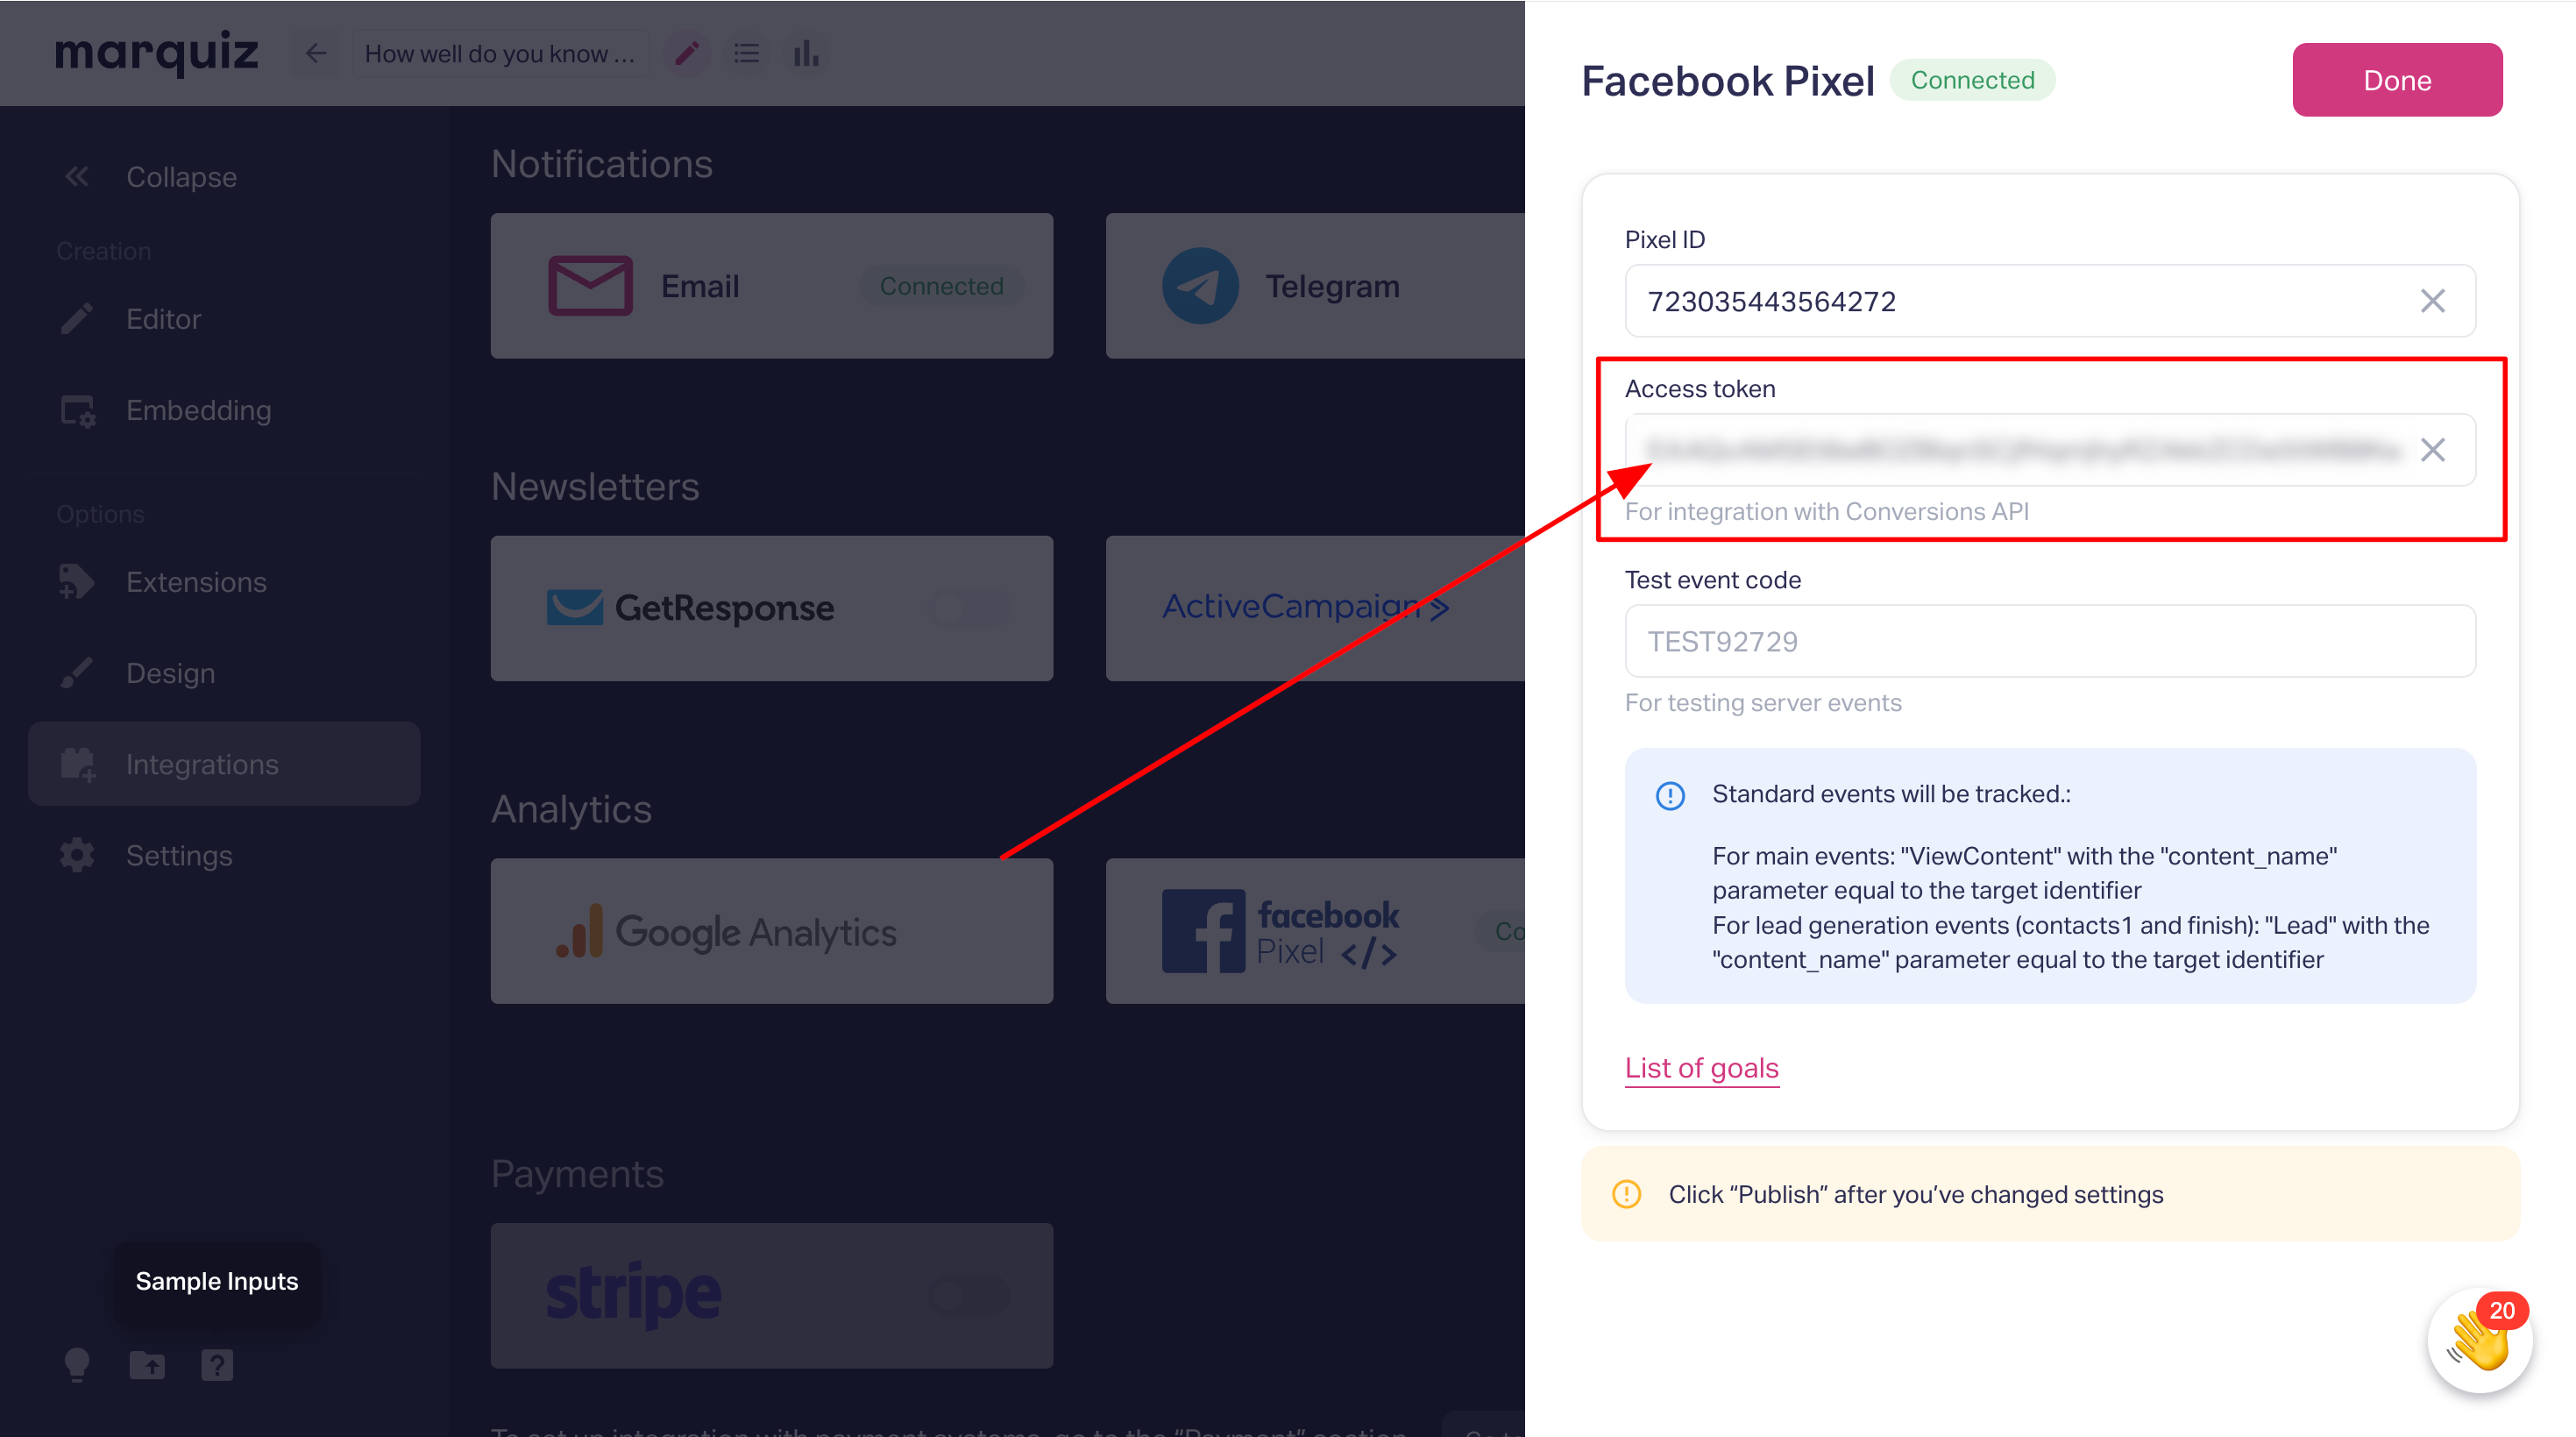
Test Event Code: Only use for testing; clear the field afterward.
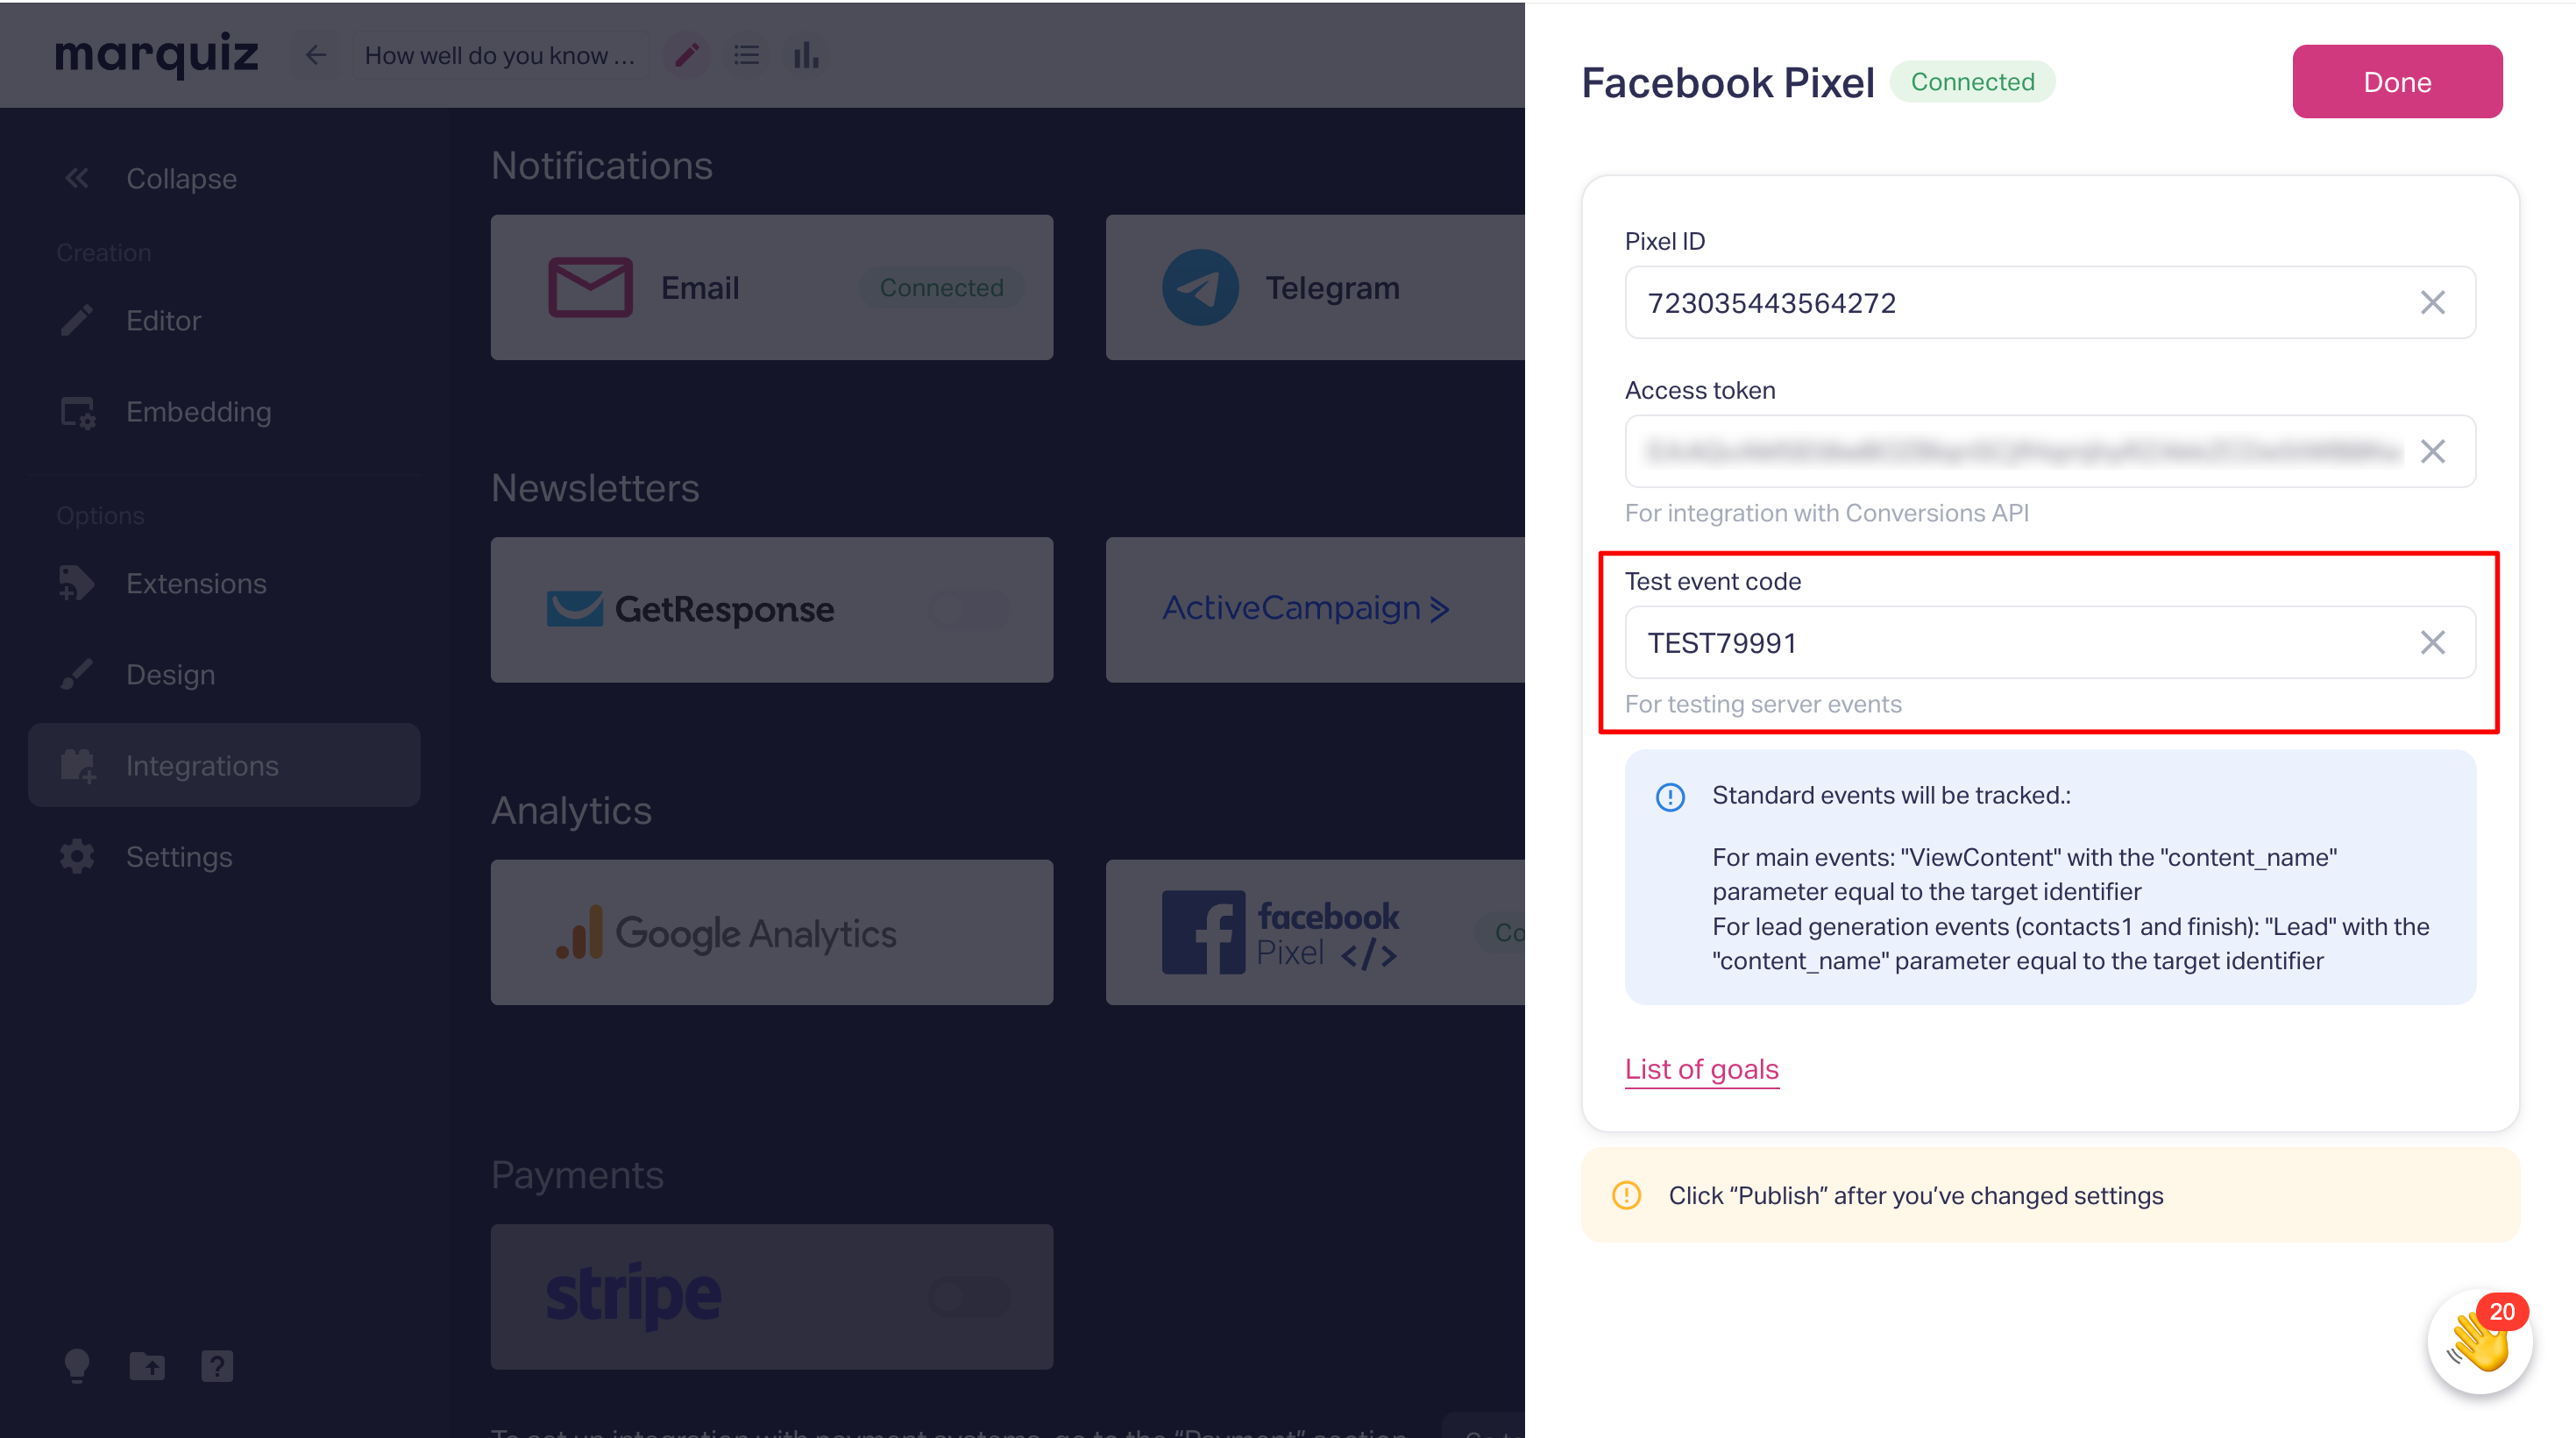
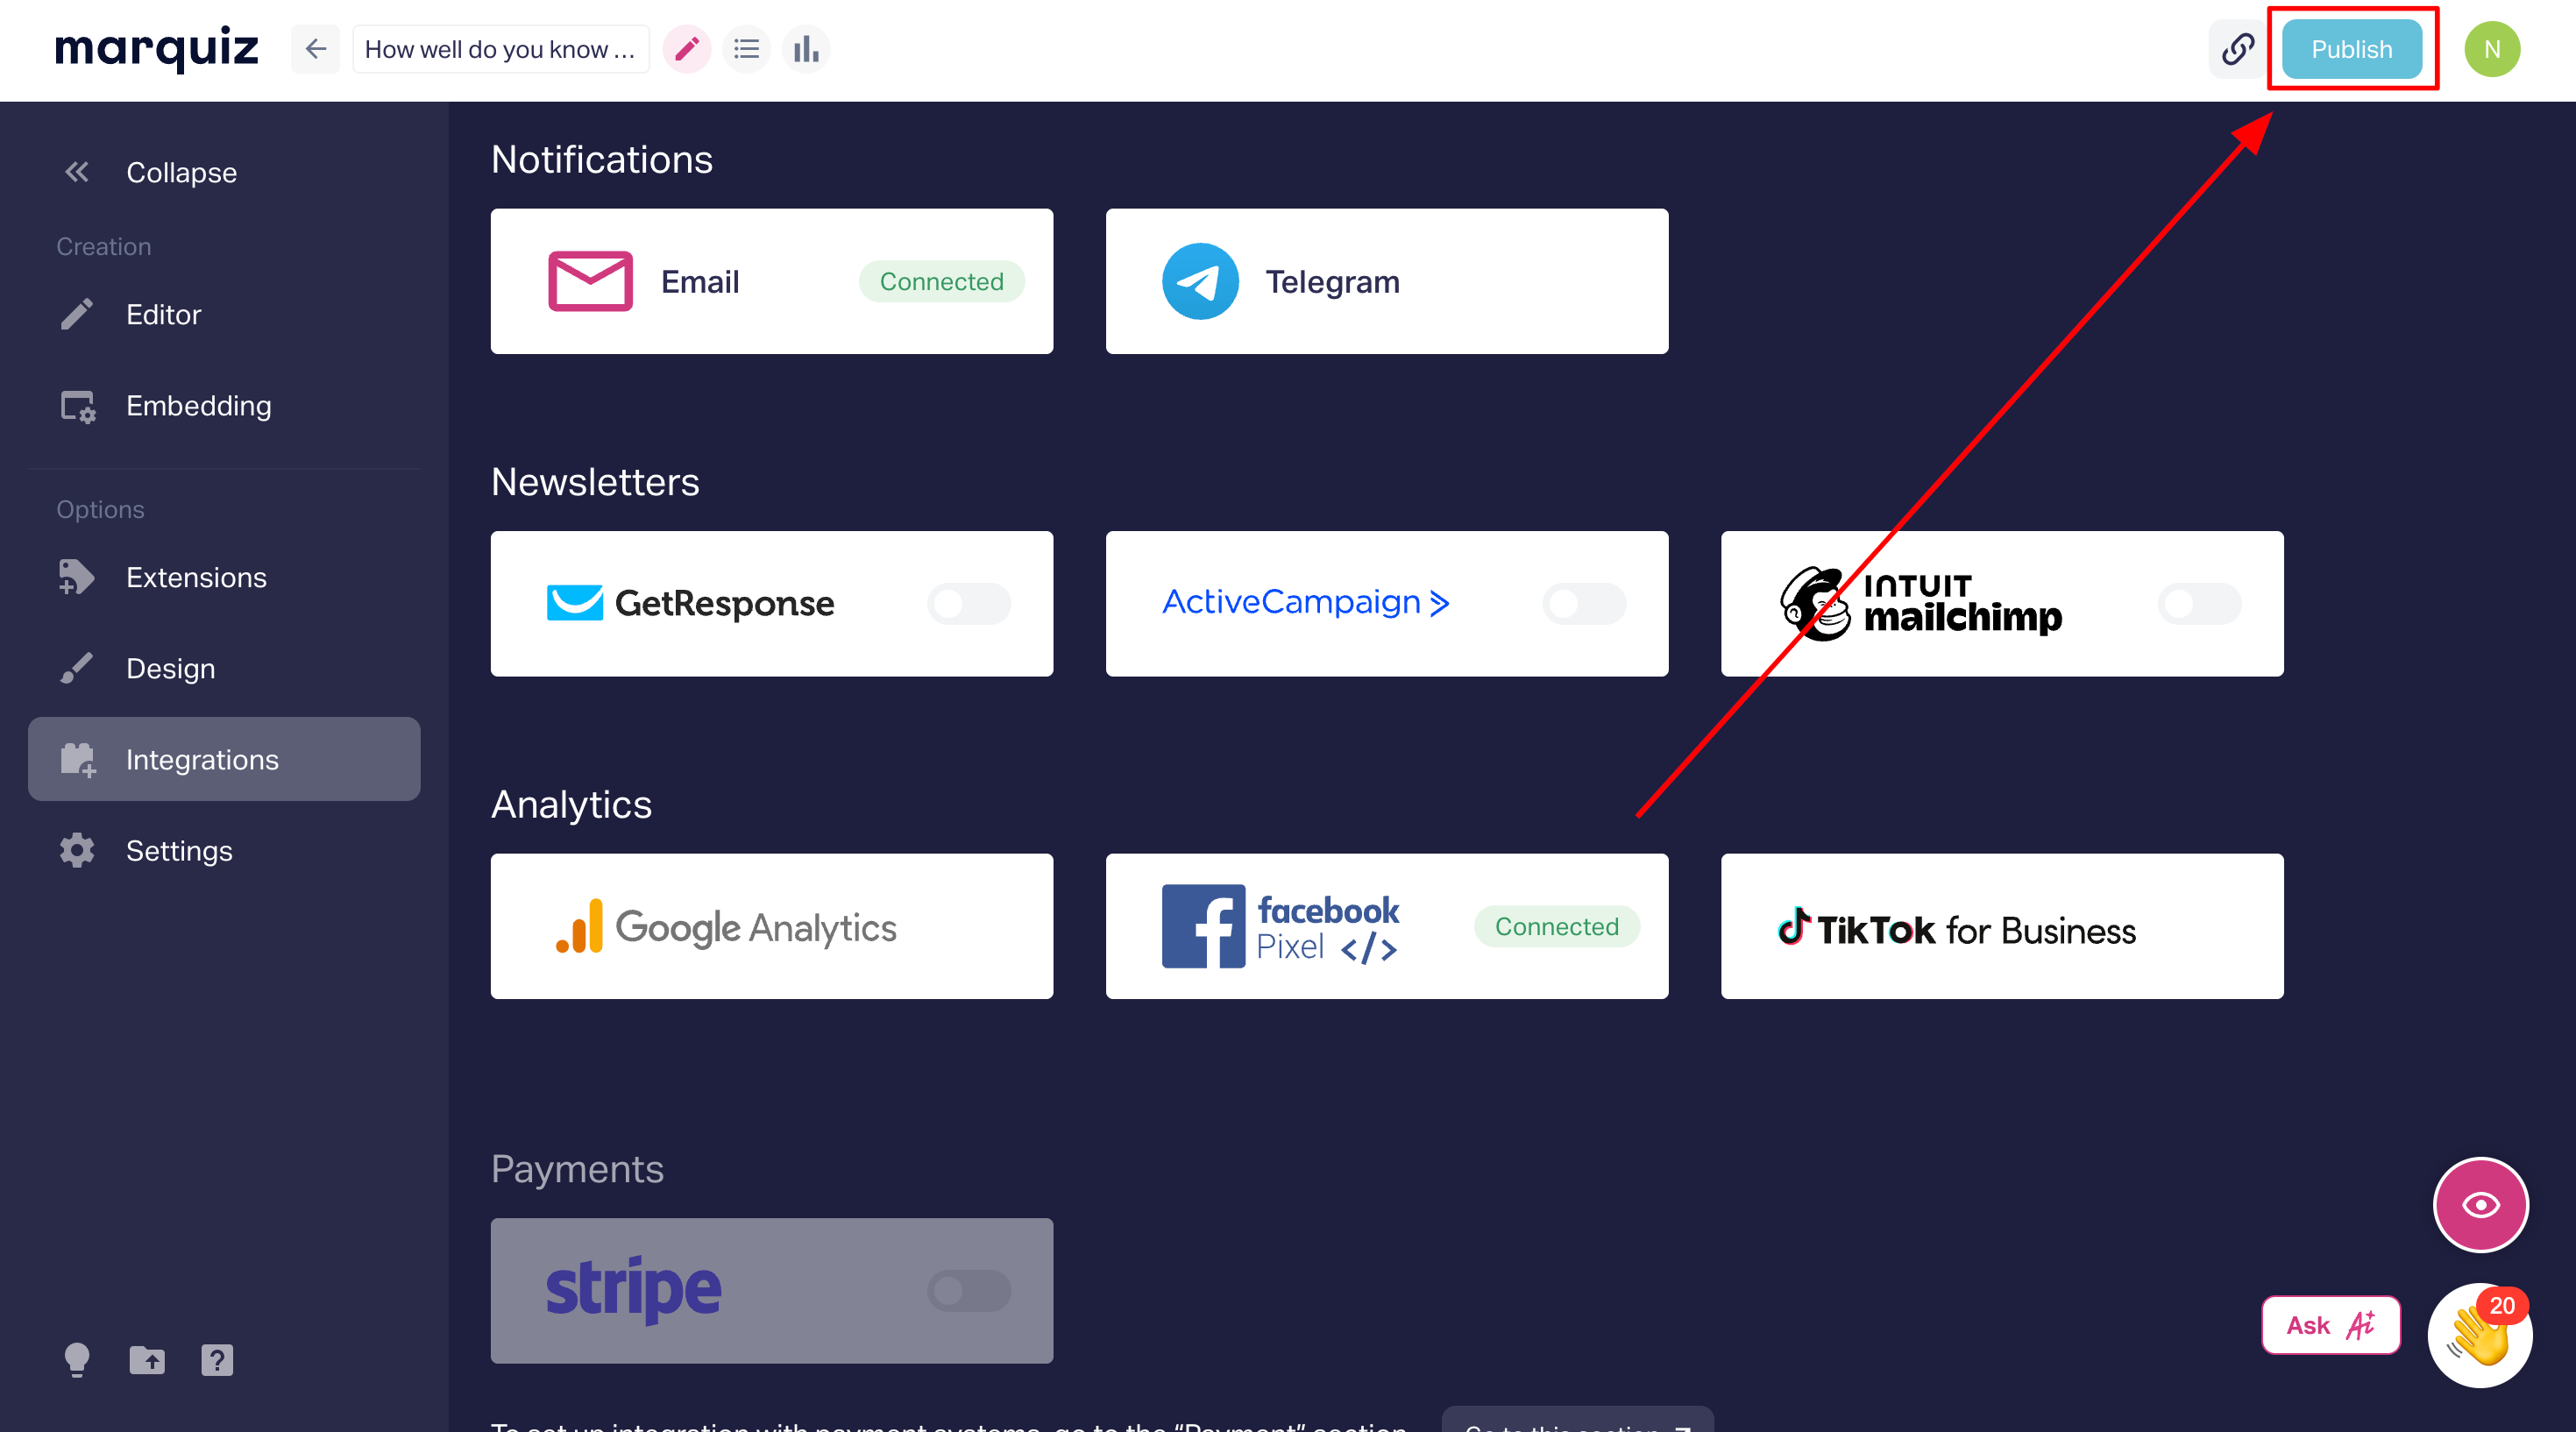
Important: After completing the setup, be sure to click the Publish button.
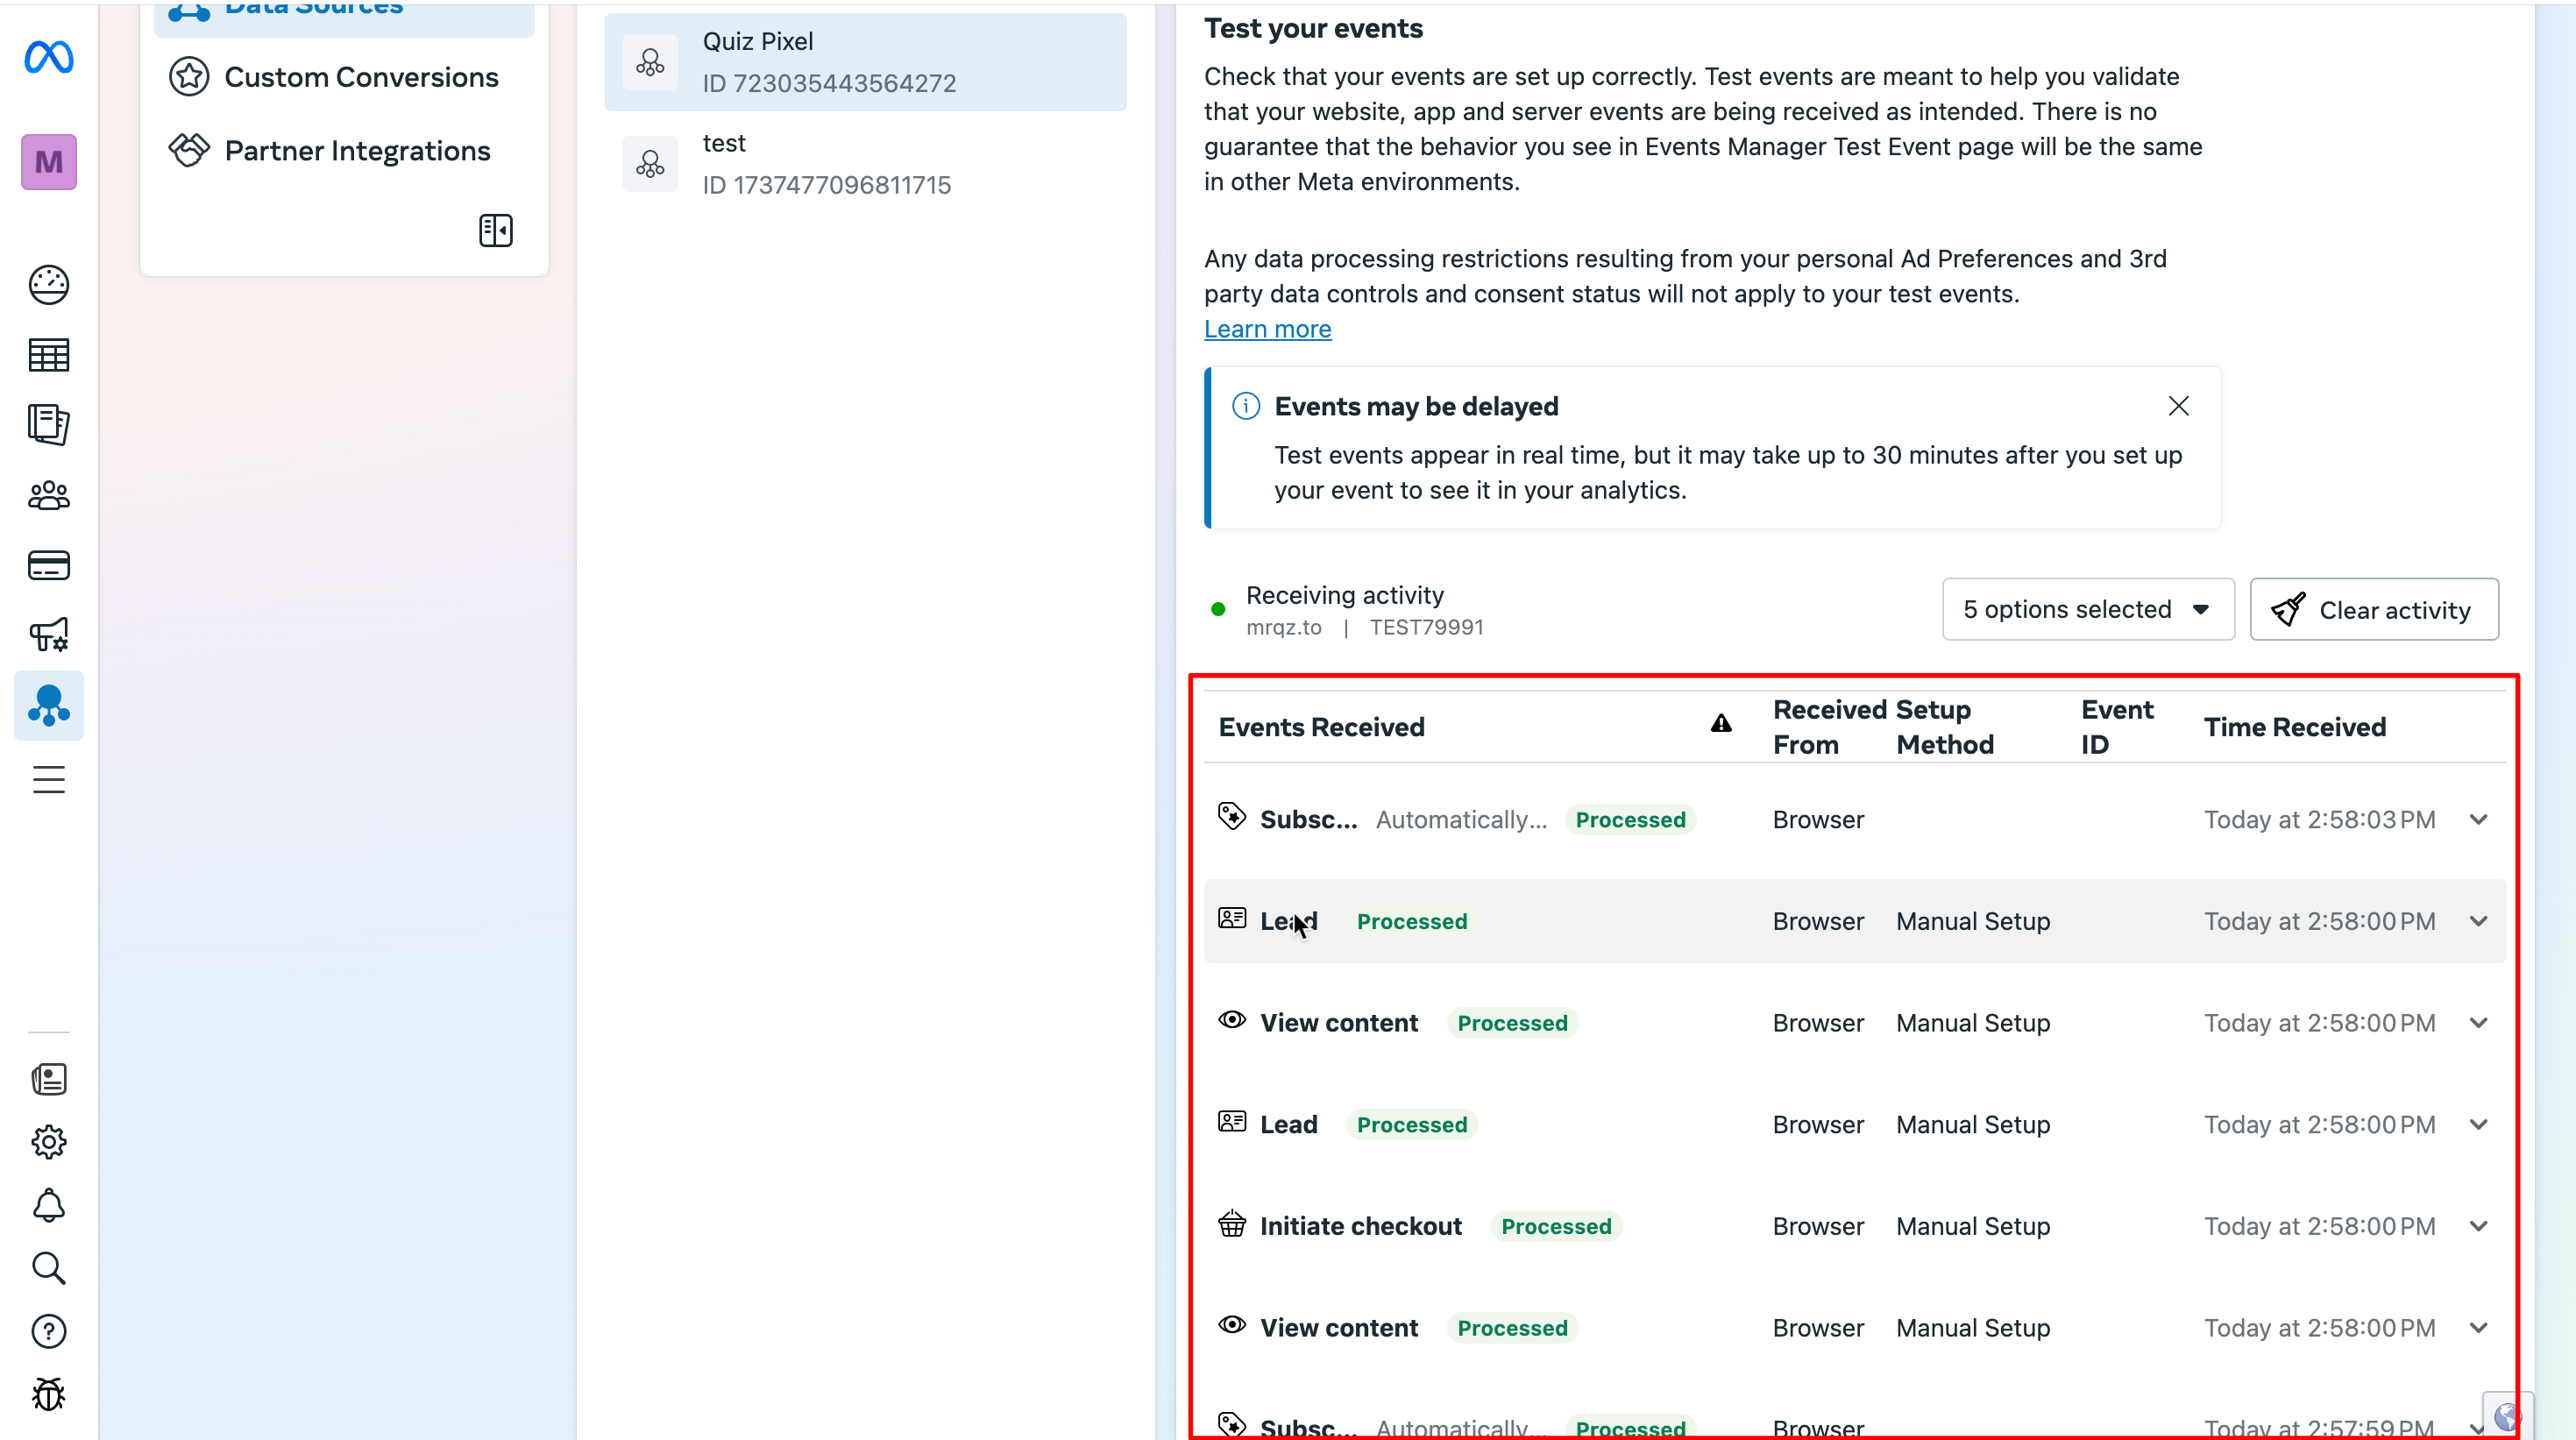
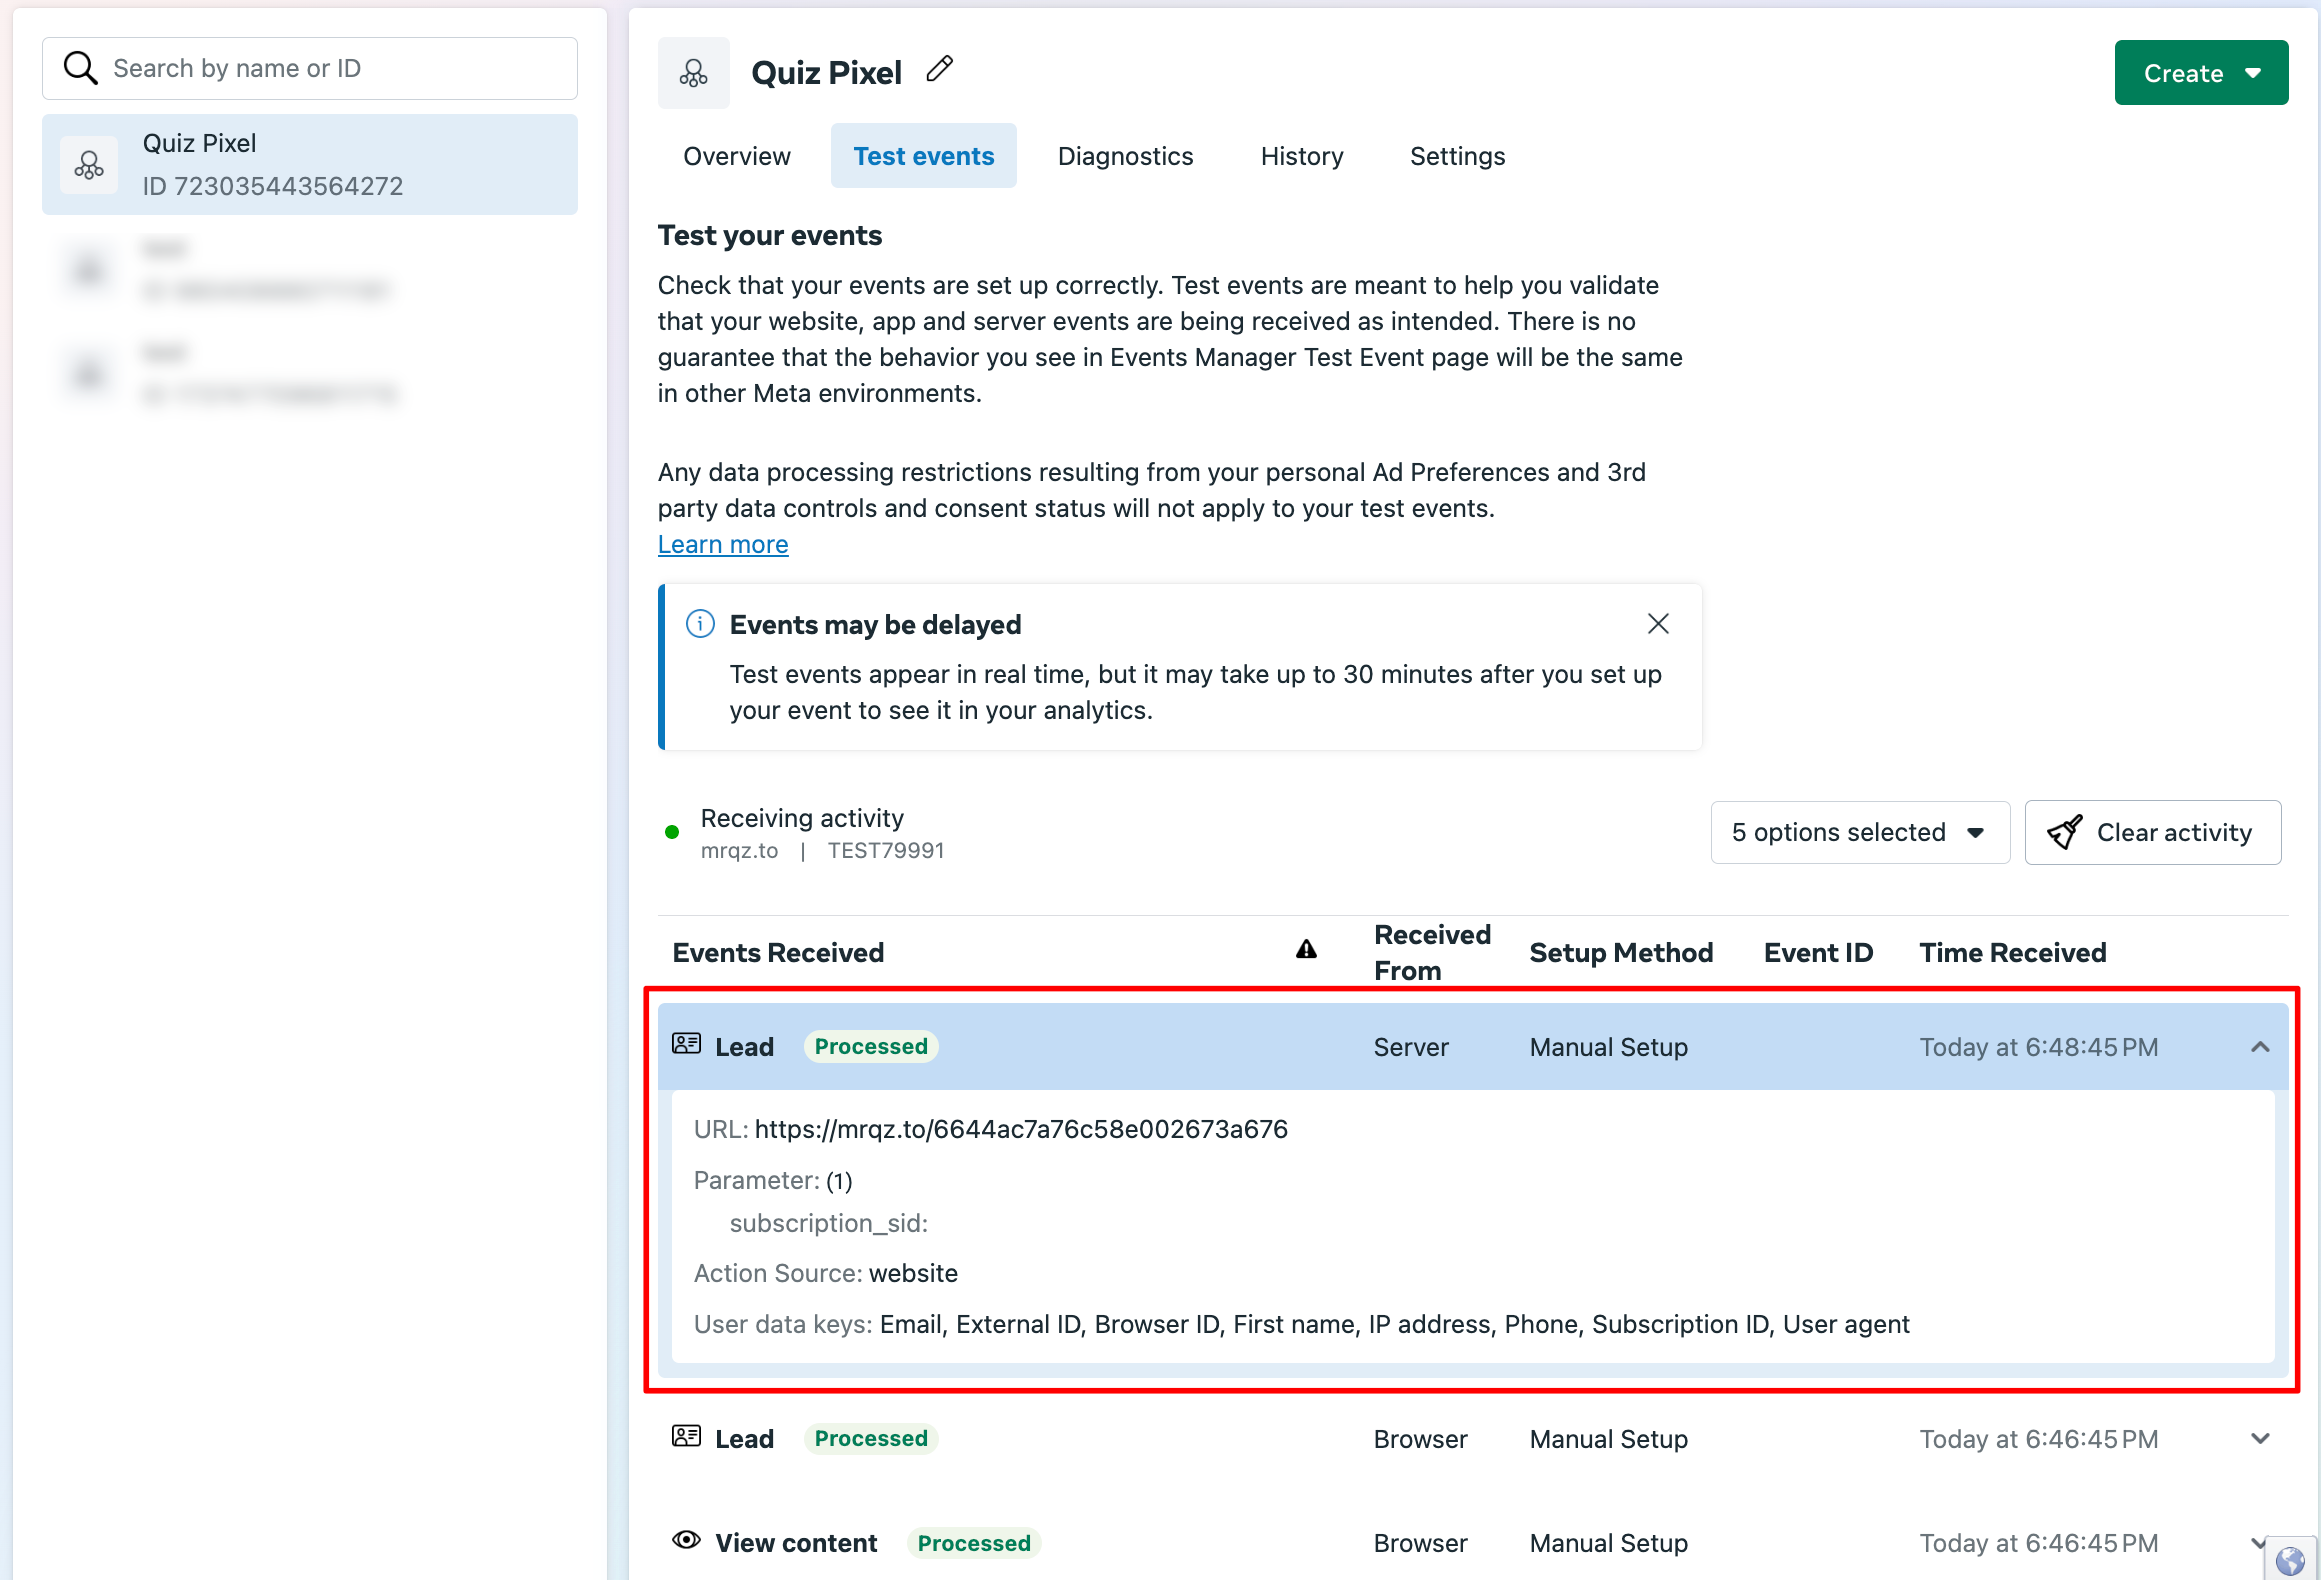
Next, you'll need to submit a test lead through the quiz. The event will appear as follows once the lead is submitted:
Important Post-Testing Steps:
Clear the TEST EVENT CODE field - Remove any test codes used during the verification process
Publish the quiz - Ensure all changes are applied and activated
Failure to complete these steps may result in tracking issues or test data appearing in your analytics.
How to Check:
Install the Facebook Pixel Helper
Navigate to your quiz page
Look for:
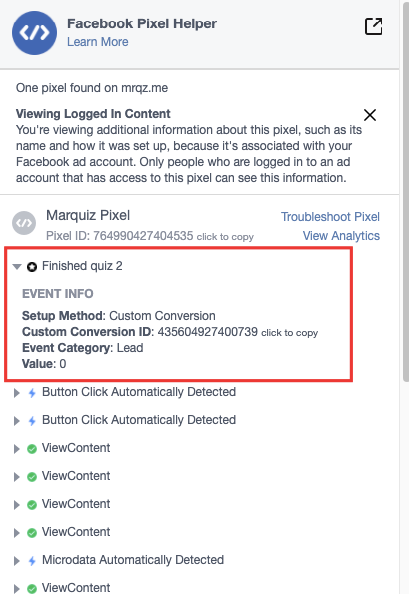
Green checkmarks (successful tracking)
Red alerts (errors needing correction)
Note: The extension only works on live published pages, not in preview modes.
Done! Facebook Pixel is now set up and active.