
Collecting user's contact information
Marquiz lets you adjust the lead form depending on your goals.
Basic form lead setup
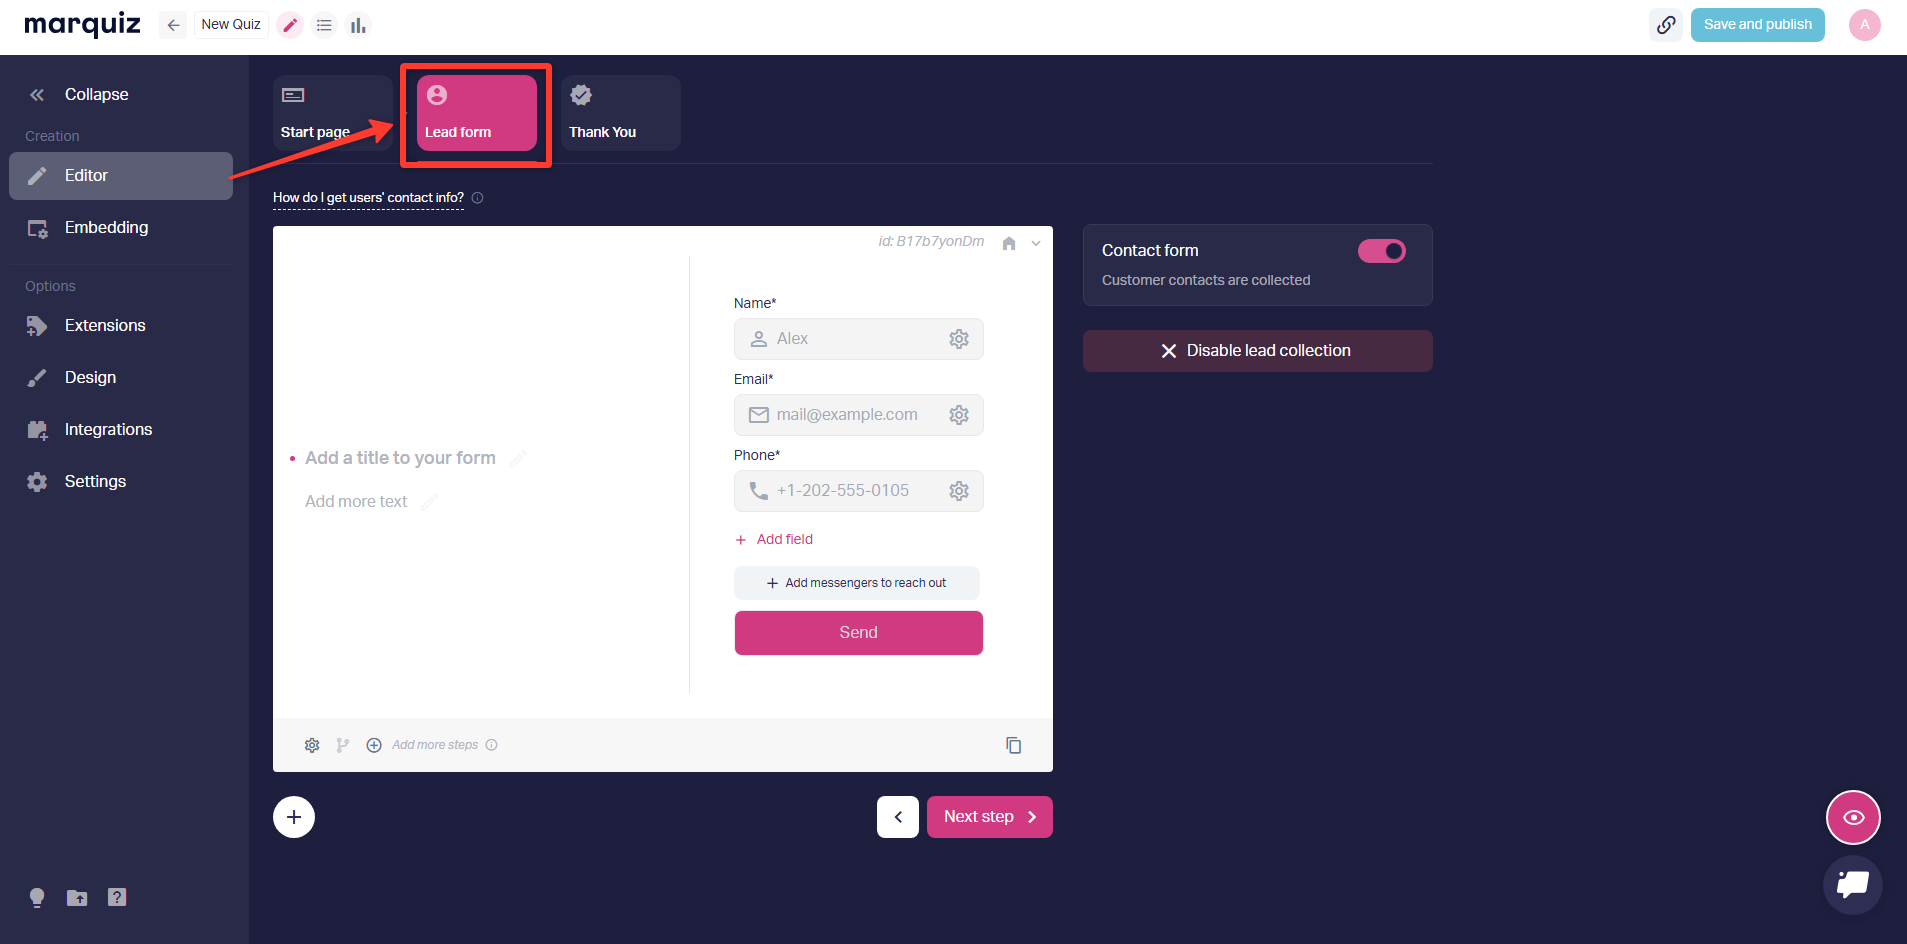
1. To set up a lead form, go the the quiz editor and choose the "Lead form" section.
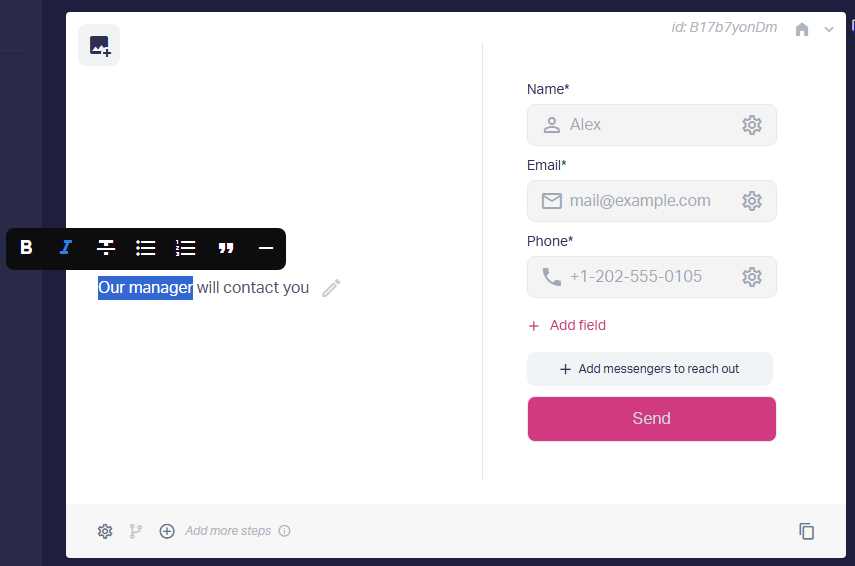
2. In the left part of the form, you can enter the text which will motivate the users to leave their contact info. To format the text, select it and choose any option in the pop-up menu.
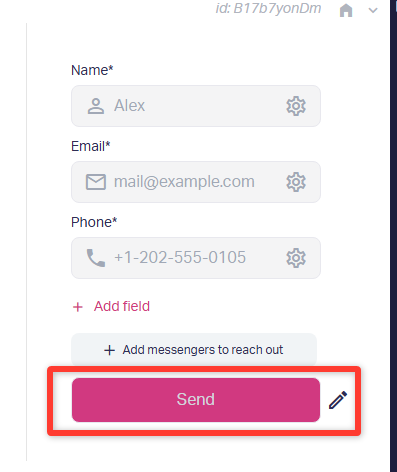
3. In the right part you can set up input fields the client will see in the form: Name, Email, Phone, Address, Text.
Important: The form must contain at least one required field — Email or Phone.
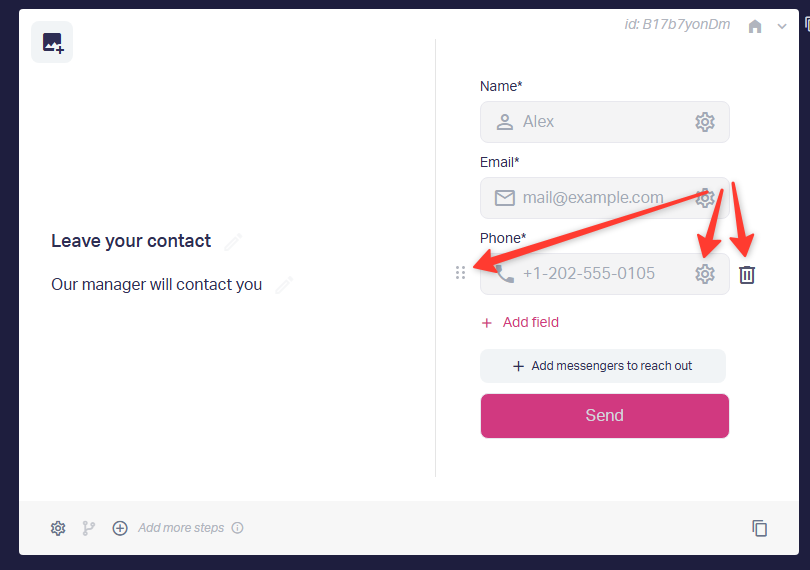
You can change the order of input fields. Click the six dots button on the left of a field, then hold and drag the field up or down. To delete a field using the trash bin button on the right.
To change field settings using the settings button.
You can add a hint in the field settings. For example, for a phone number, you can enter the hint "Enter number" or "Your phone number". You can also configure the phone mask there.
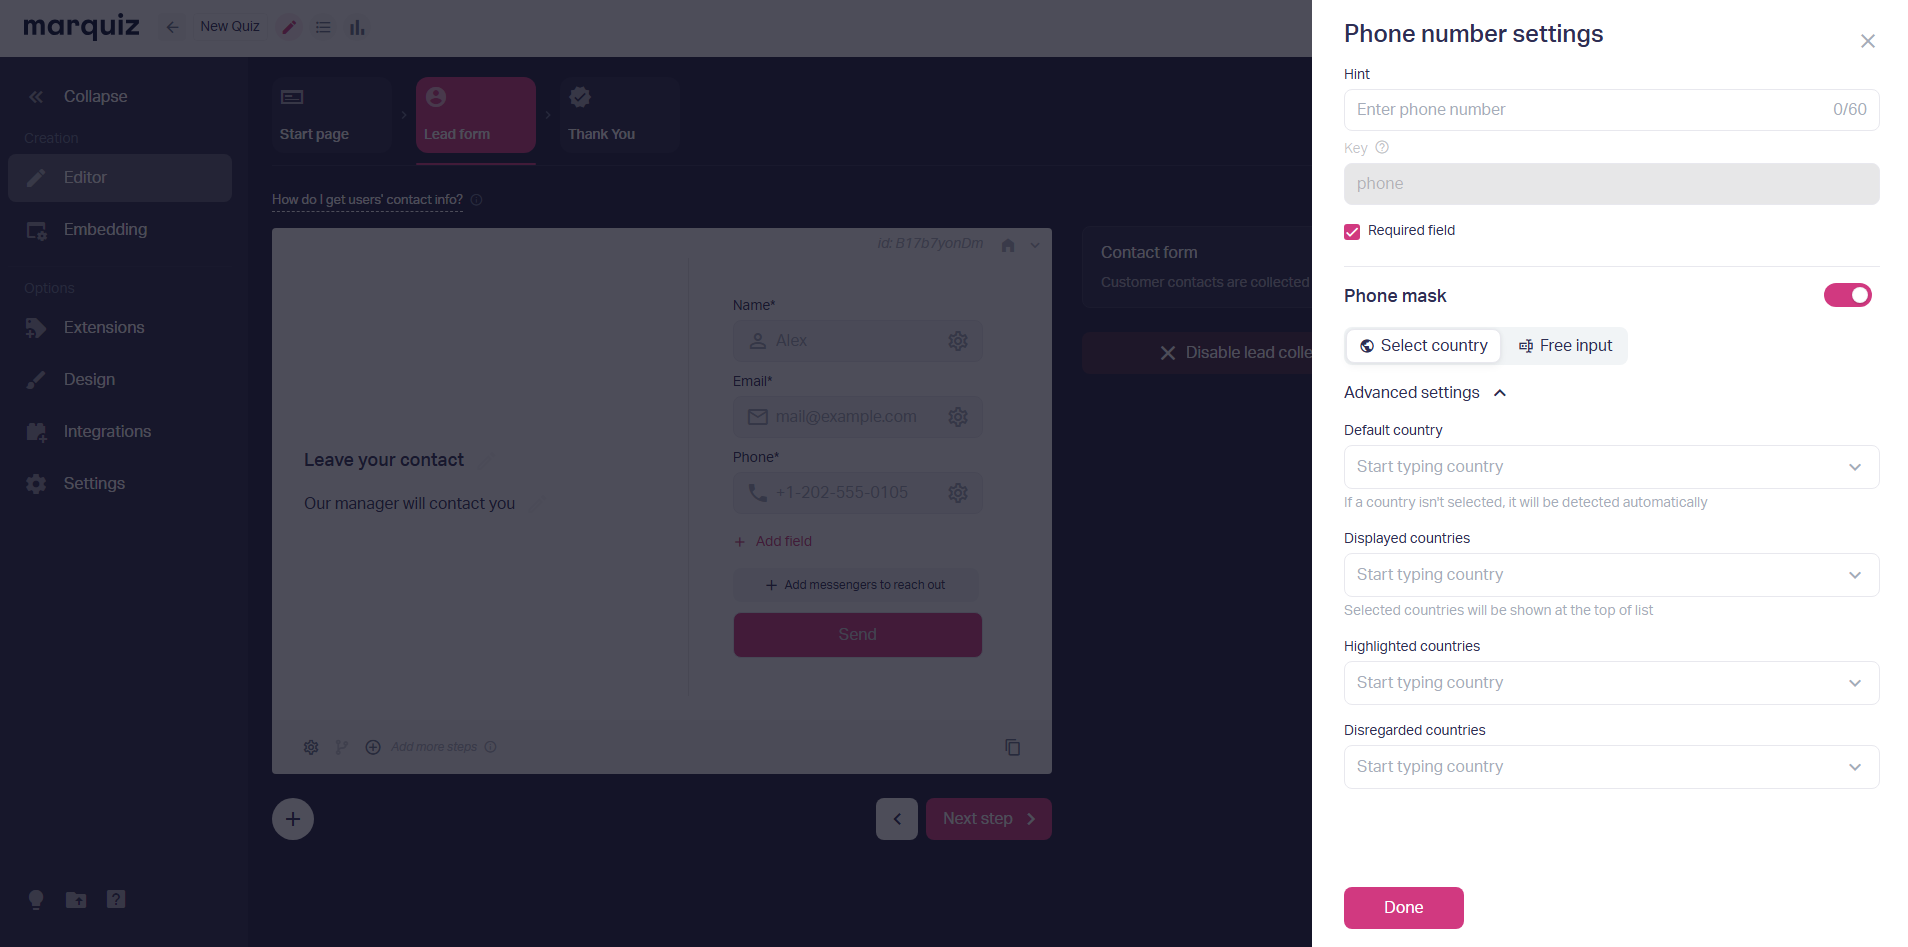
If we do not specify the country code, it will be determined automatically depending on the user's browser language.
Advanced country selection settings:
Default country: You can select only one country, which will be automatically displayed in the field regardless of the user's browser settings.
Countries shown: Only the specified countries will be visible in the list.
Selected countries: All countries are shown, but the ones you select are displayed at the very top of the list.
Ignored countries: The specified countries will not be shown in the list.
Important: You cannot simultaneously configure "Shown" and "Highlighted" countries, as well as "Shown" and "Ignored" countries.
4. Finally, we add the button text in the contact form. To do this, click on the text and enter your own version.
Options for setting up lead form
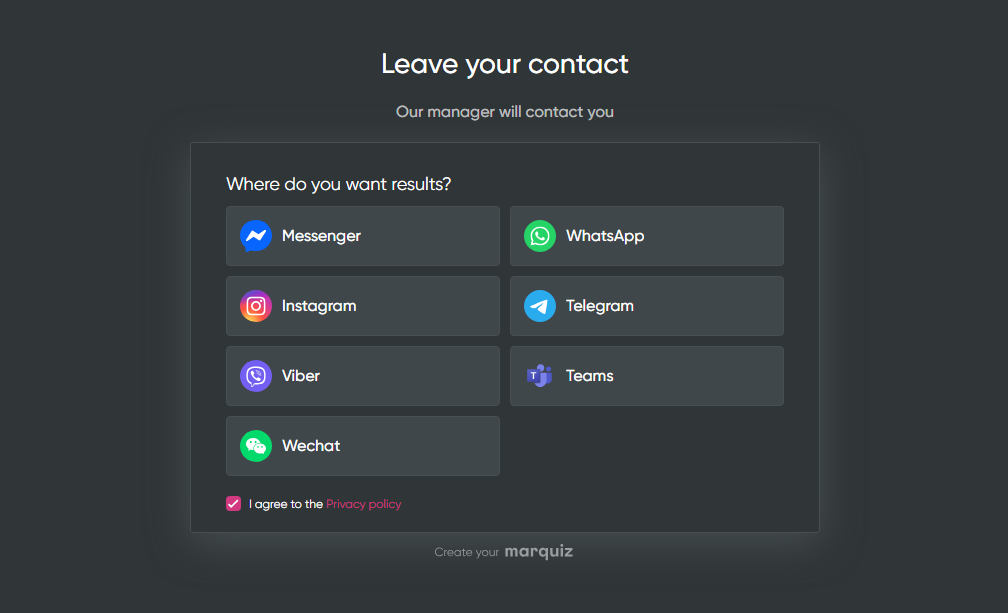
1. You can also set up collection of messenger contacts.
The first option is to have messengers alongside classic lead form fields. If you do that, the client will have an option to “Use messenger”. They will have a choice between classic form fields and messenger ones.
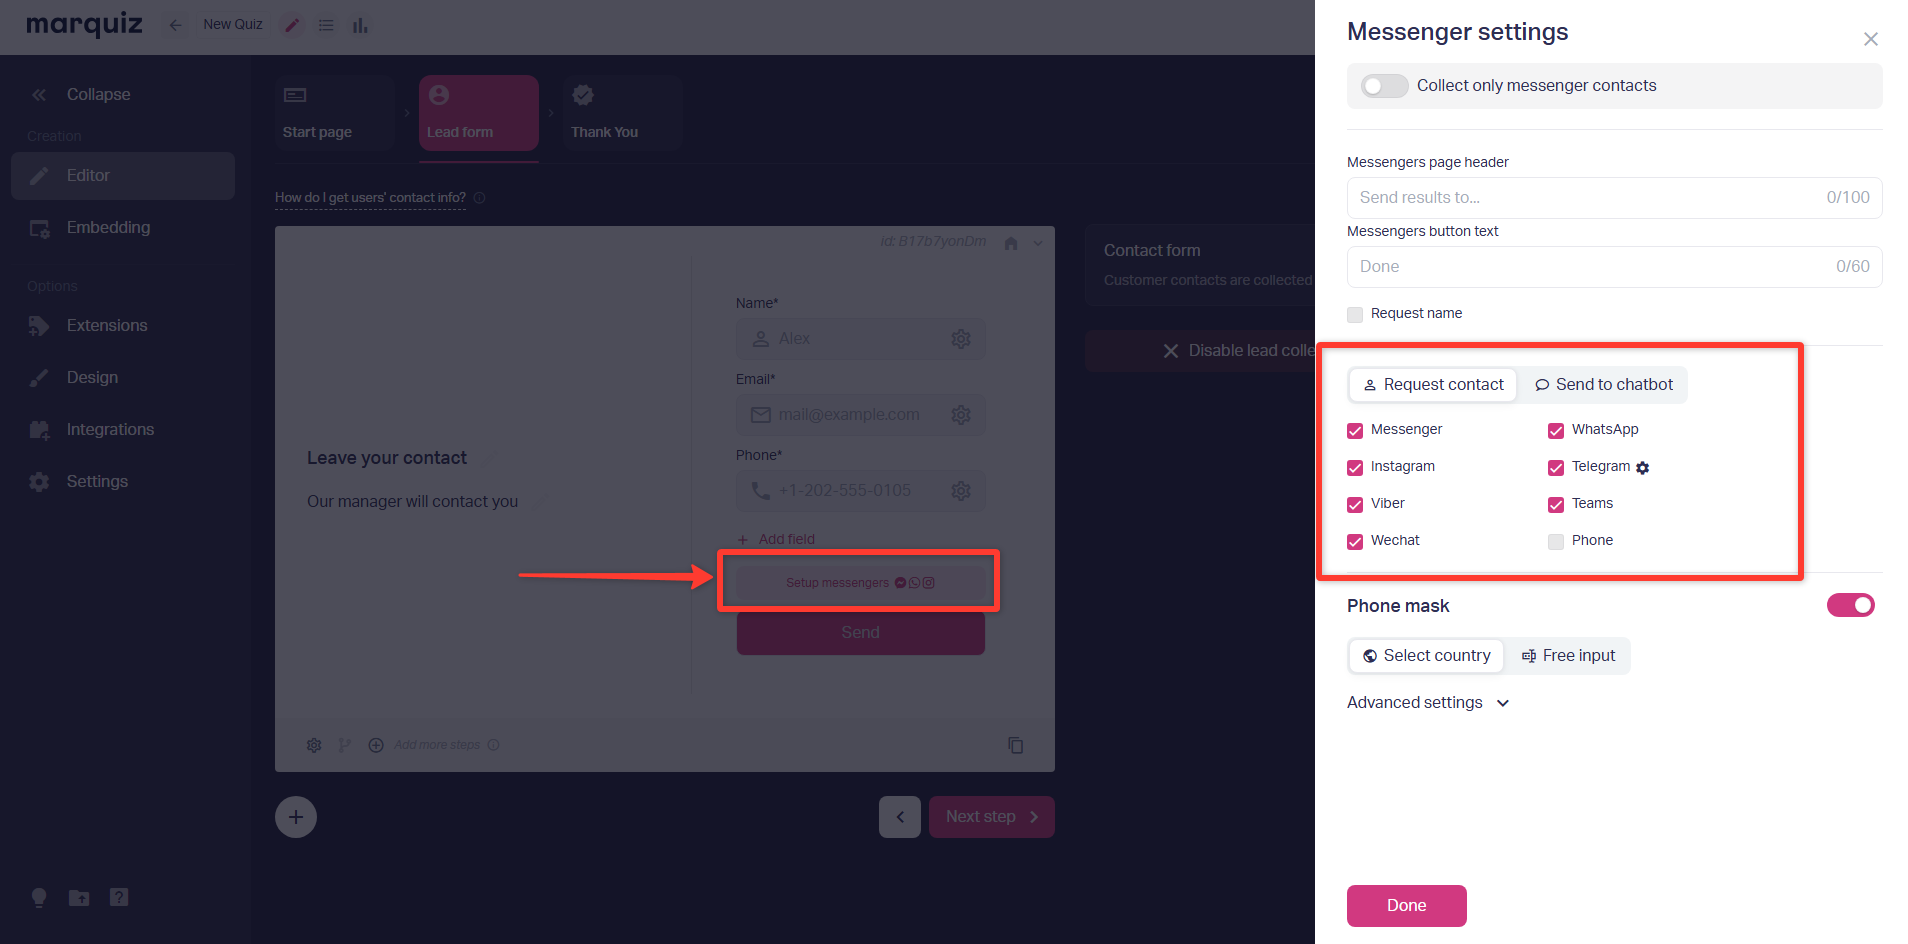
The second option is to collect only messenger contacts. That way, right after finishing the quiz, the client will be shown a page where they will have to choose a messenger and leave their contacts for it.
To enable this option, check “Collect only messenger contacts” in the lead form settings.
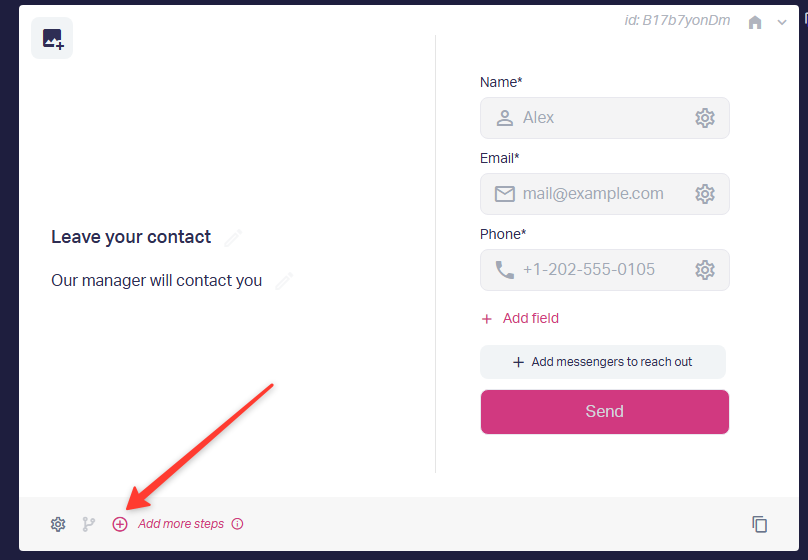
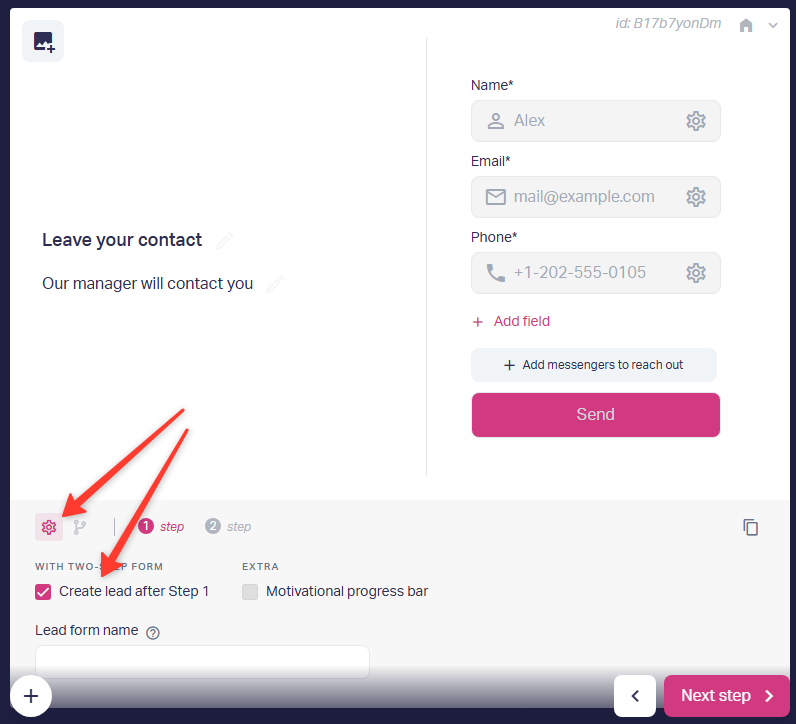
2. You can set up the collection of contacts in two steps or one. The lead will be created after the client fills in the first part and then sent. You can add a second step by clicking on “Add more steps.”You can delete it by clicking on the cross next to it. Adding a second step gives you a way to encourage the user to leave you their contact information and might help increase the conversion.
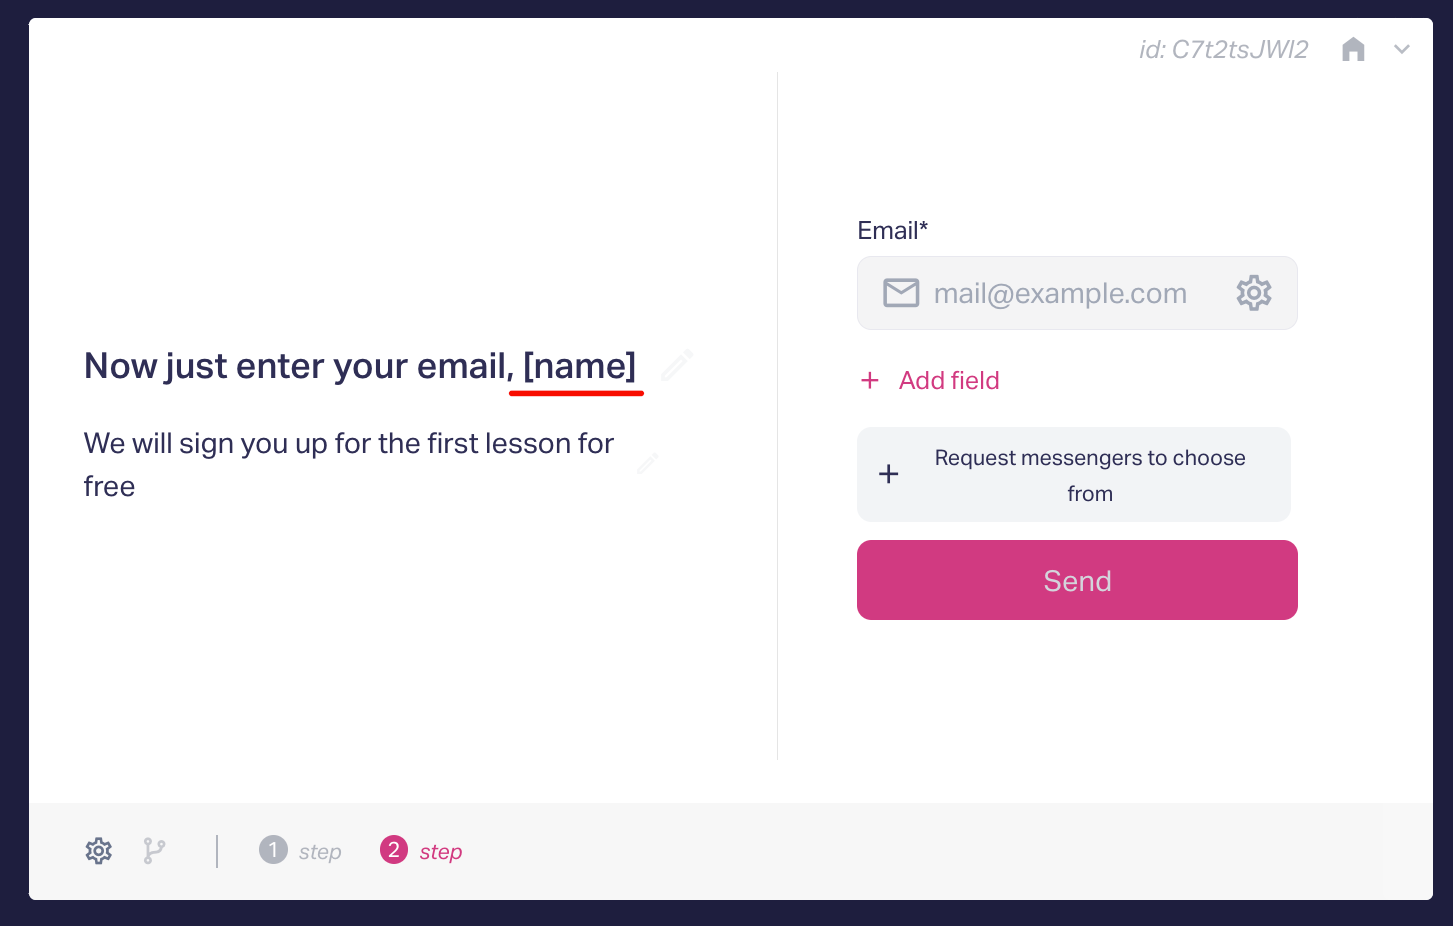
If you have a “name” field in the first step, you can use substitution [name] in the second step to personalize the text.
Important: If a field has already been added in one of the steps, it cannot be added a second time in another step.
If you want to receive leads only from clients who filled in both steps of the form (by default, the lead is created after the first step is filled in), you need to disable “Create lead after Step 1” in the lead form settings.
If you have a two-step form and enabled “Create lead after Step 1”, then after the first step is filled in, the lead will be created right away but sent only after 2 minutes. If the client will not fill in the second step within those 2 minutes, it will not be taken into account, the lead will be sent only with the first step.
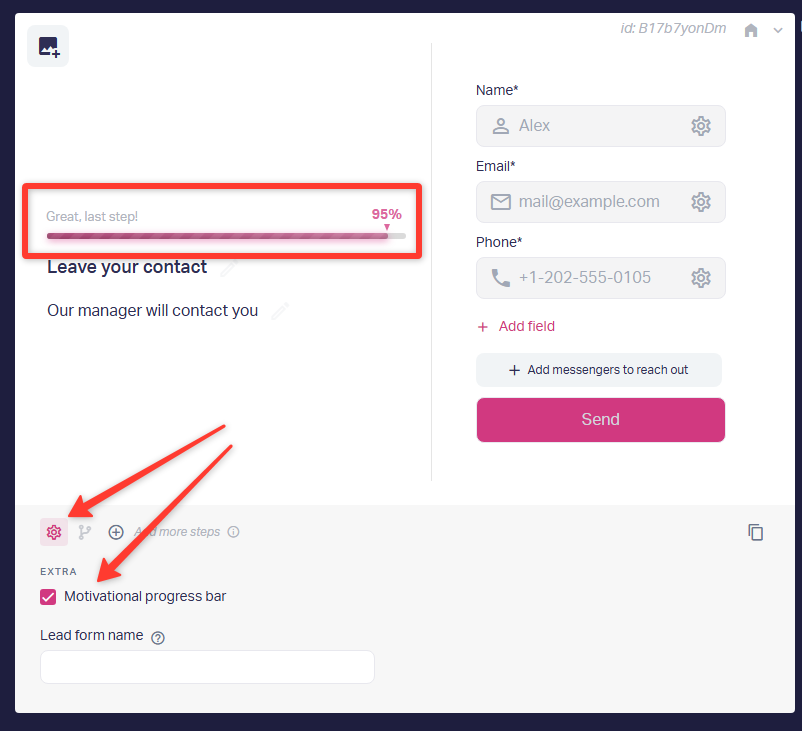
3. You can add motivation text in the form settings. It will have a progress bar and space for text.
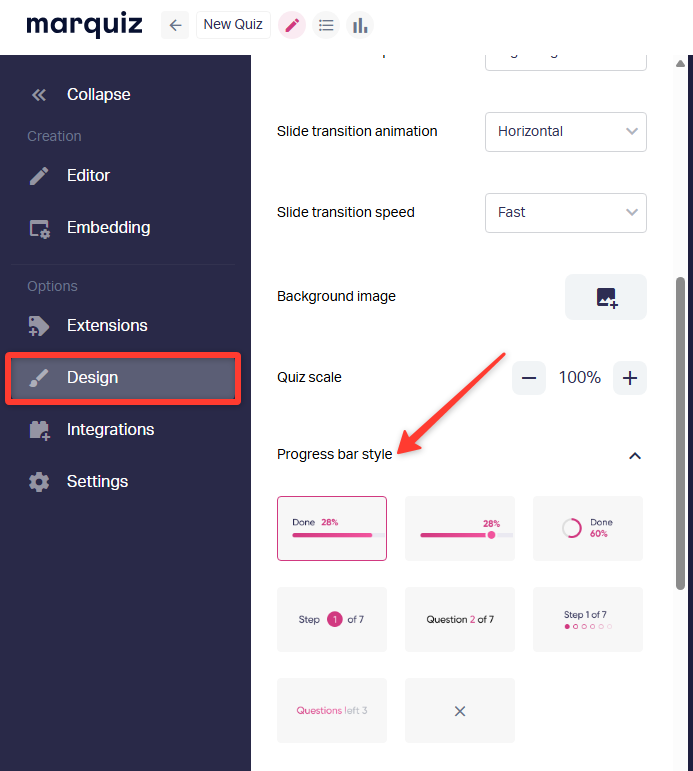
Select the progress bar style in the "Design" section.
4. In the quiz, you can completely disable the contact form, and then only users' answers to the quiz questions will be displayed in the leads. Such leads will be removed from the balance as standard leads, and if there are no leads on the balance, it will be possible to view them only after the lead balance has been replenished.
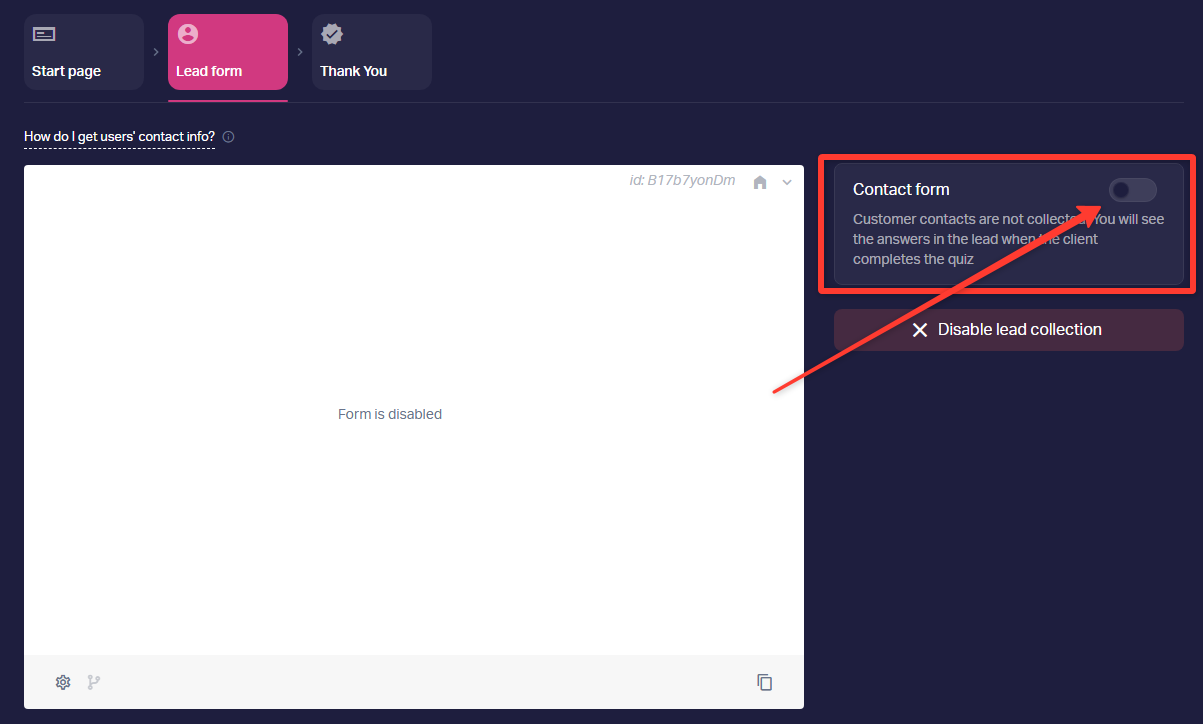
Important: The form disabling feature itself is free, but if you don't want to receive any leads from the quiz at all, you need to enable the optional add-on "Disable lead collection."
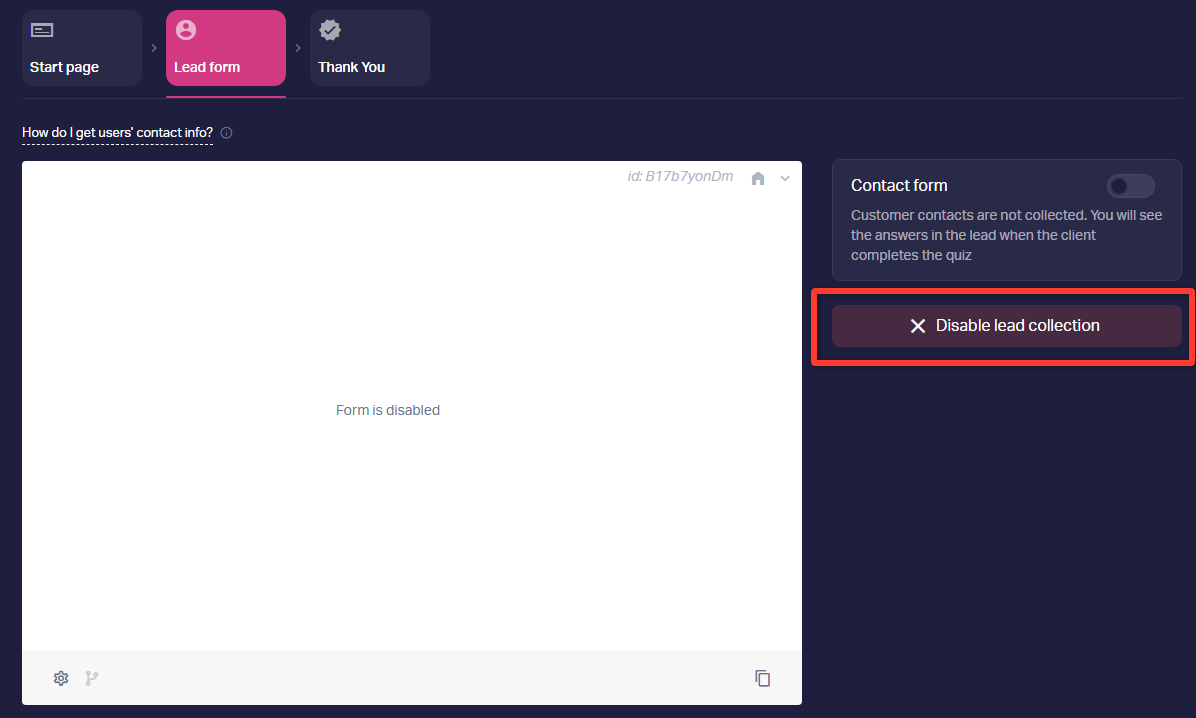
You can enable this feature either in the contact form in the desired quiz or in the section Payment and balance — Add-ons.
The "Disable lead collection" service is a paid add-one — $8 per quiz, per month . After disabling, you will stop collecting answers to questions, and leads from the plan will not be used.
Done! Now the lead form will be displayed to users according to the selected settings, and the collected data will appear in the leads.
You can also configure different lead forms depending on the quiz answers. How to do this is described in our instruction “Contact form depending on answers.”