Setting Up the "Thank You" Page in a Quiz
How to Set Up the "Thank You" Page
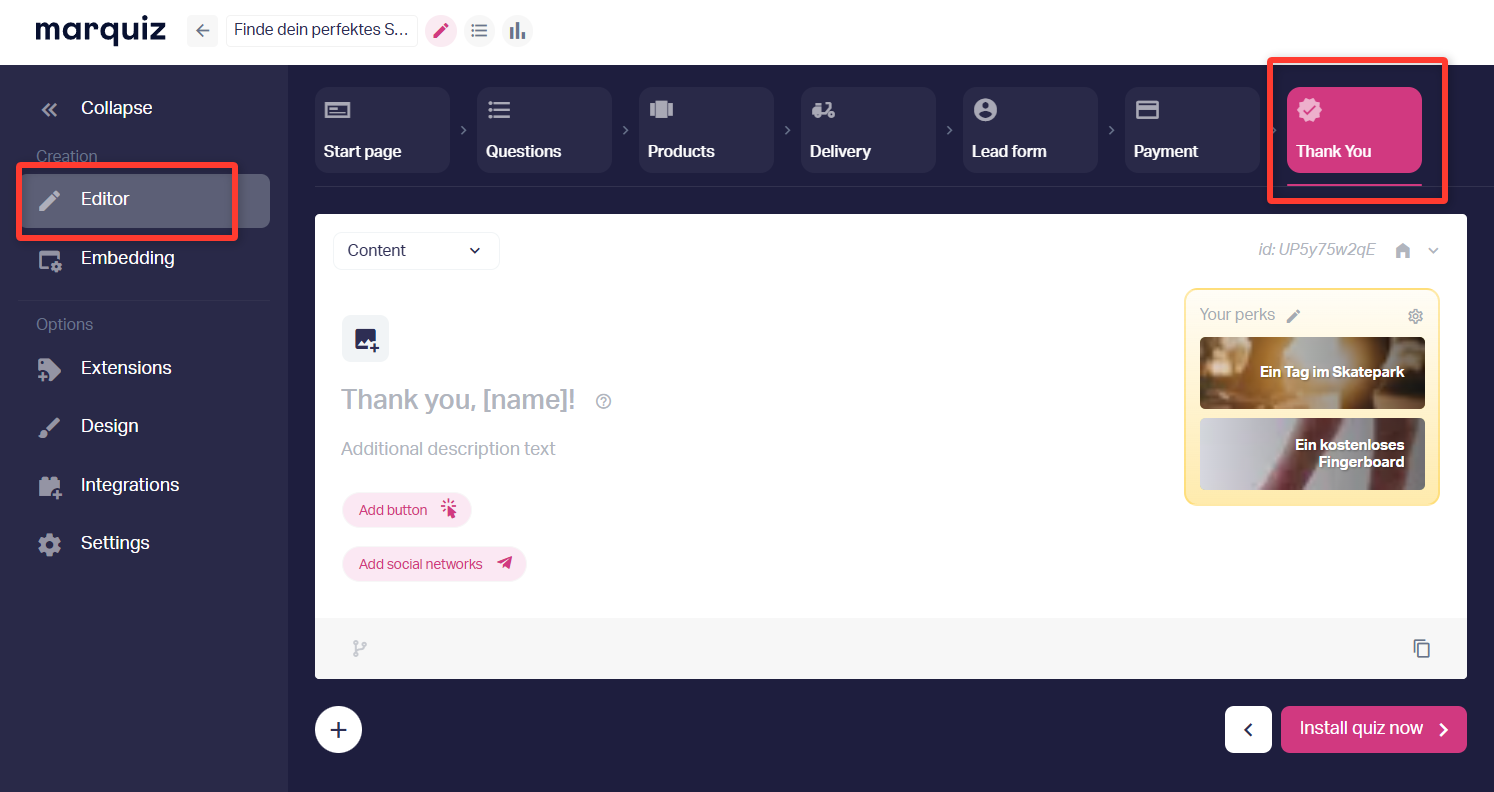
Enter the quiz editing mode.
Select the "Thank You Page" tab.
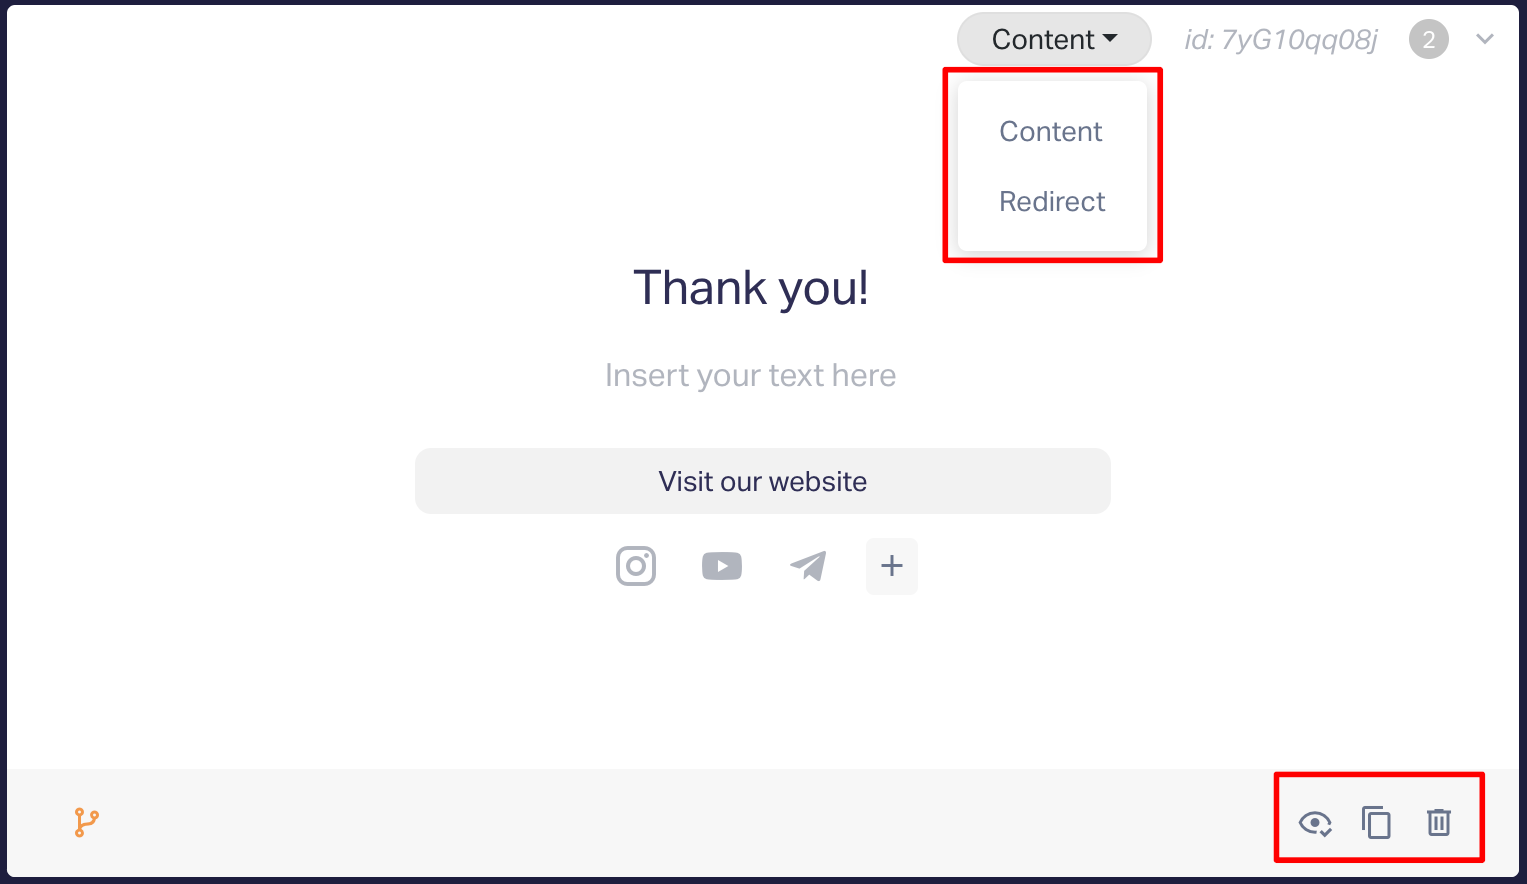
Here, you have two main setup options:
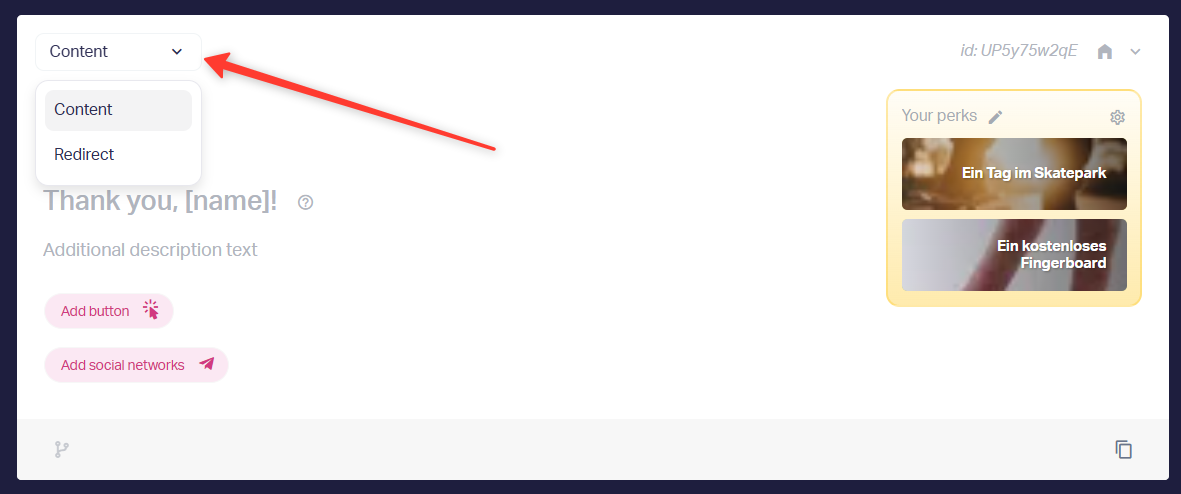
Content — displaying a message after the form is submitted.
Redirect — automatically redirecting to another page after the form is completed.
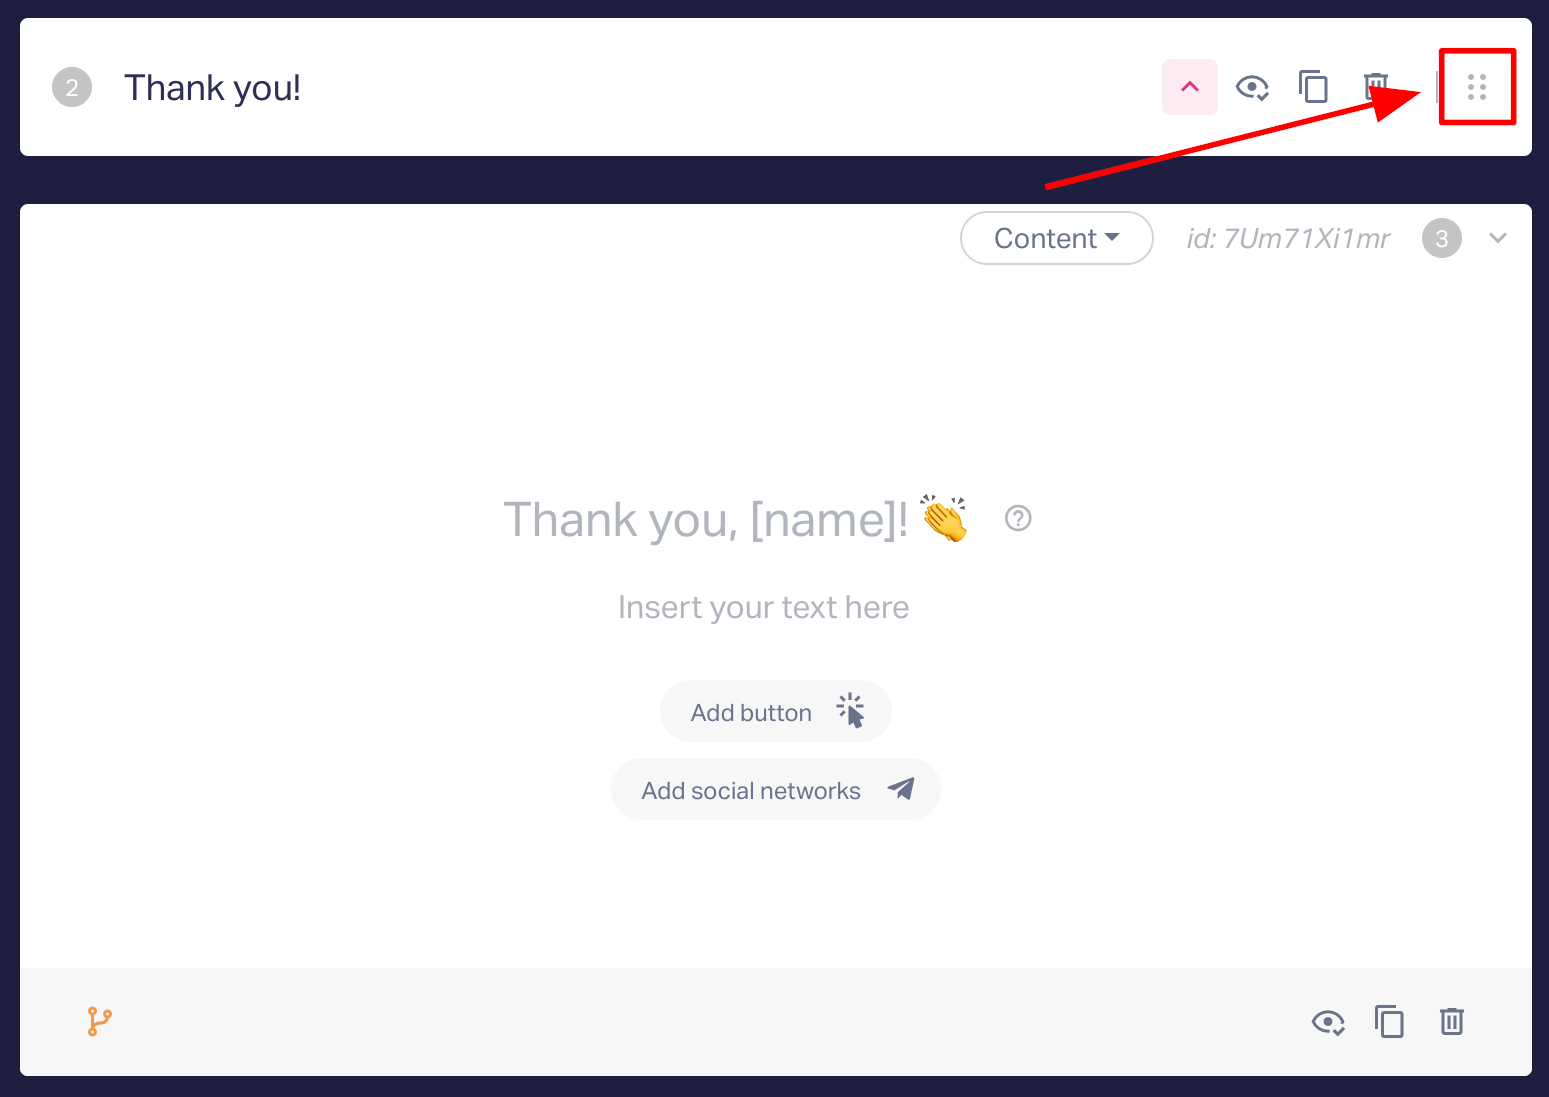
Configuring the "Content" Option
When choosing this option, you can:
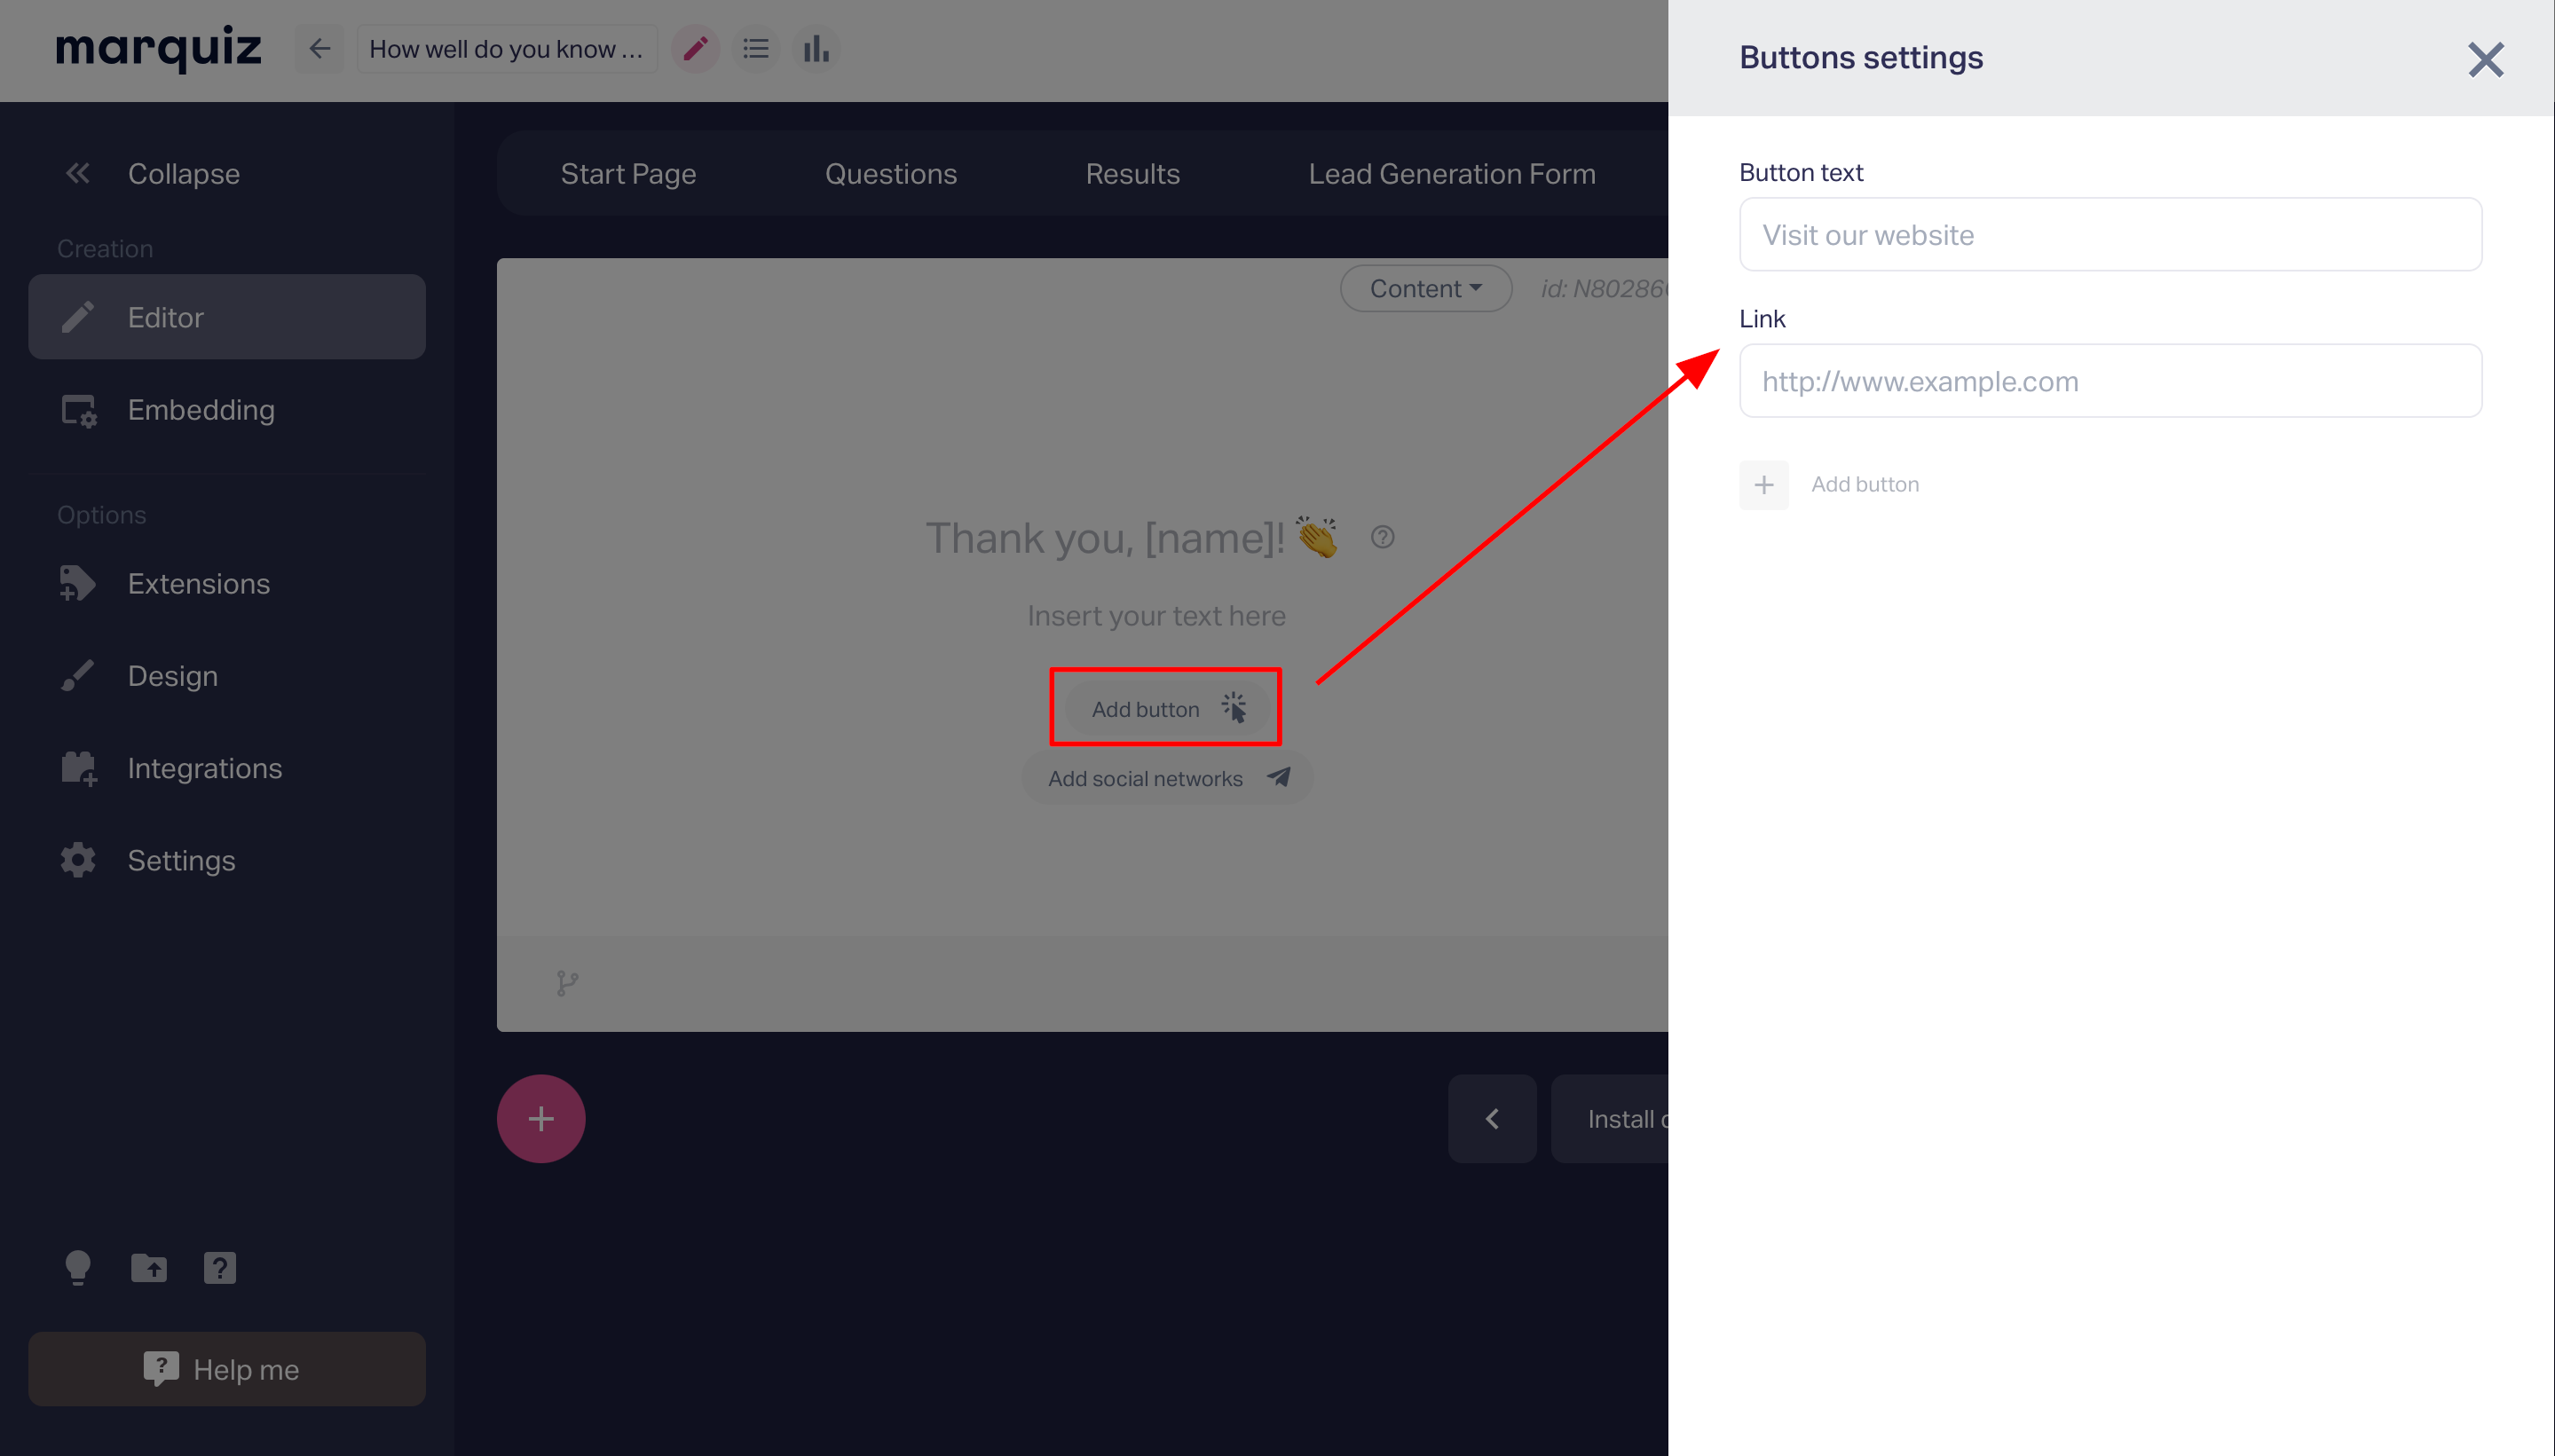
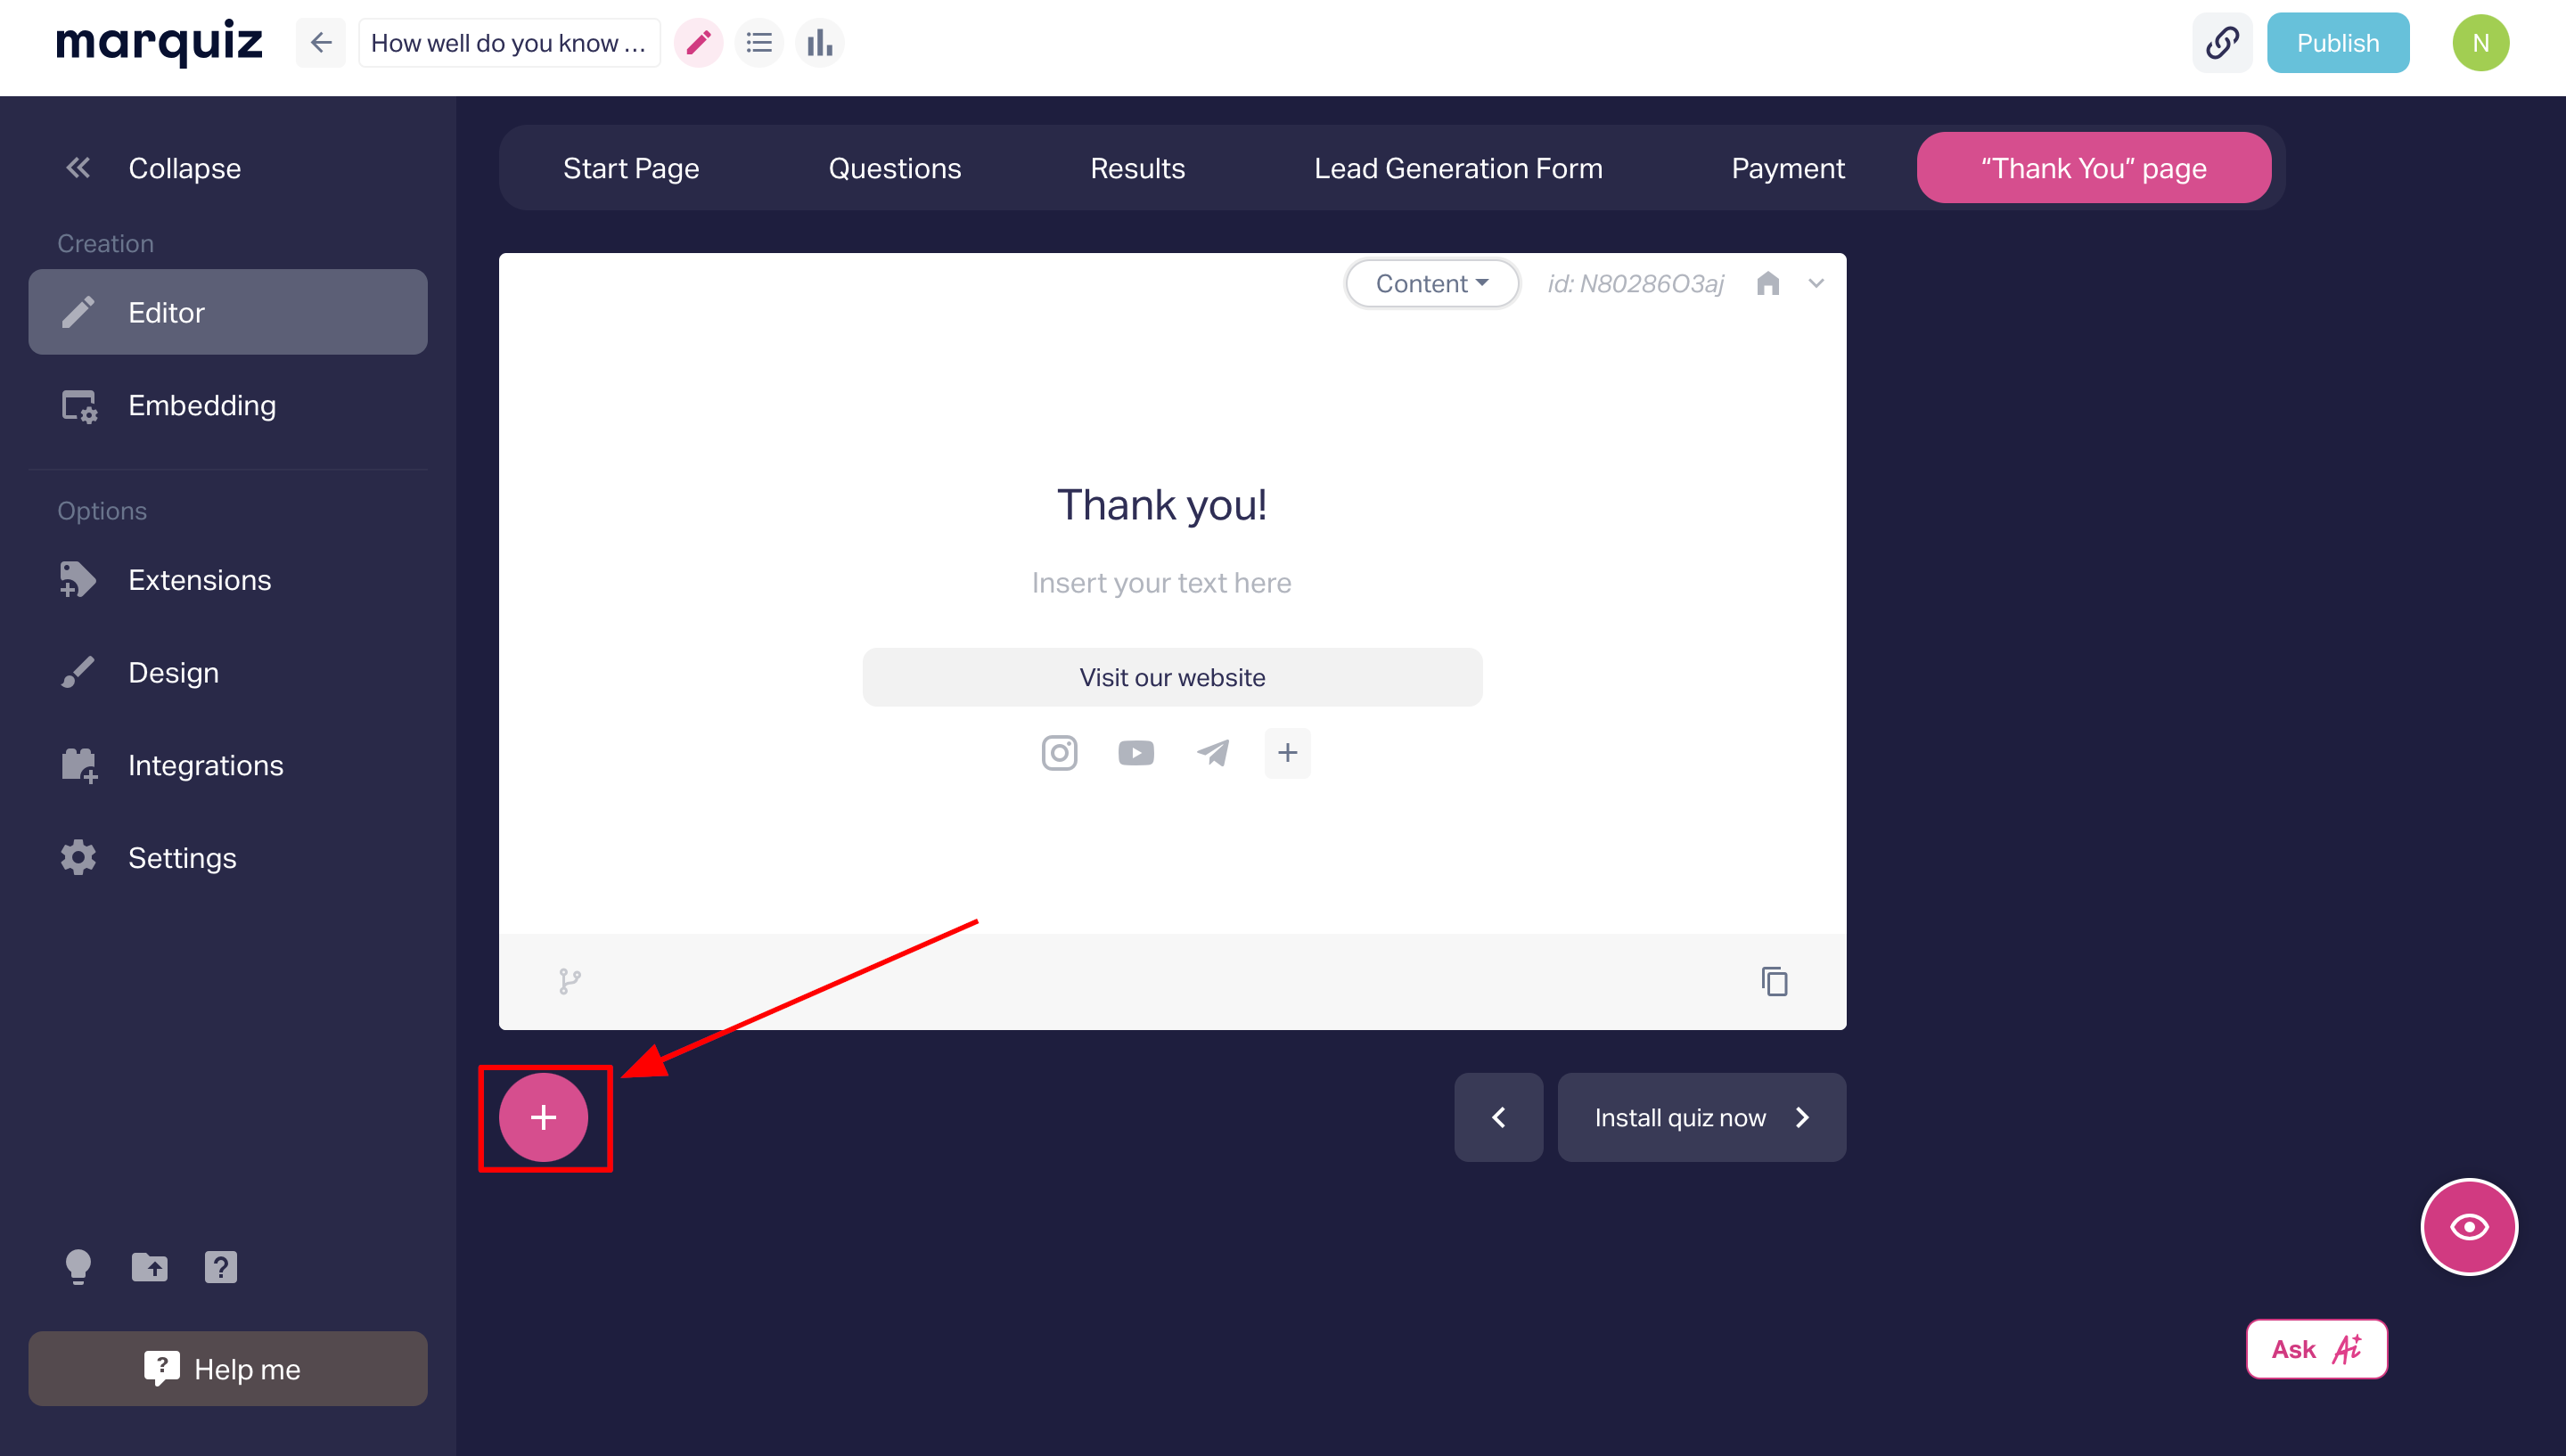
Add text that users will see after submitting their contact information.
Insert a button with a redirect link (redirection will only occur after clicking the button).
Add links to your social media profiles.
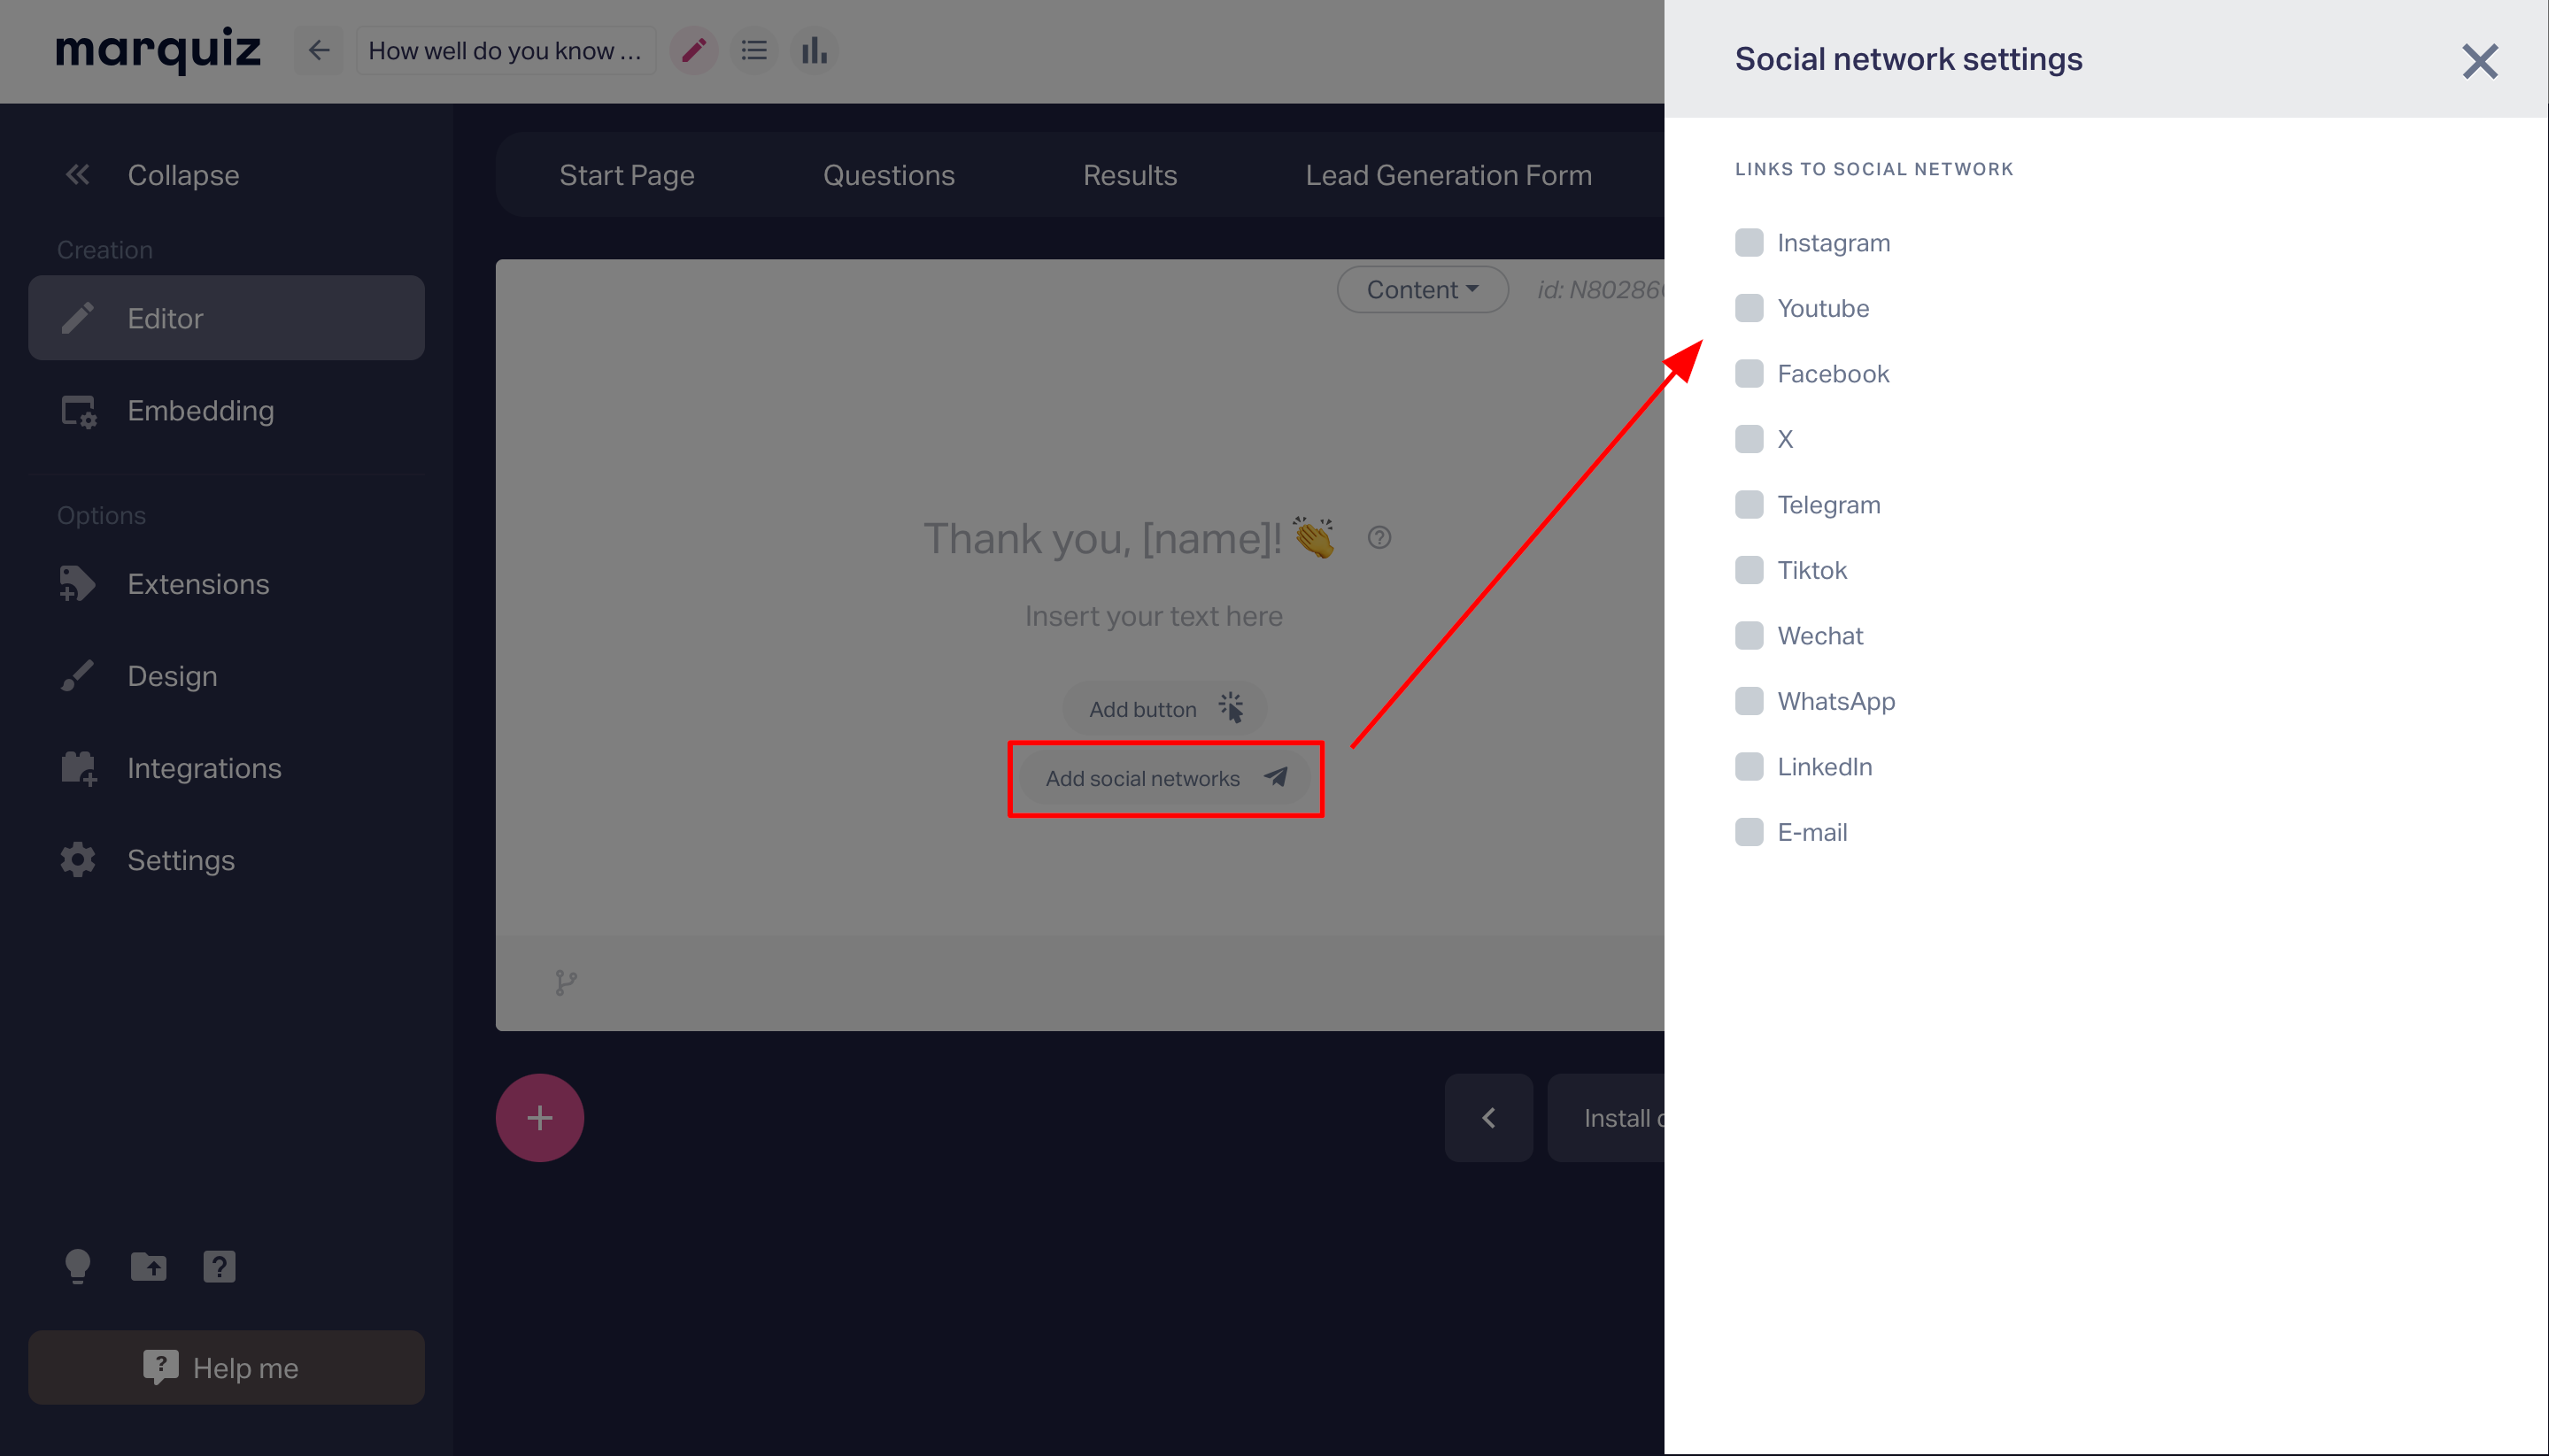
Example of a configured "Thank You" page:

Configuring the "Redirection" Option
If you select this option, specify the link to which the user will be redirected immediately after submitting the form. Please note: this feature is only available on paid plans.

Creating Multiple "Thank You" Pages
You can set up multiple "Thank You" pages in the quiz and define conditions for their display.
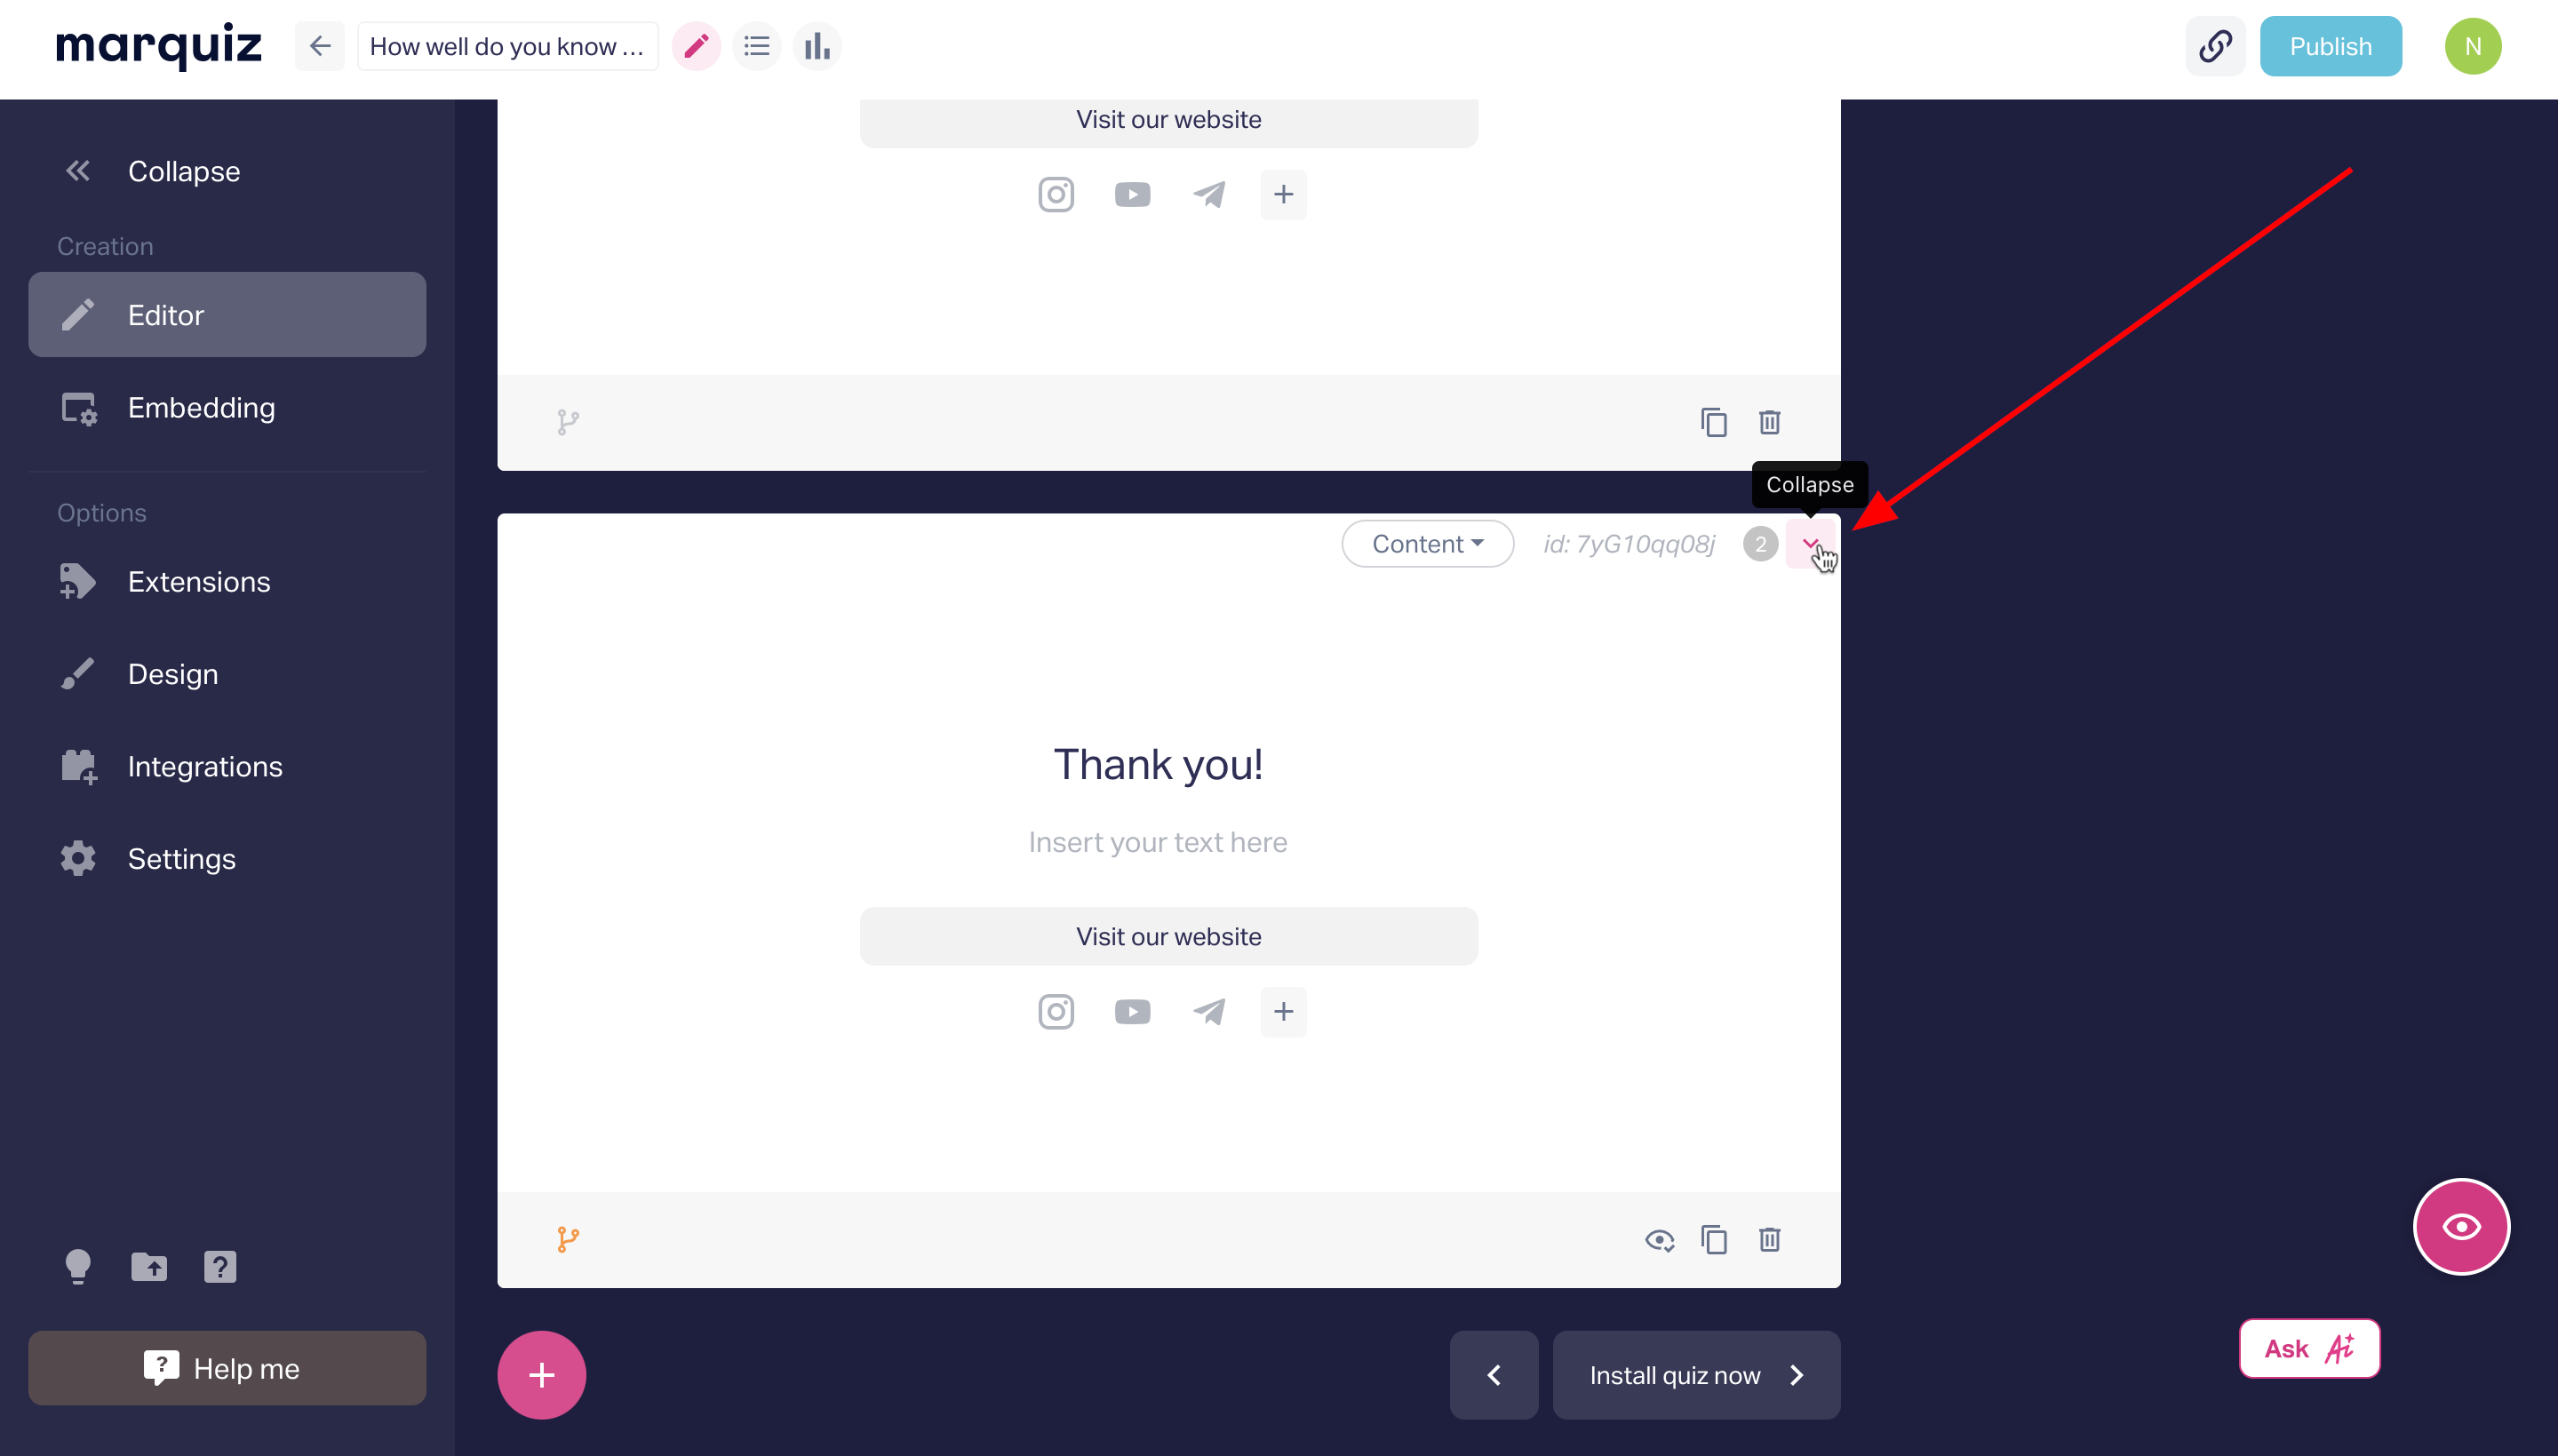
To add a new page, click the "Duplicate" button in the bottom right corner or create a new page using the "+" button.
For each page, you can configure:
Type (Content or Redirection).
Page visibility (it will remain in the editor but won’t be displayed during the quiz).
Duplication or deletion.
Managing Pages
- If there are more than three pages, you can collapse them by clicking the "Collapse" button in the top right corner.
- To change the order of the pages, click and hold the desired page and move it up or down.
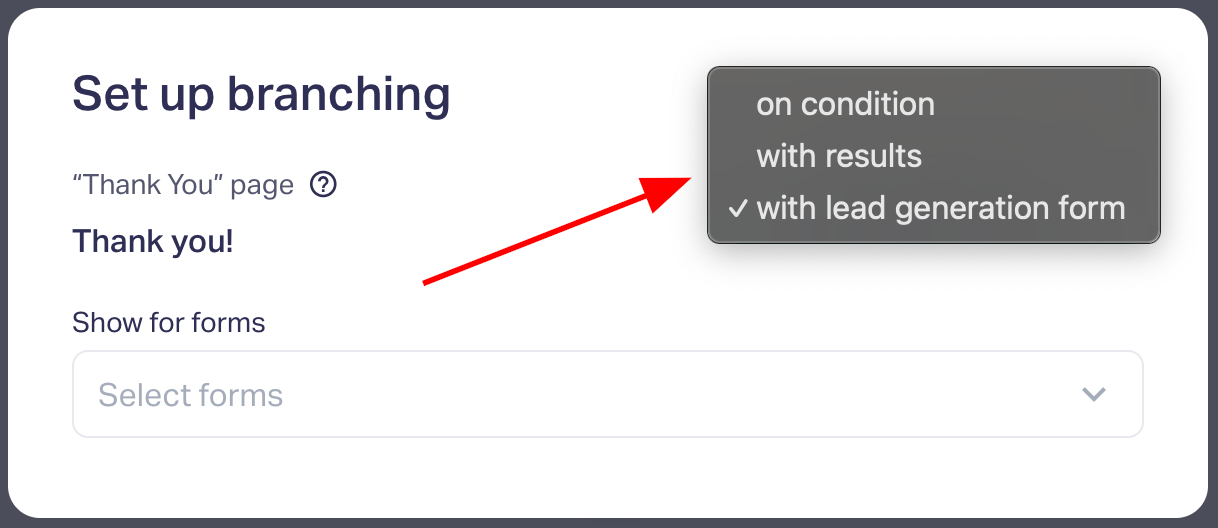
Configuring Branching
If you’ve added two or more "Thank You" pages, you can set conditions for their display.
- The first page is displayed by default if no conditions for other pages are met.
- Branching is configured starting from the second page.
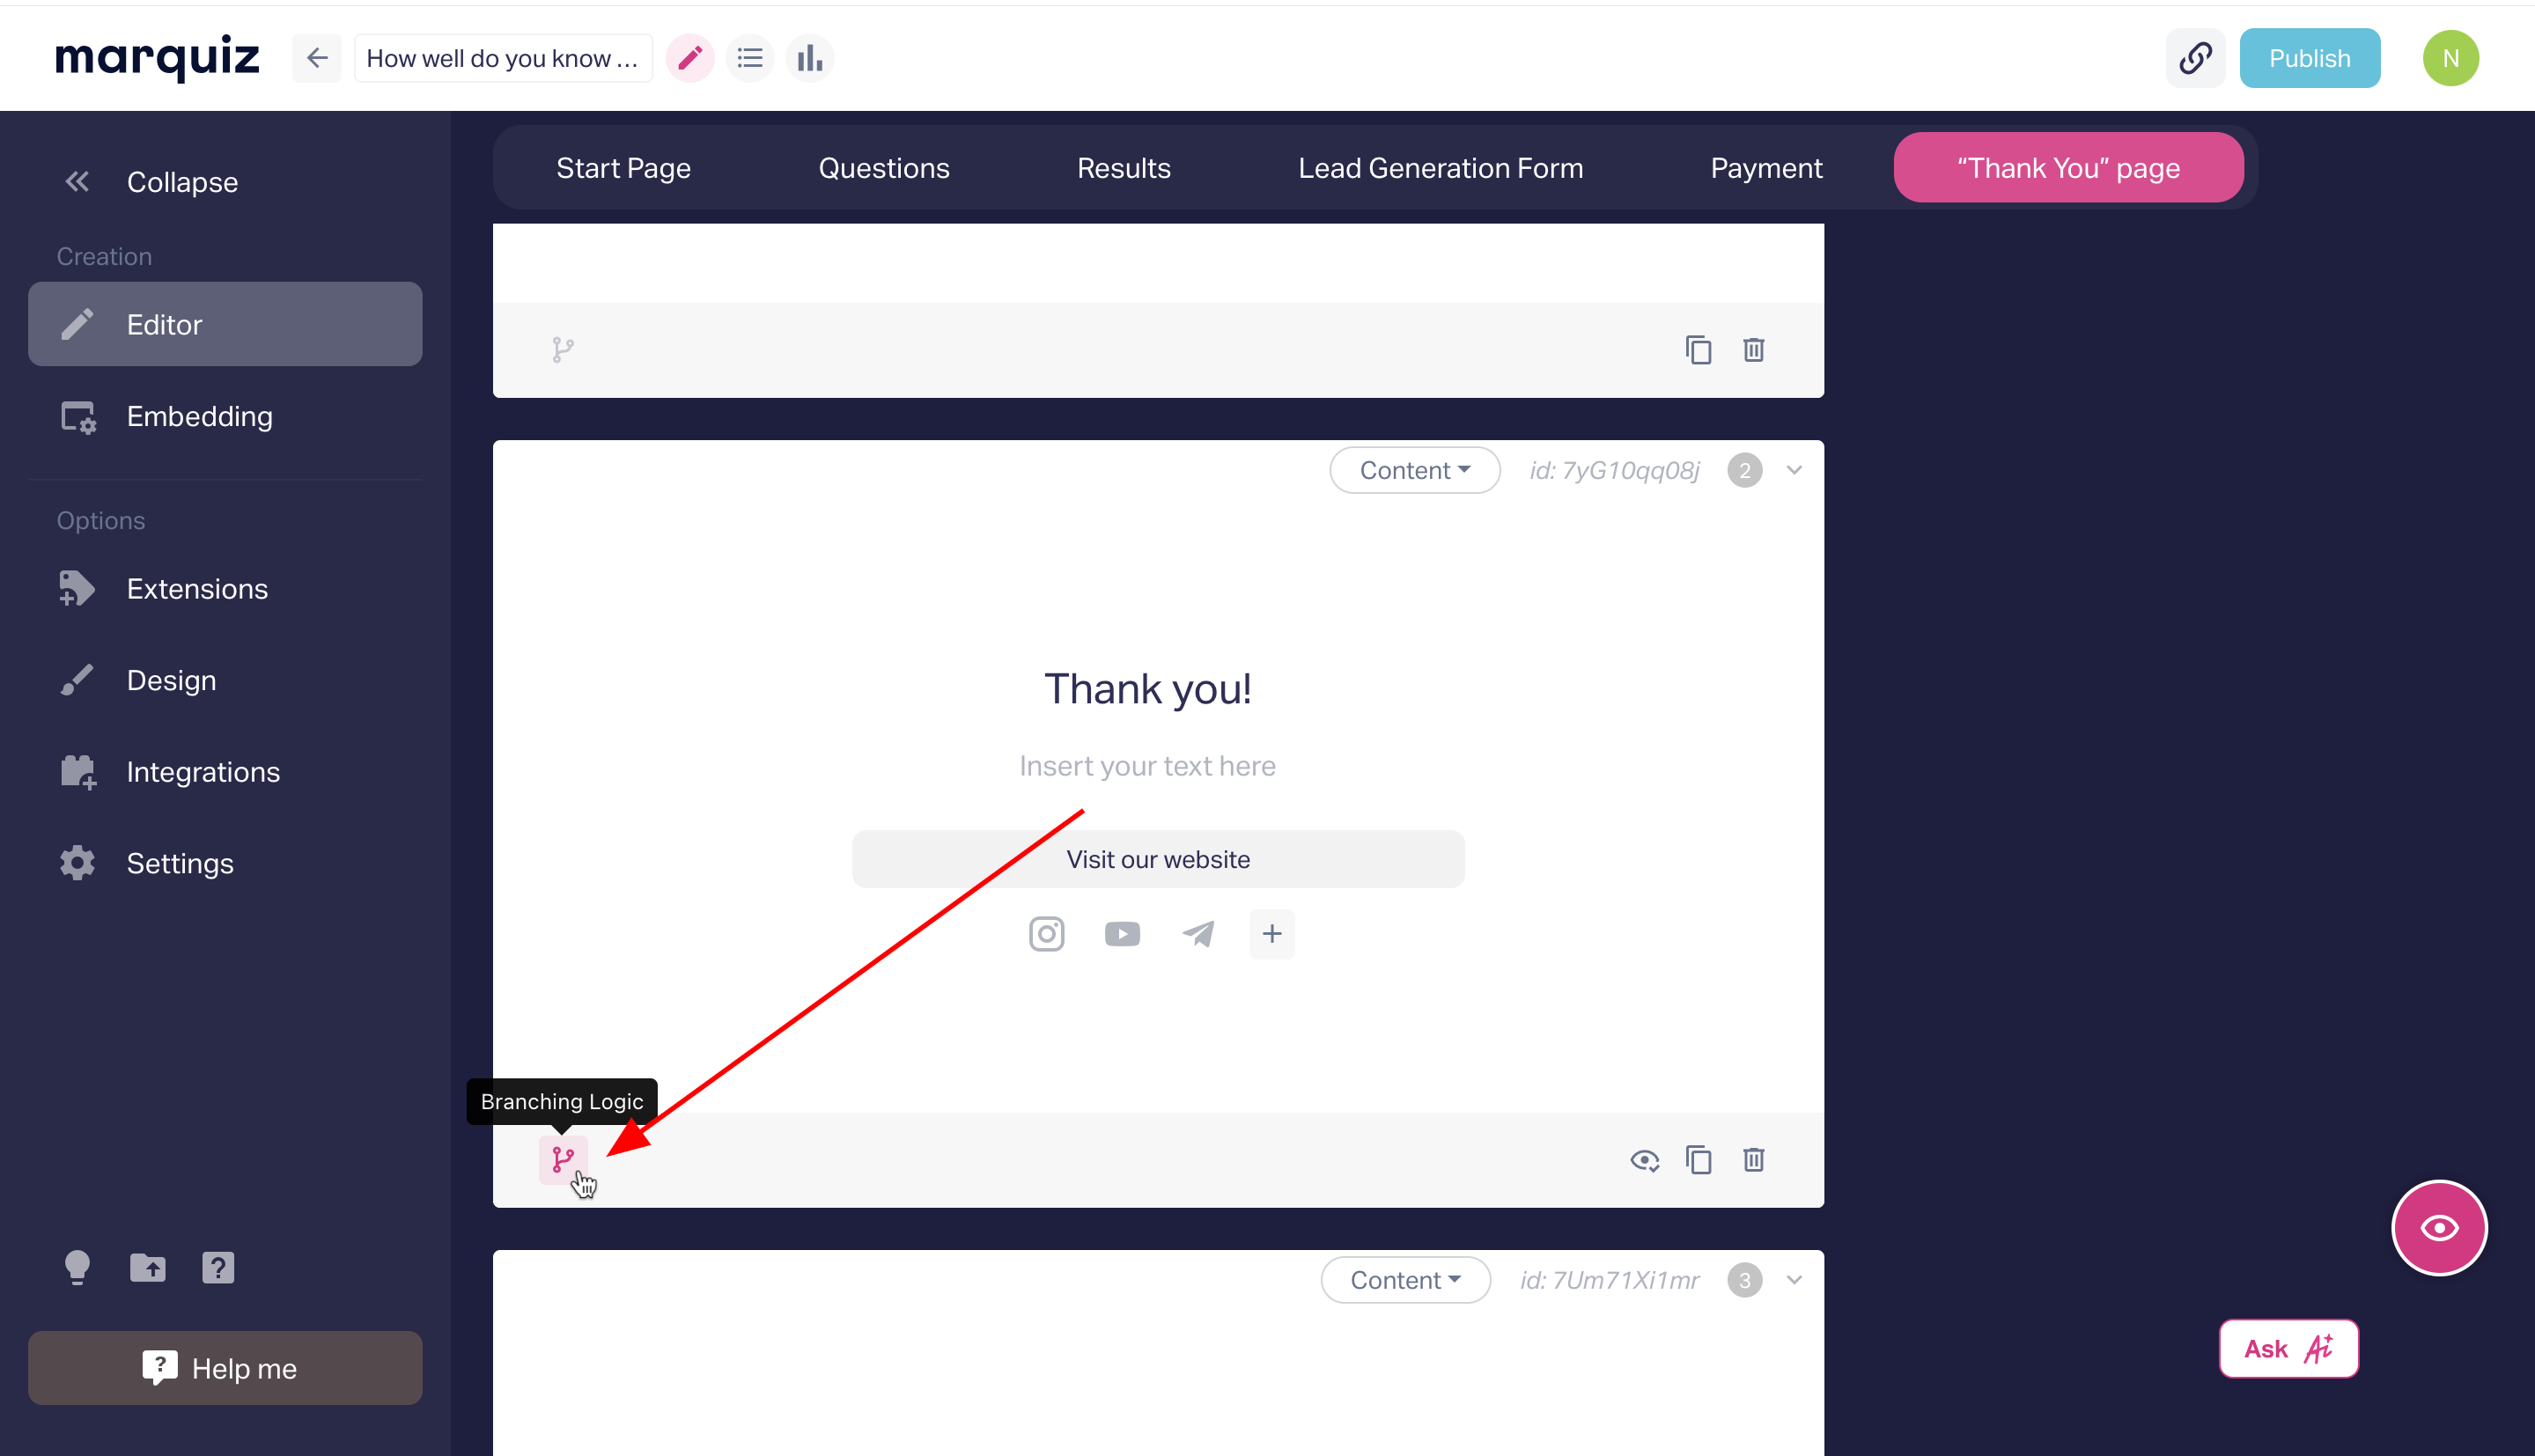
Display conditions can depend on:
The form the user sees.
The result selected for the user.
The answer option chosen by the user in the quiz.
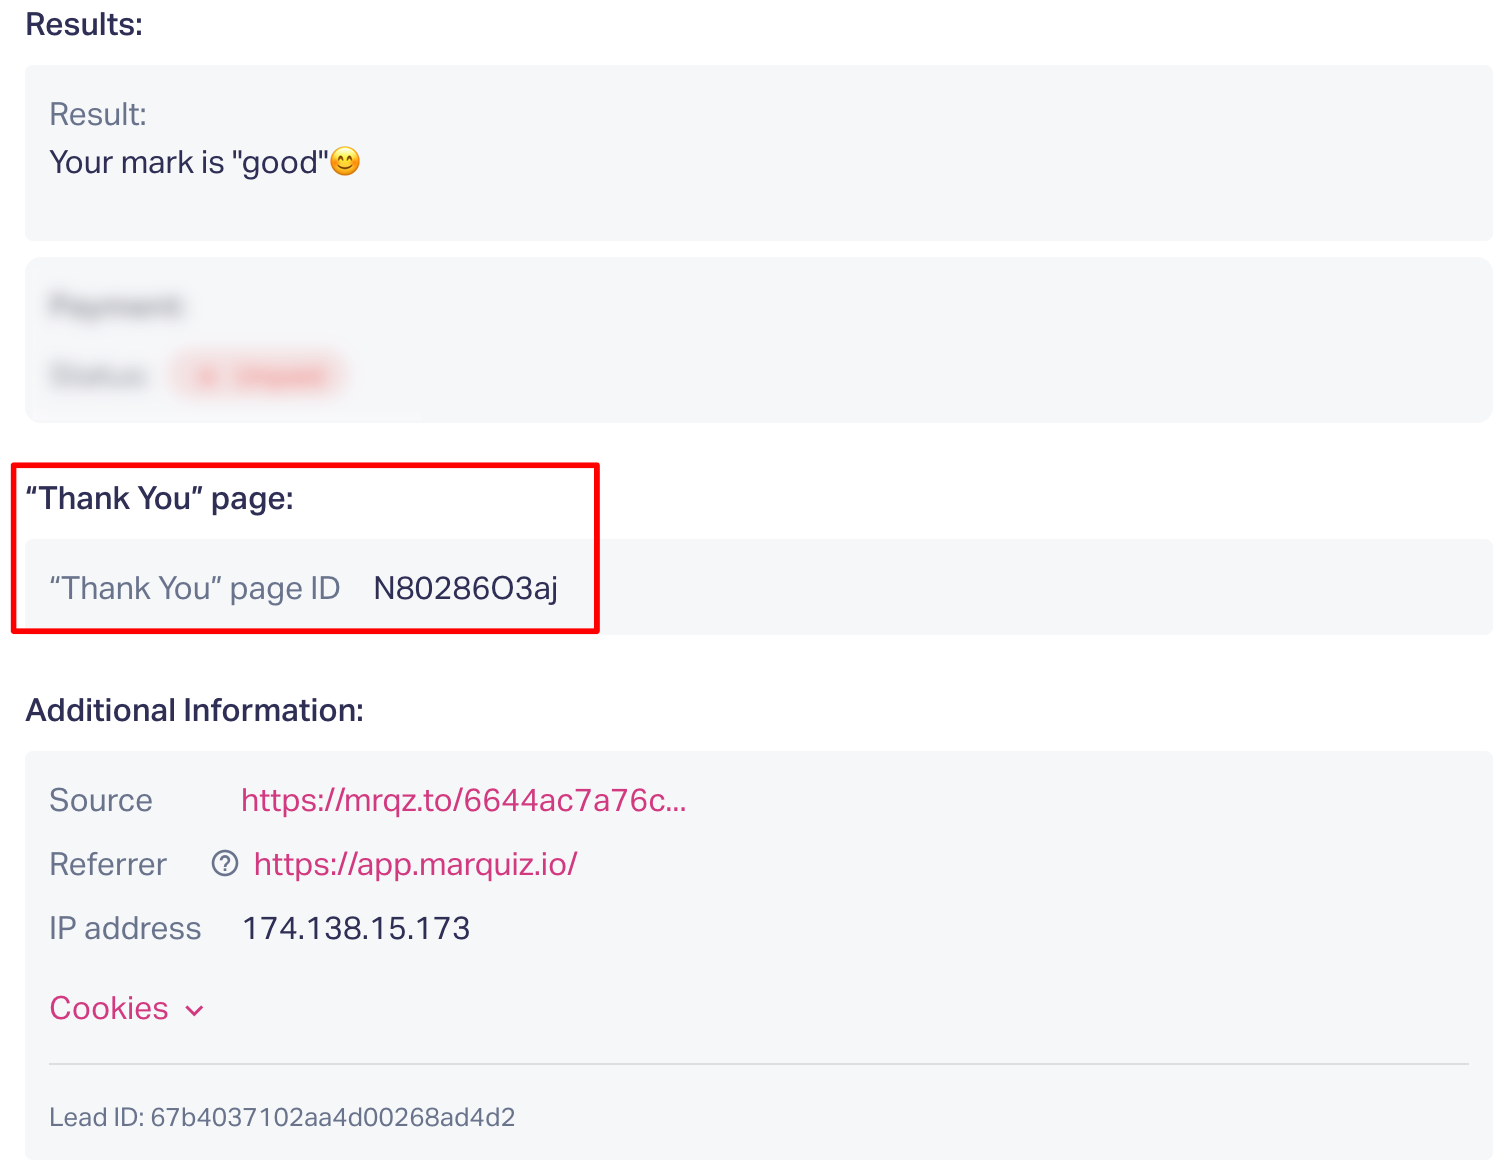
In the branching settings, the "Thank You" page ID is displayed. If there are multiple active pages in the quiz, the ID will be indicated in the.