
Create quiz results
Marquiz can display quiz results based on users’ answers. The result may be displayed before or after a capture form. Also, you can send the results to users emails.
When shown before the capture form, the result is a call-to-action for the user to leave his contact details. After the contact form, the result is a bonus for which the lead form has to be filled in.
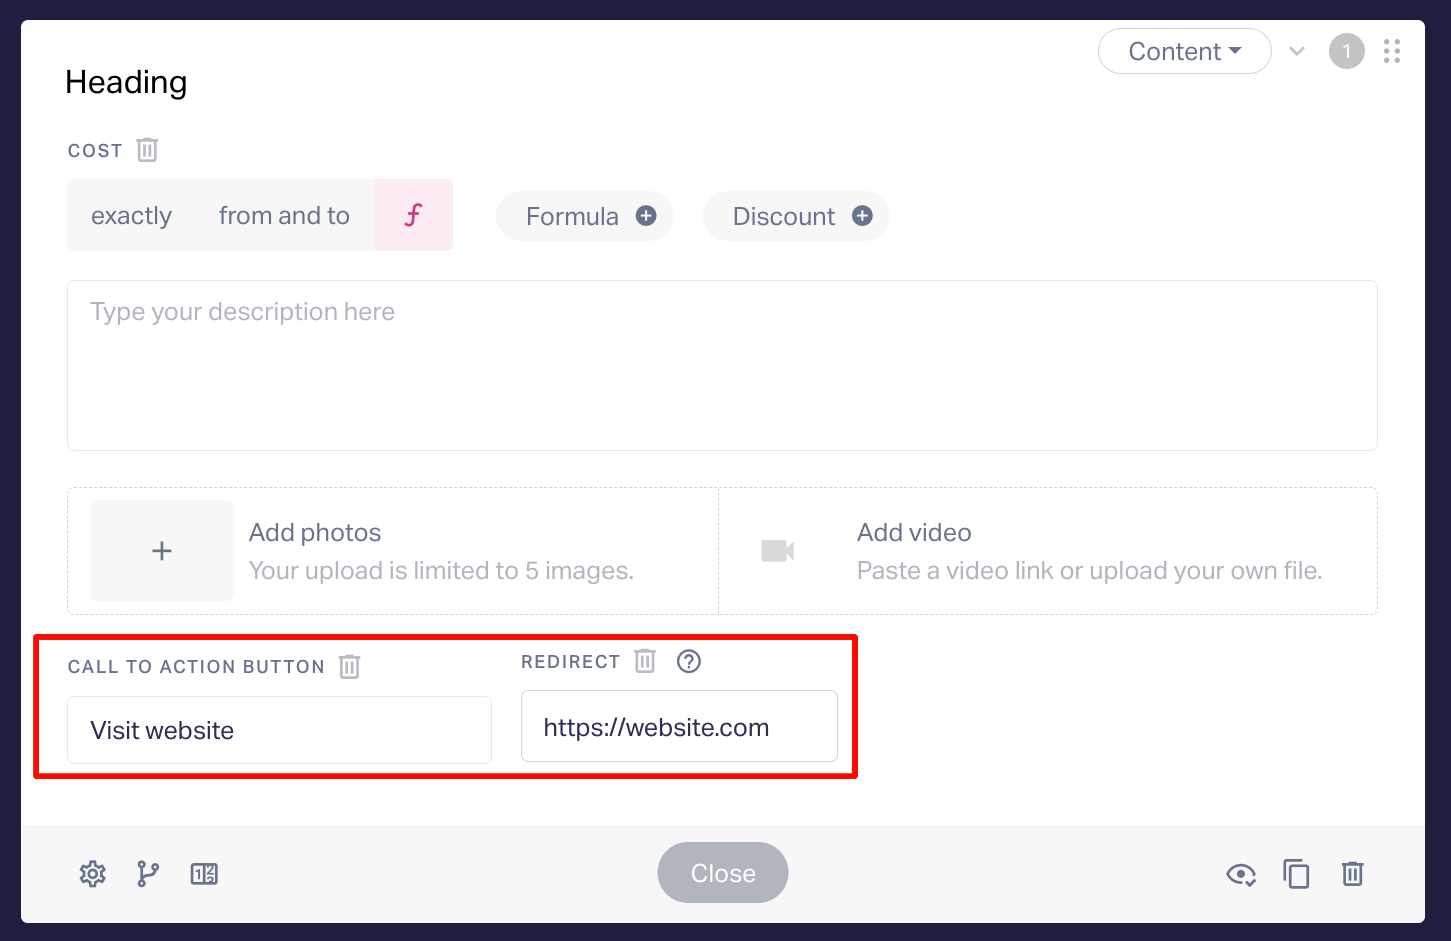
If the result is displayed after the lead form, you can set up redirection to your website.
Results can be displayed based on the correct answers and points scored. How to set up points is here.
You can display the results as product cards. How to set up the shopping cart and product cards can be found here
To calculate the cost in the results, you can configure the calculator.
You can learn more about configuring the calculator here
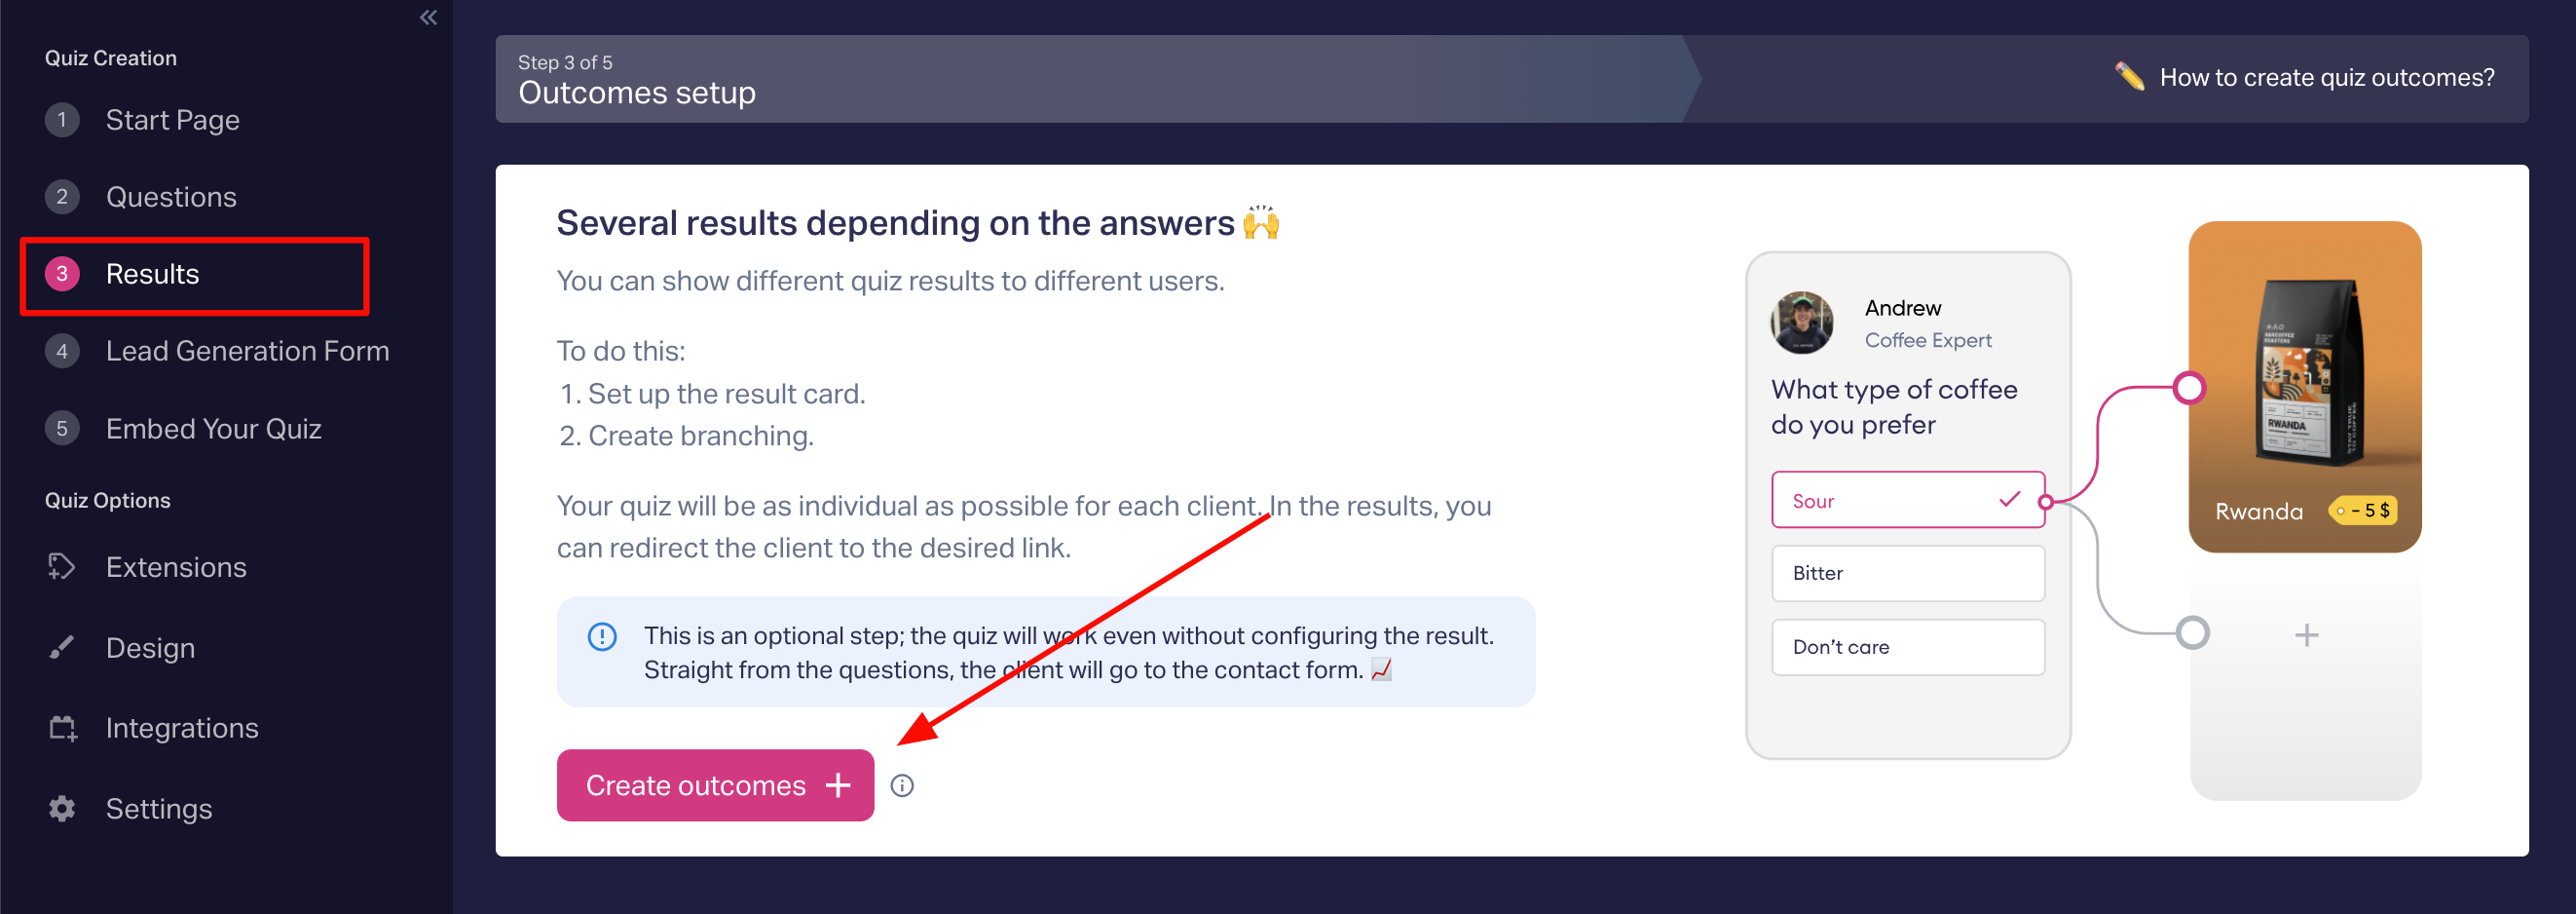
Setting up the results:
Open "Results" in the editor. Click on "Create outcomes":
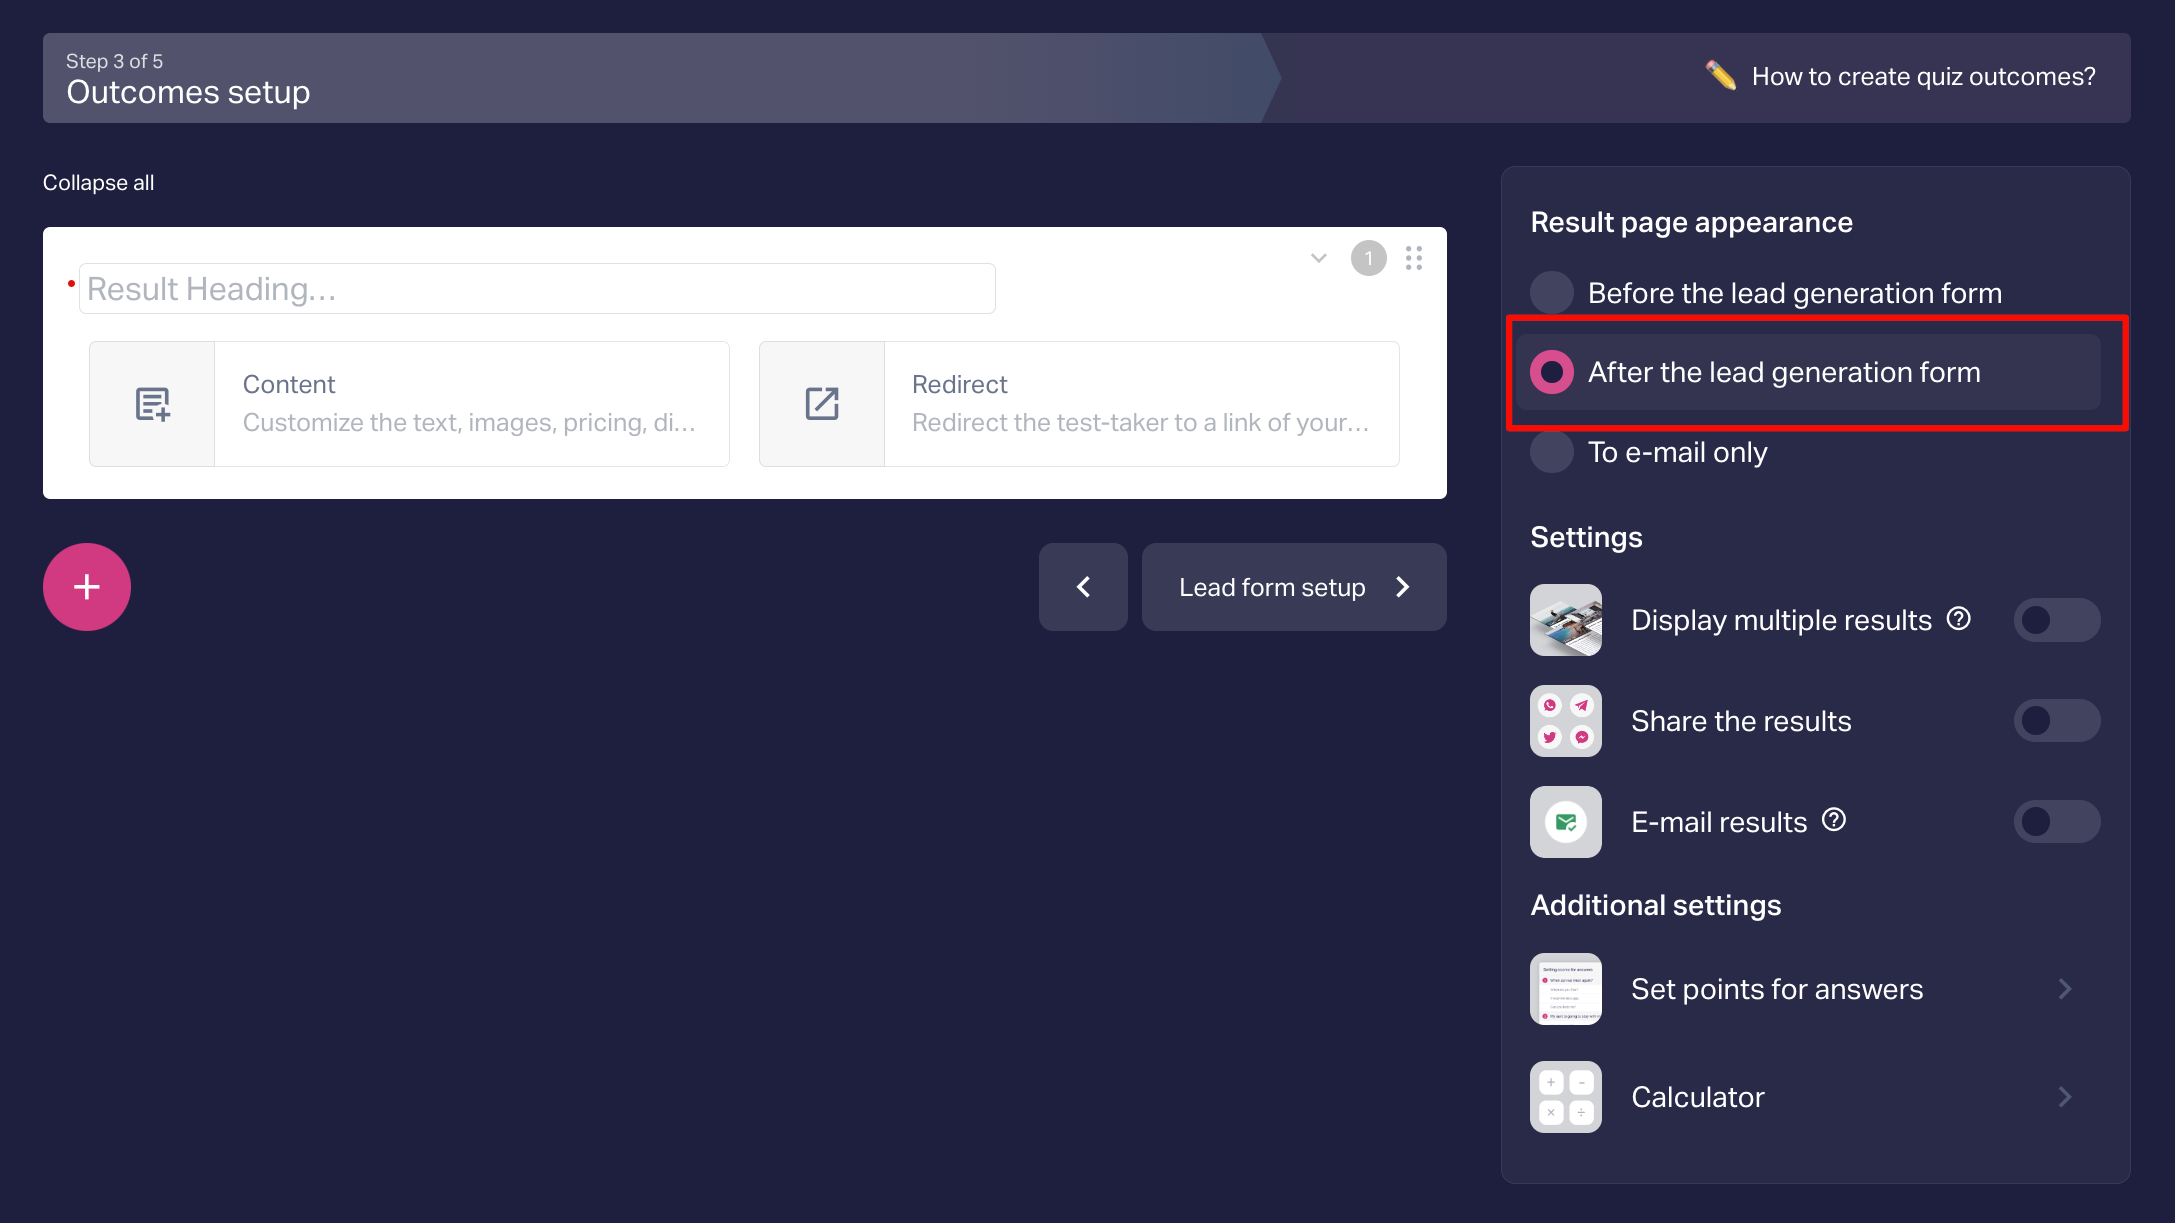
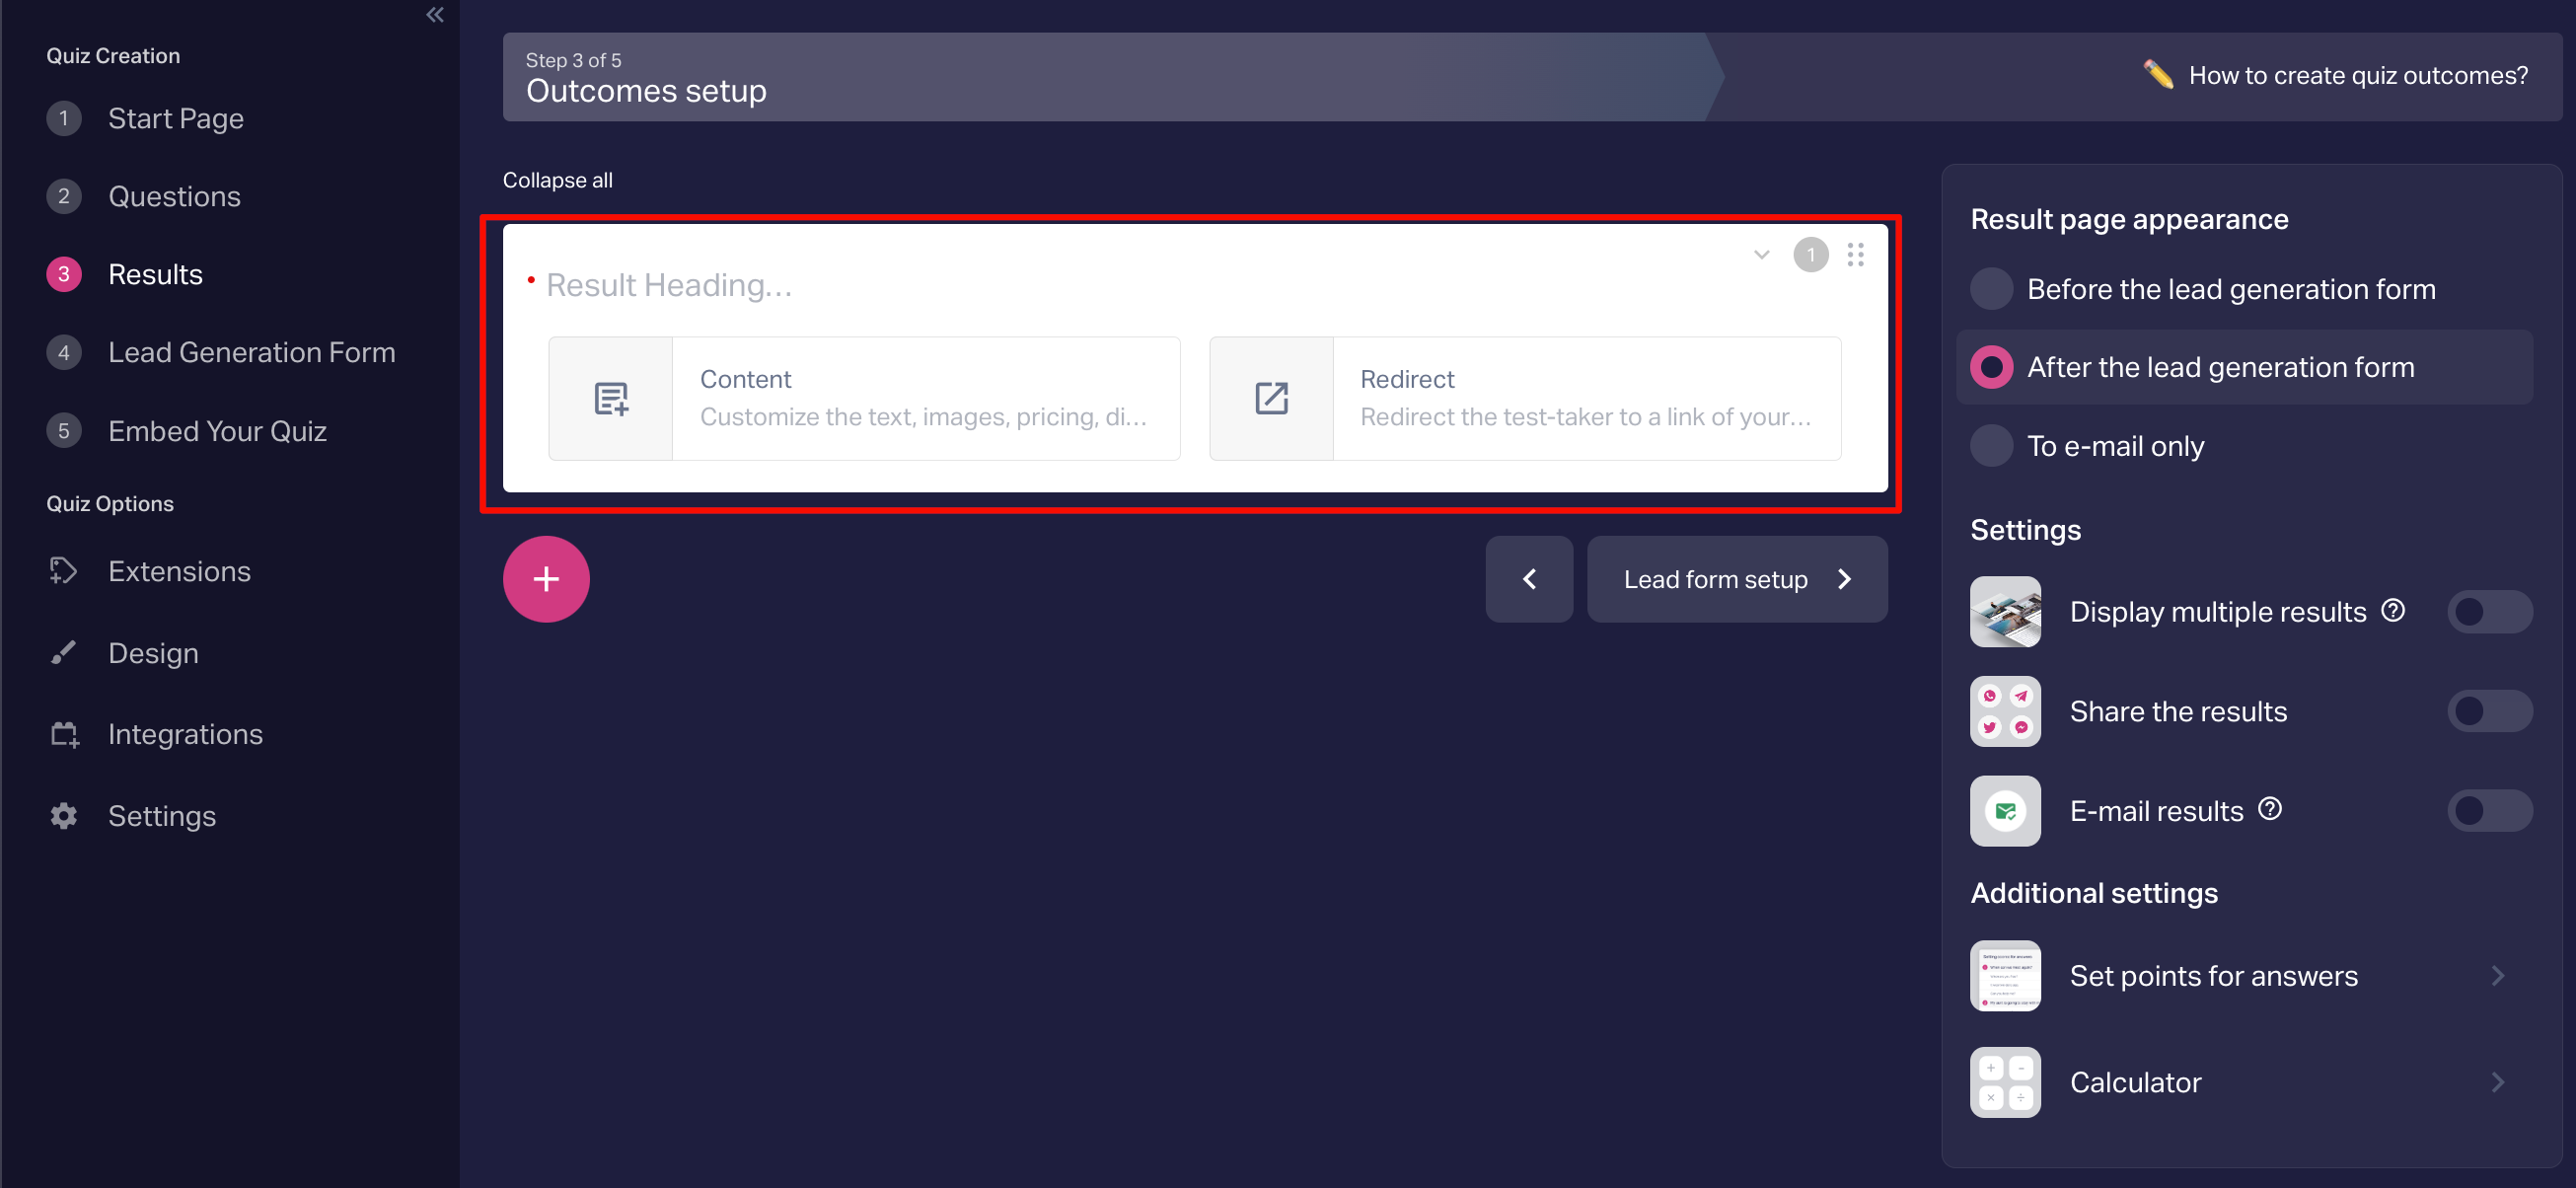
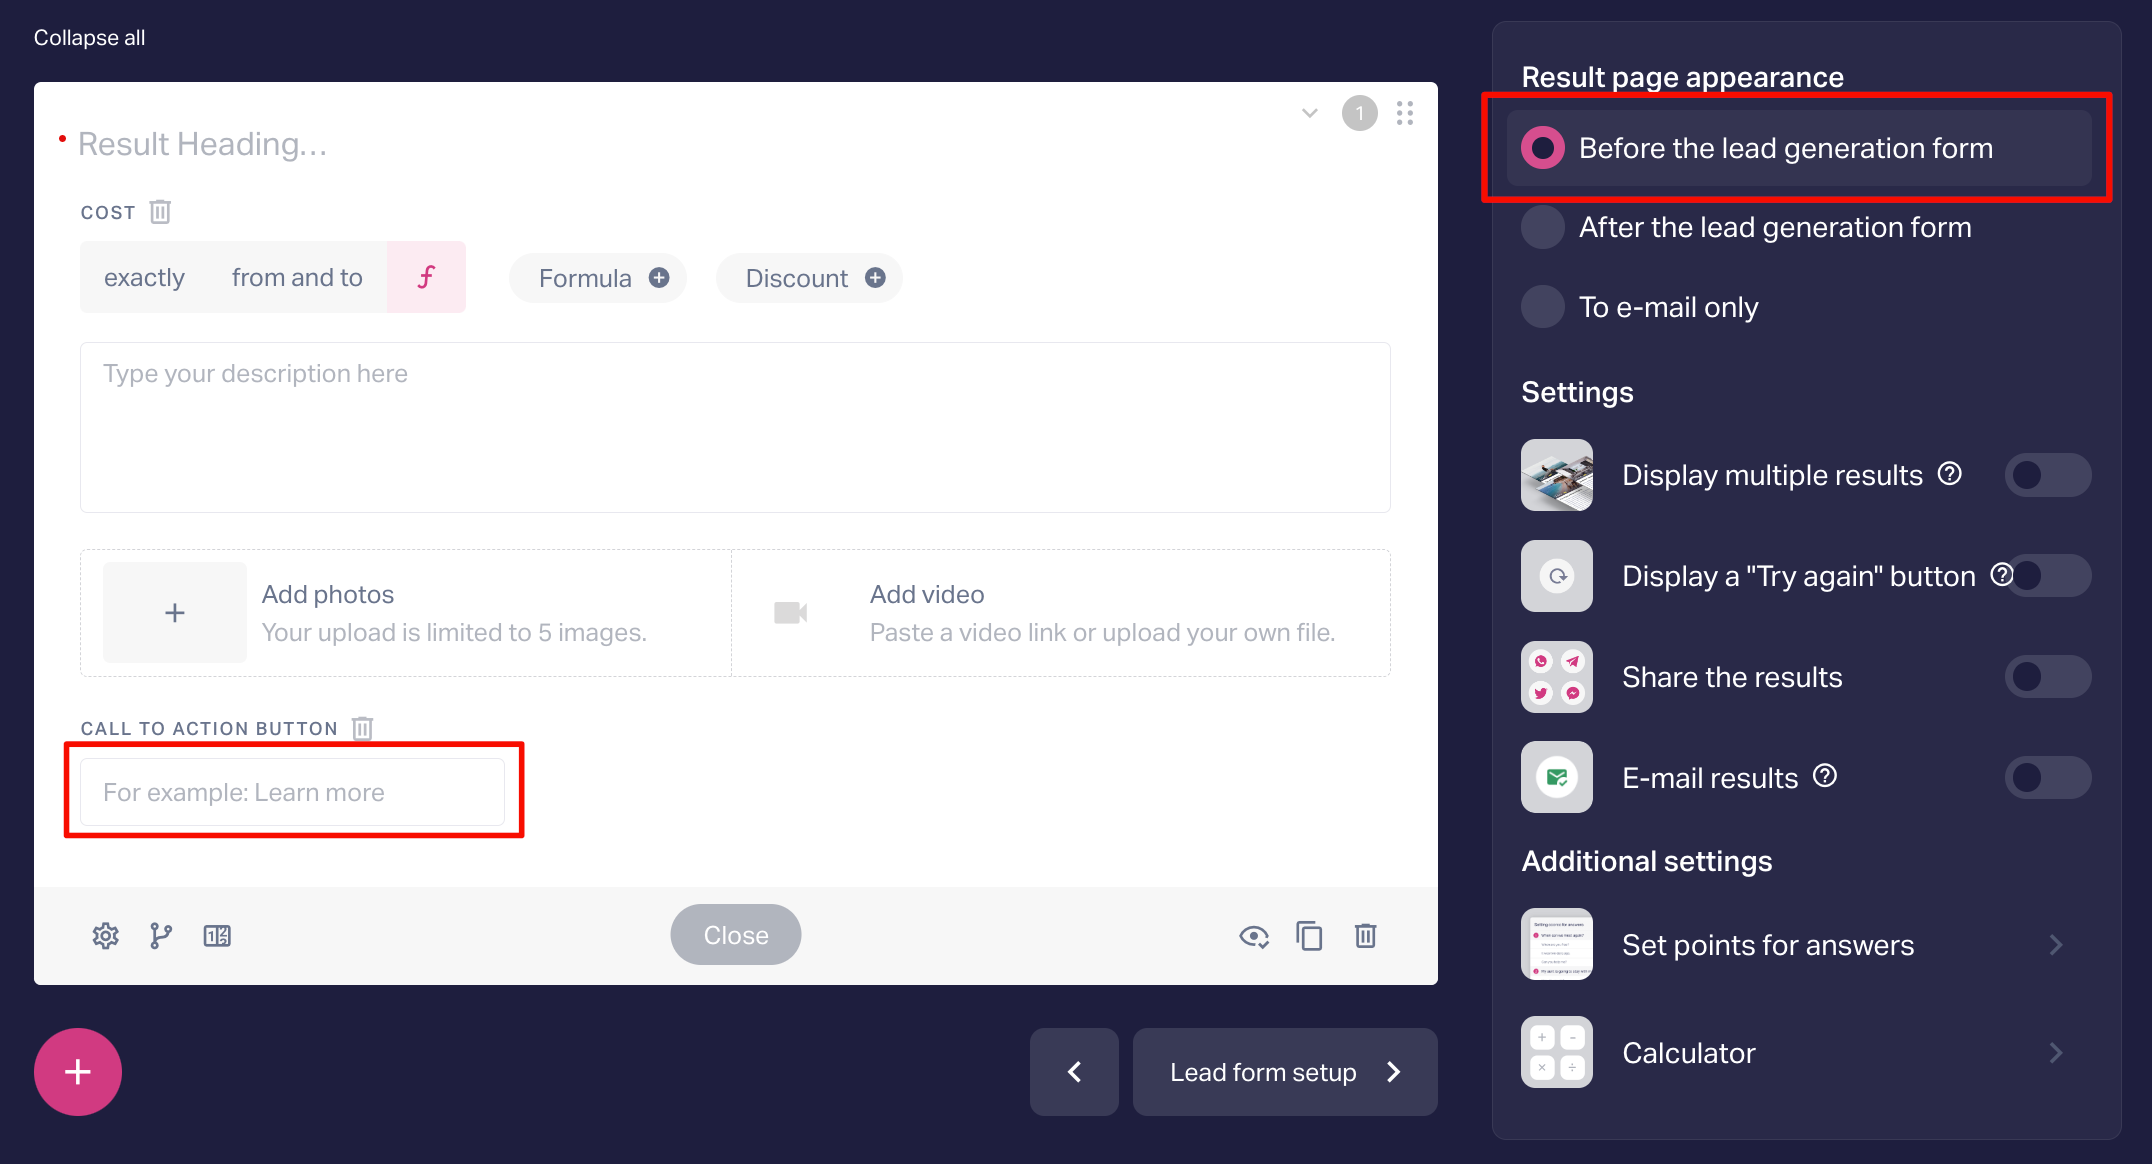
Select when to display the outcome — before or after the lead form.
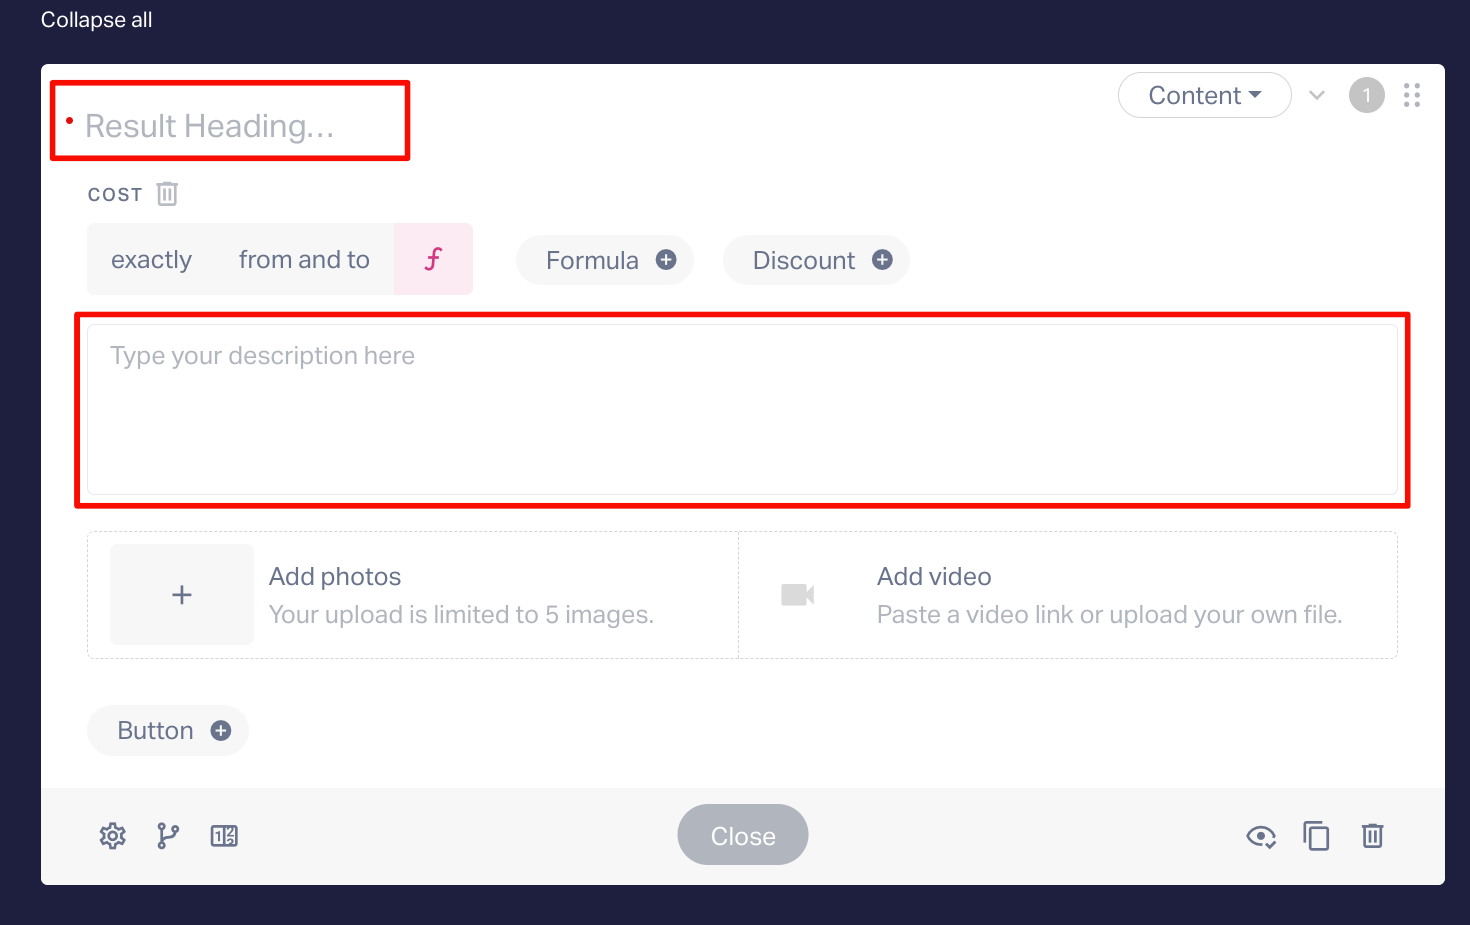
Select the outcome type (Content/Redirect) and fill contents in (do not forget to click the “Publish” button on the bar down below). Only the heading and description fields are required to be filled in; prices, images/videos, discounts may be added optionally.
If the outcomes are displayed before the lead form, the text field on the button which opens up the lead form must be filled (says “Learn more” by default).
If the outcomes are displayed after the lead form, you can also set a button with a link to your website.
Principles for the result display are the following:
The result to be displayed is chosen according to the maximum amount of matched conditions. If two results have the same amount of matches, then the top result is displayed (the results have a priority order)
If no results is appropriate, the user will see the message: “Results skipped because no matching auto-result found”, which is no good. In this case, you’d be better setting up a result by default which will be displayed, when the other conditions and results don’t match. To do this, just don't set any conditions.
Another case. You can set one and only result for all possible answers and use it as a call to action. In this case, the conditions should be set either.
A useful hint: To set and check results in a convenient way, set to display the results before the lead form. As soon as everything works well, switch it to “After the lead generation form” (if necessary).
How to set up conditions:
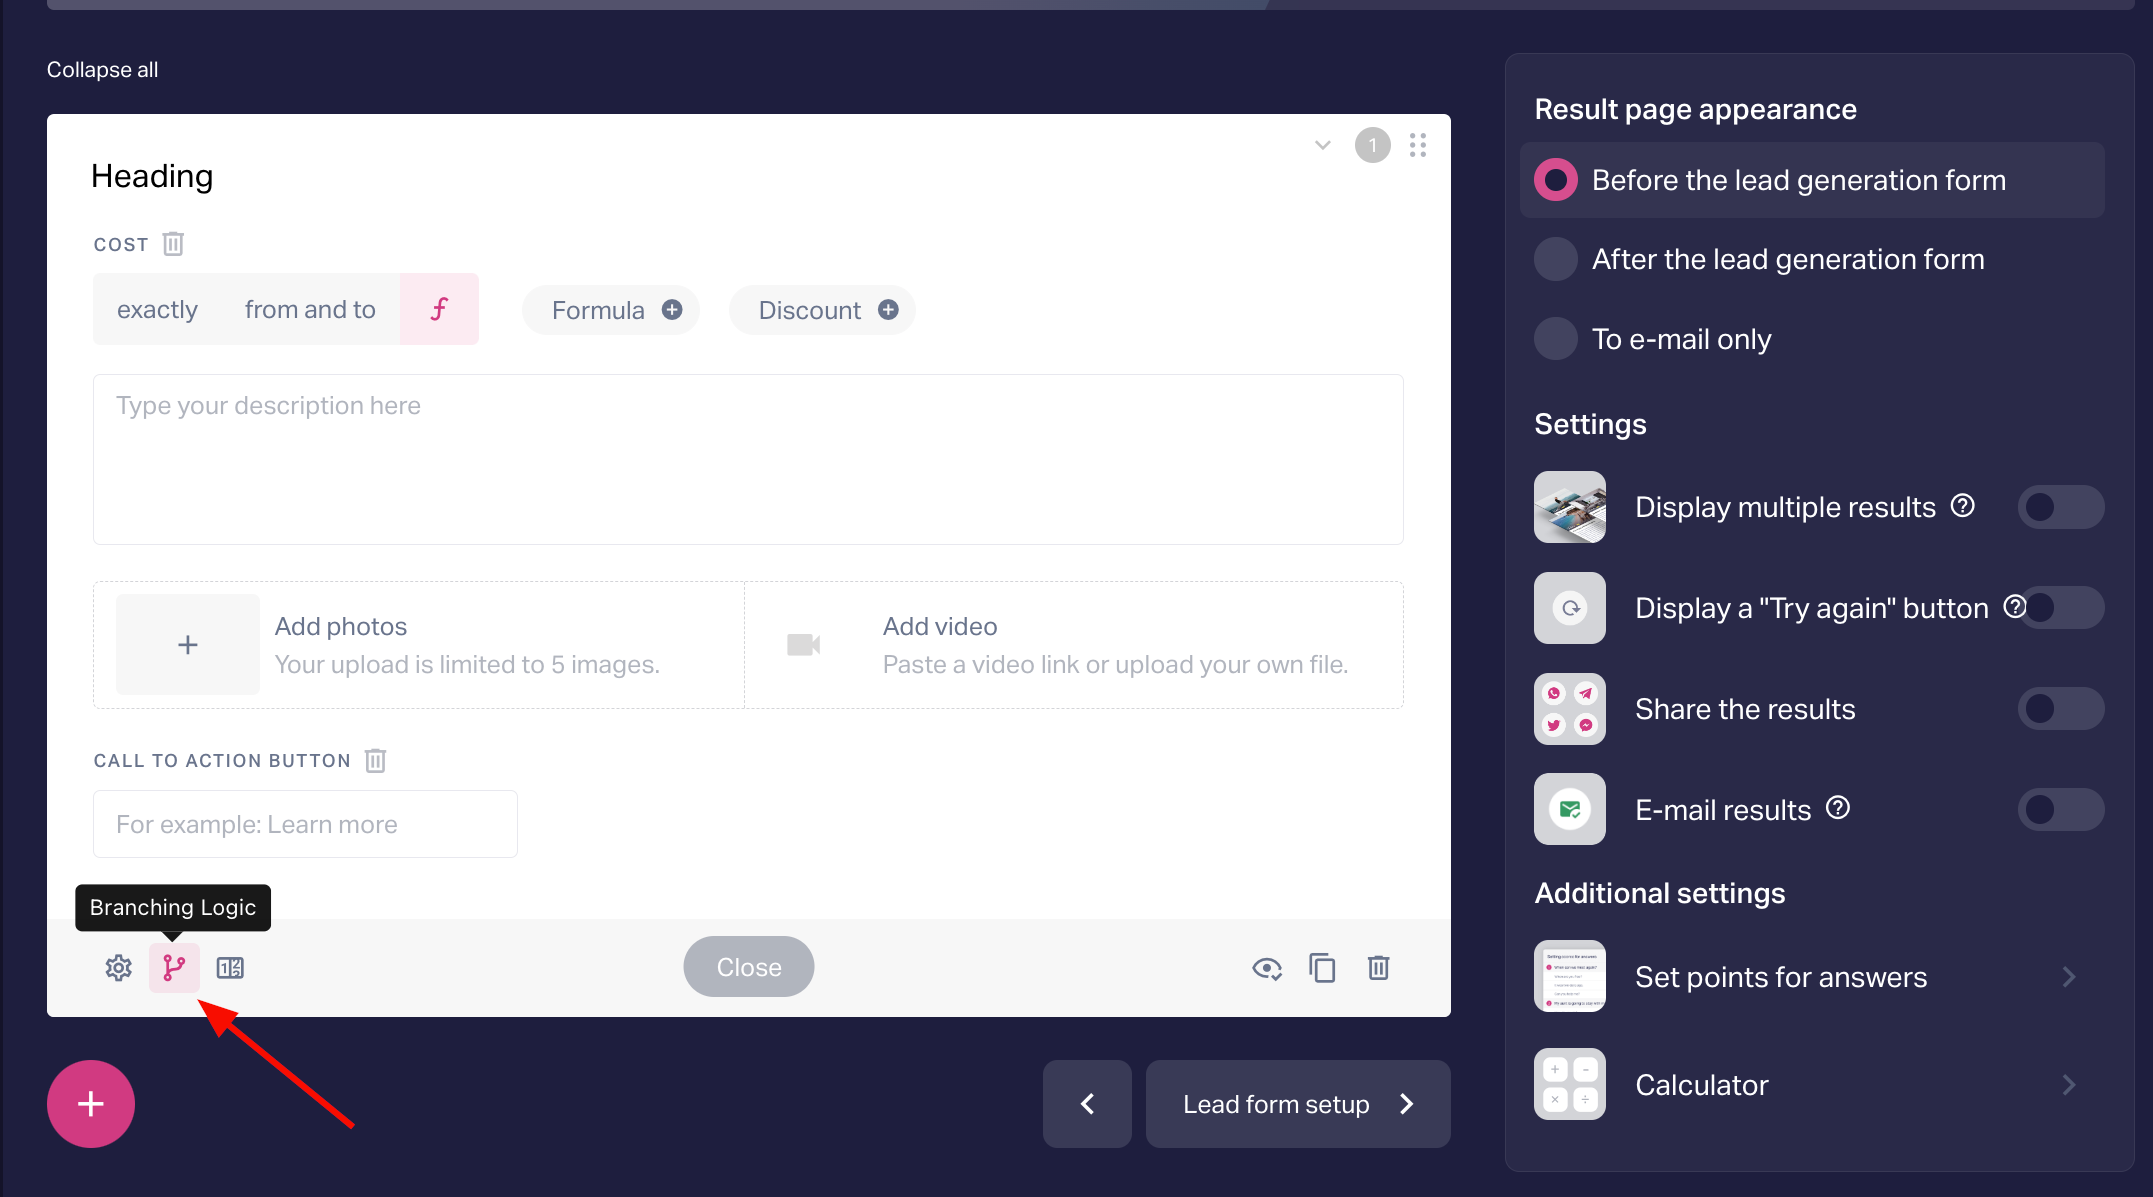
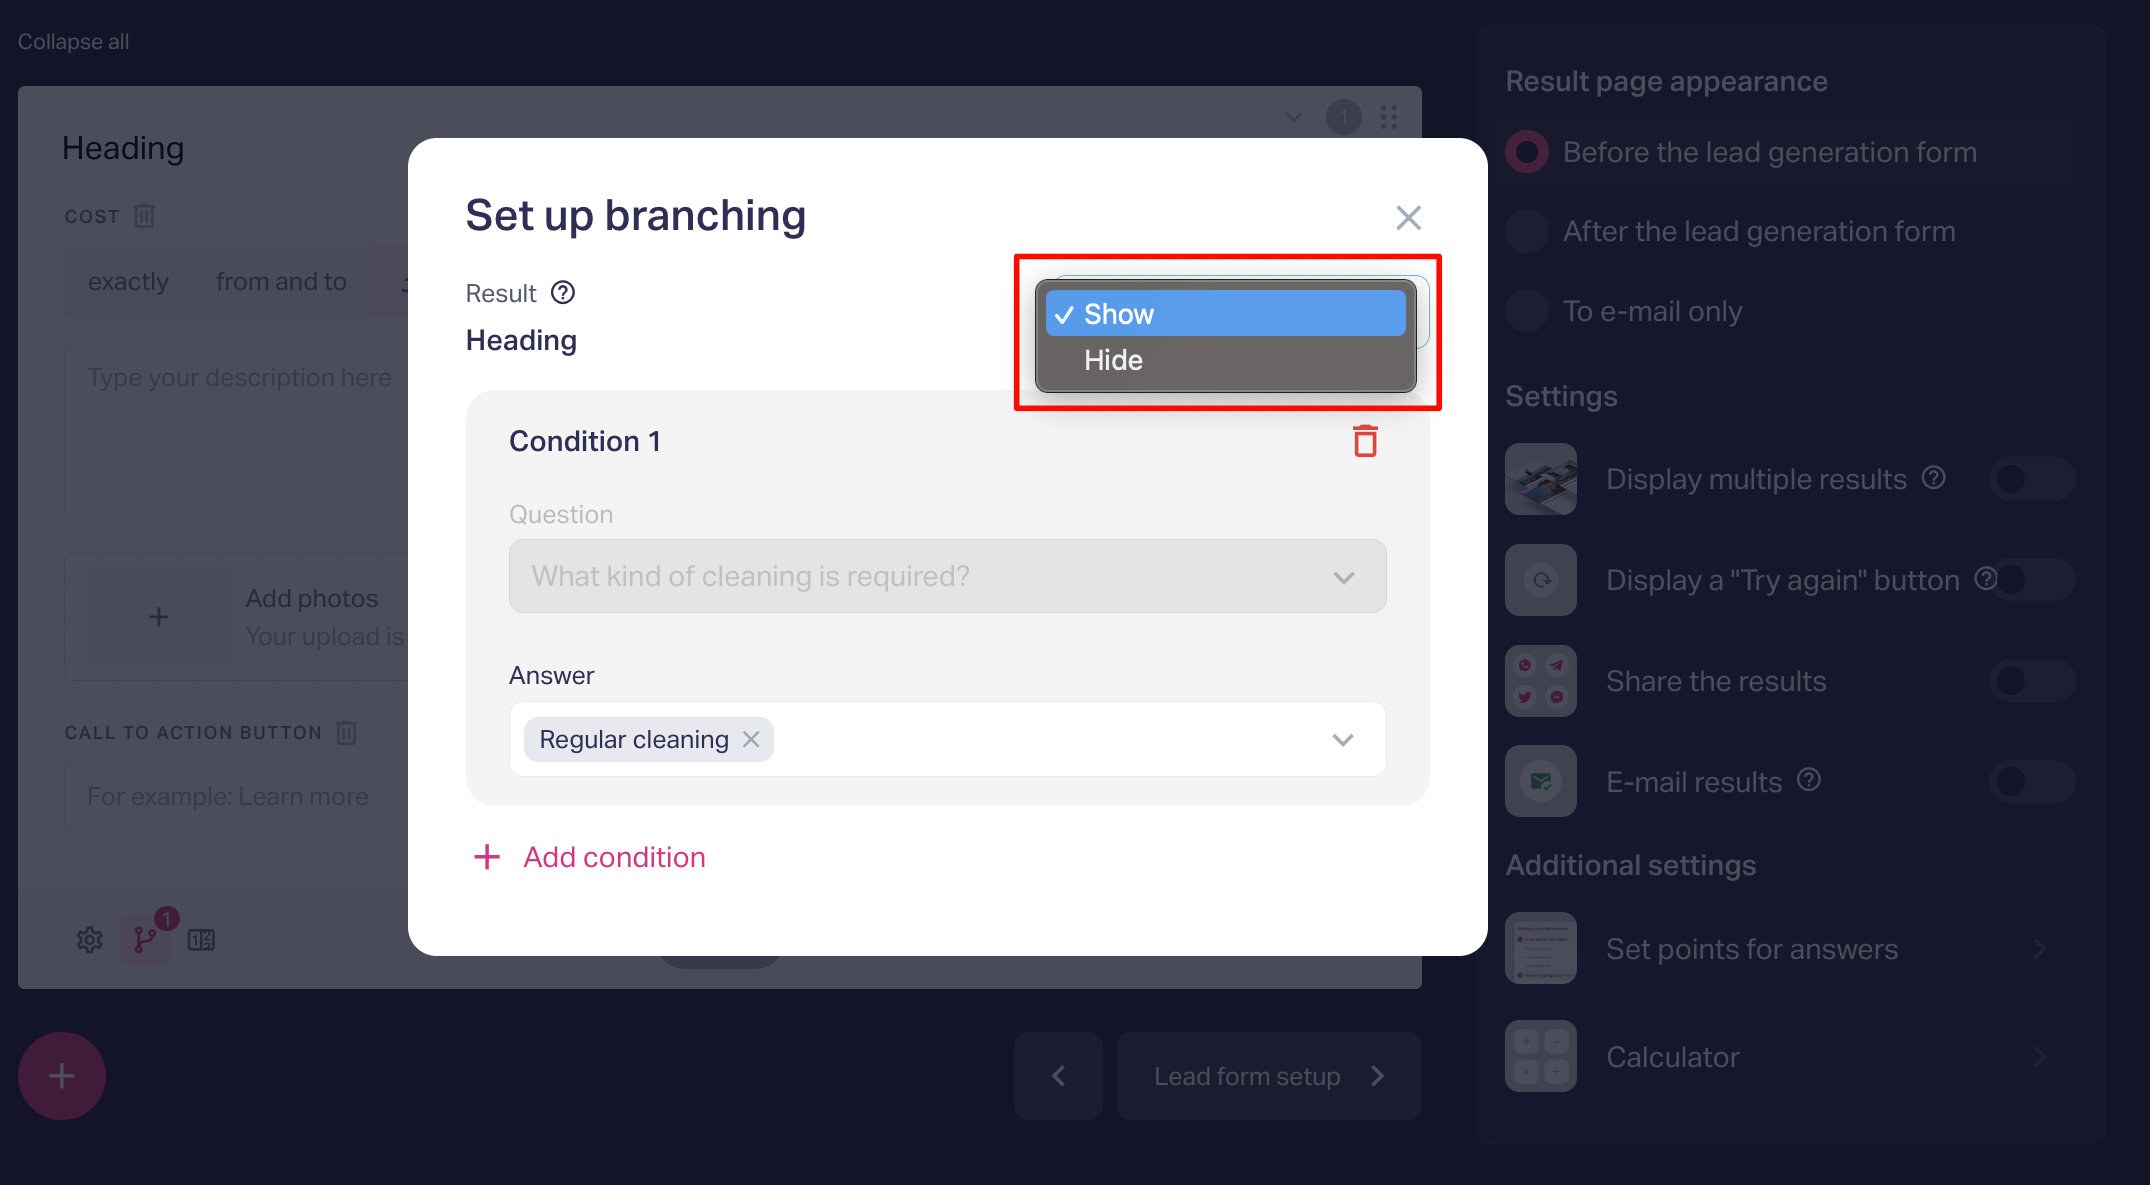
Click on “Branching logic” when you set up an outcome. In a pop-up window, click on “Add conditions”. Choose the necessary question and the necessary answer for the outcome.
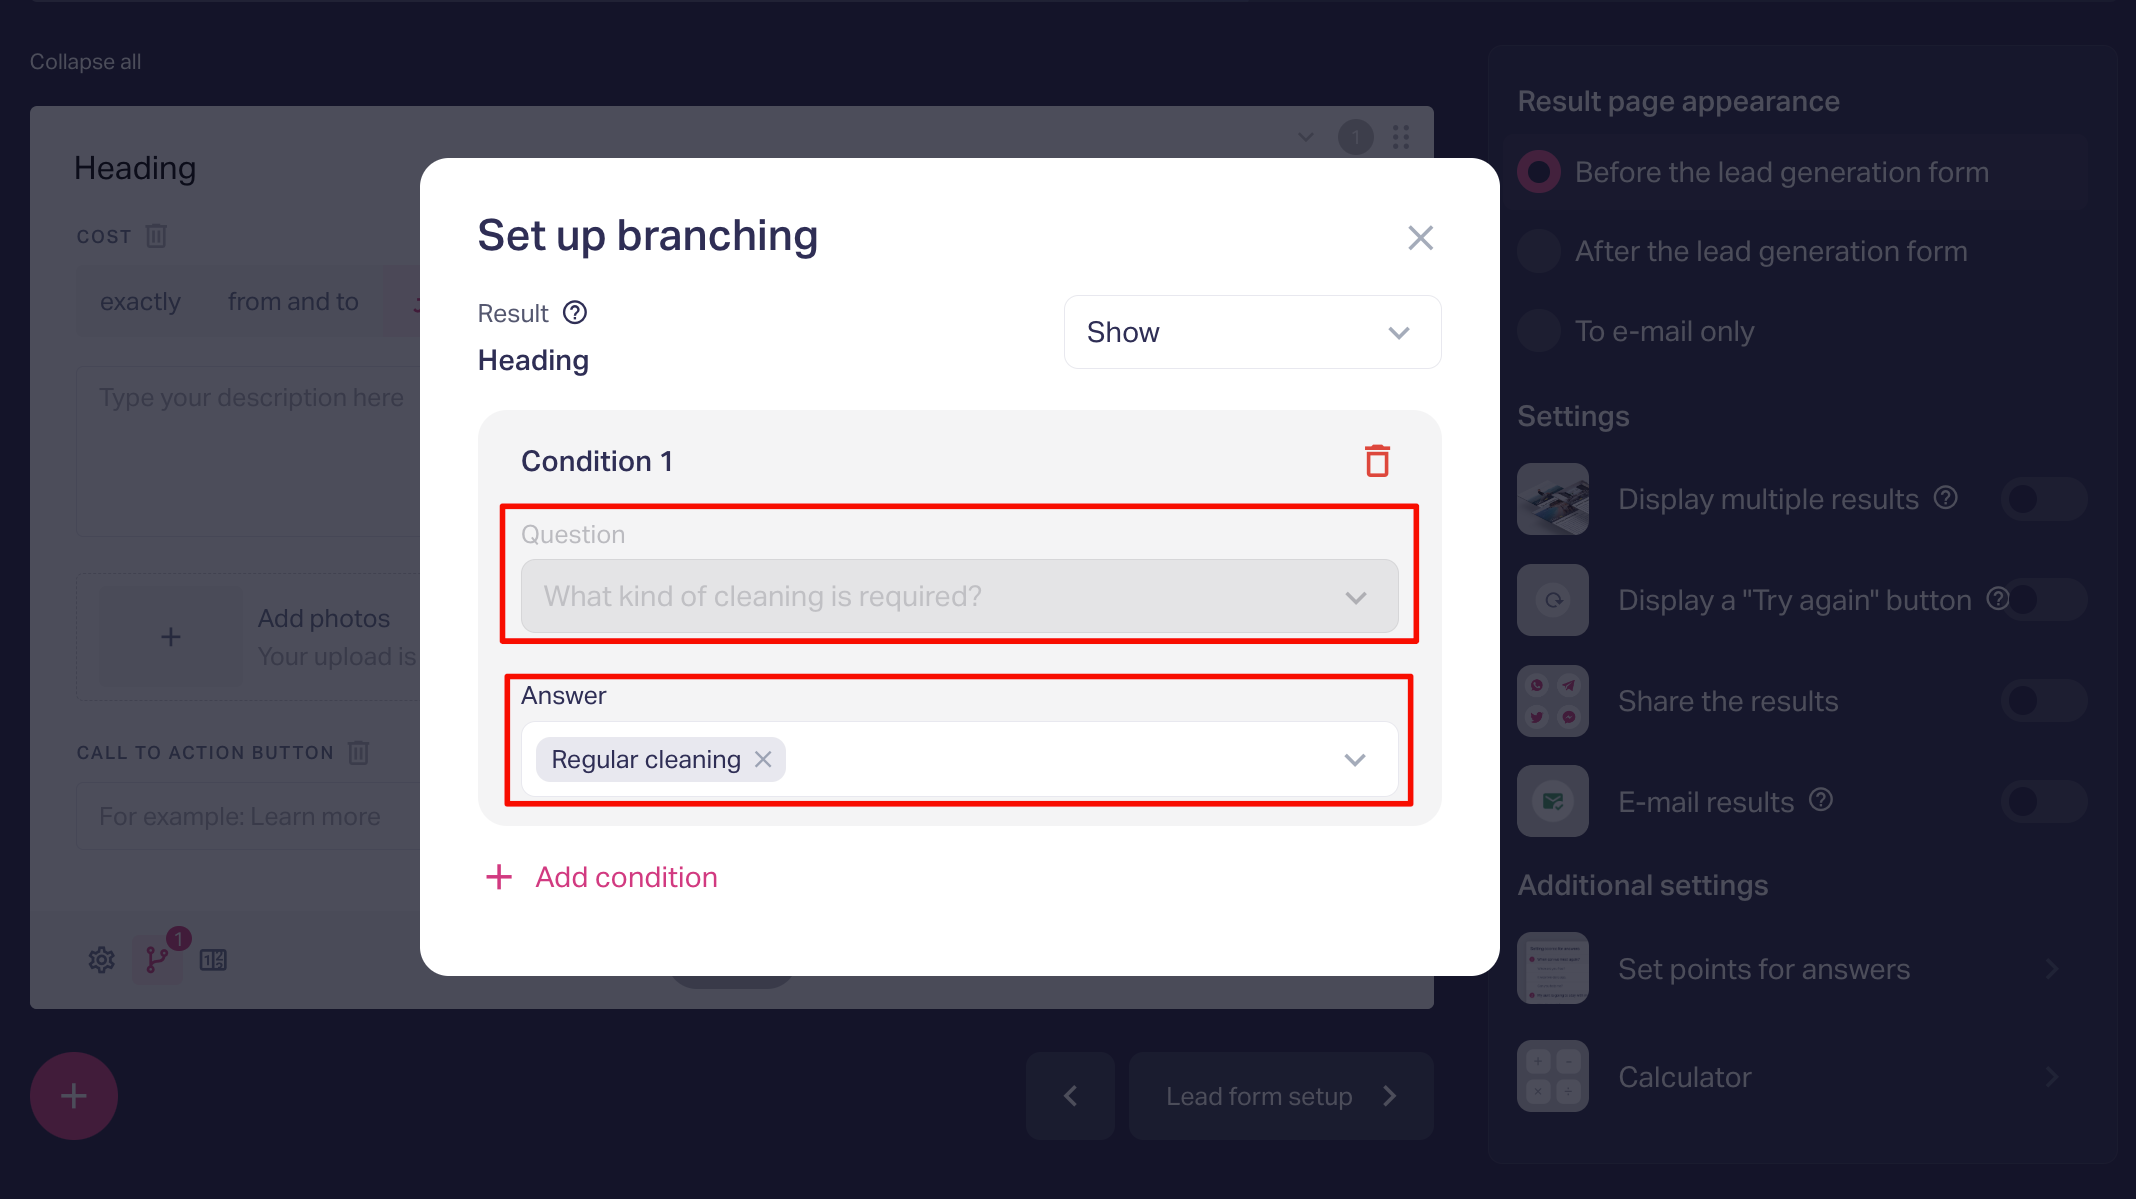
You can choose Show or Hide the result depending on conditions.
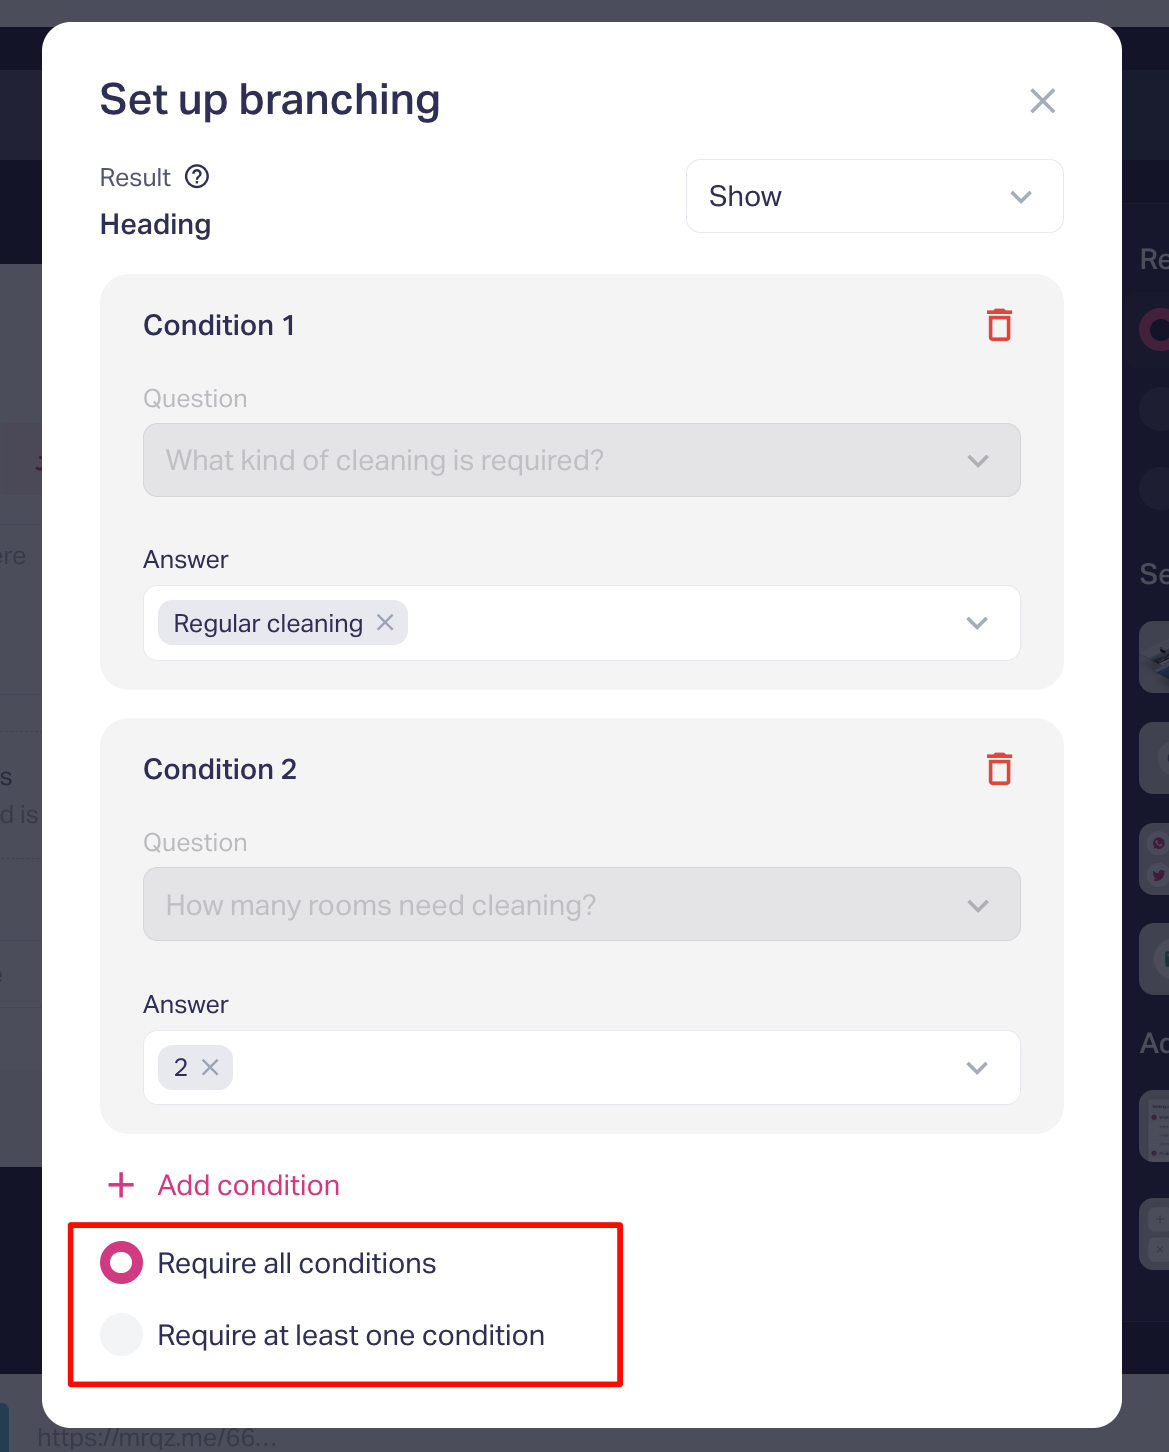
Several conditions can be created in order to make the result dependent on the answers to several questions. Hereby, you can choose whether all the conditions are mandatory or matching at least one condition is enough.
Questions with multiple choice options:
Choose several answers, which the result depends on. Hold down CTRL or SHIFT for that.
If the conditions depend on a question with multiple possible options to choose, you can set the following conditions:
1. “Require all conditions” — The question will be displayed, if the selected options are picked.
2. “Require at least one condition” — The question will be displayed, if any of the selected options is picked.
For example:
What’s your favorite color?
- Red
- Black
- Blue
Red and black are set in the conditions
When the option “Show” is chosen, then...
“Require all conditions”: The result will be displayed, if both red and black are chosen
“Require at least one condition”: The result will be displayed, if red or black is chosen
If the user chooses blue, the outcome will not be displayed.
When the option “Hide” is chosen, then...
“Require all conditions”: the result will be displayed if one of the options (red, black, blue) is chosen but hidden if both red and black are chosen.
“Require at least one condition”: the result will be displayed only if blue is chosen.
If anything is still not clear for you, send us a chat message and we’ll help you out :)